Configuring Linkages
In Linkage Configuration, you need to configure the linkages between navigators, canvases, and widgets. This will enable users to switch layers and filter data using the navigators.
Linking Navigator and Canvas
If you have added multiple canvases to the page, you need to configure the linkages between navigators and canvases to enable dynamic canvas switching based on users’ selection in the navigators. If no linkage is established between navigators and canvases, changes from the navigators will trigger data update but no canvas switching.

Follow the steps below to establish the linkage:
Select a navigator that you added to the canvas.
Select the condition for switching canvas via navigator.
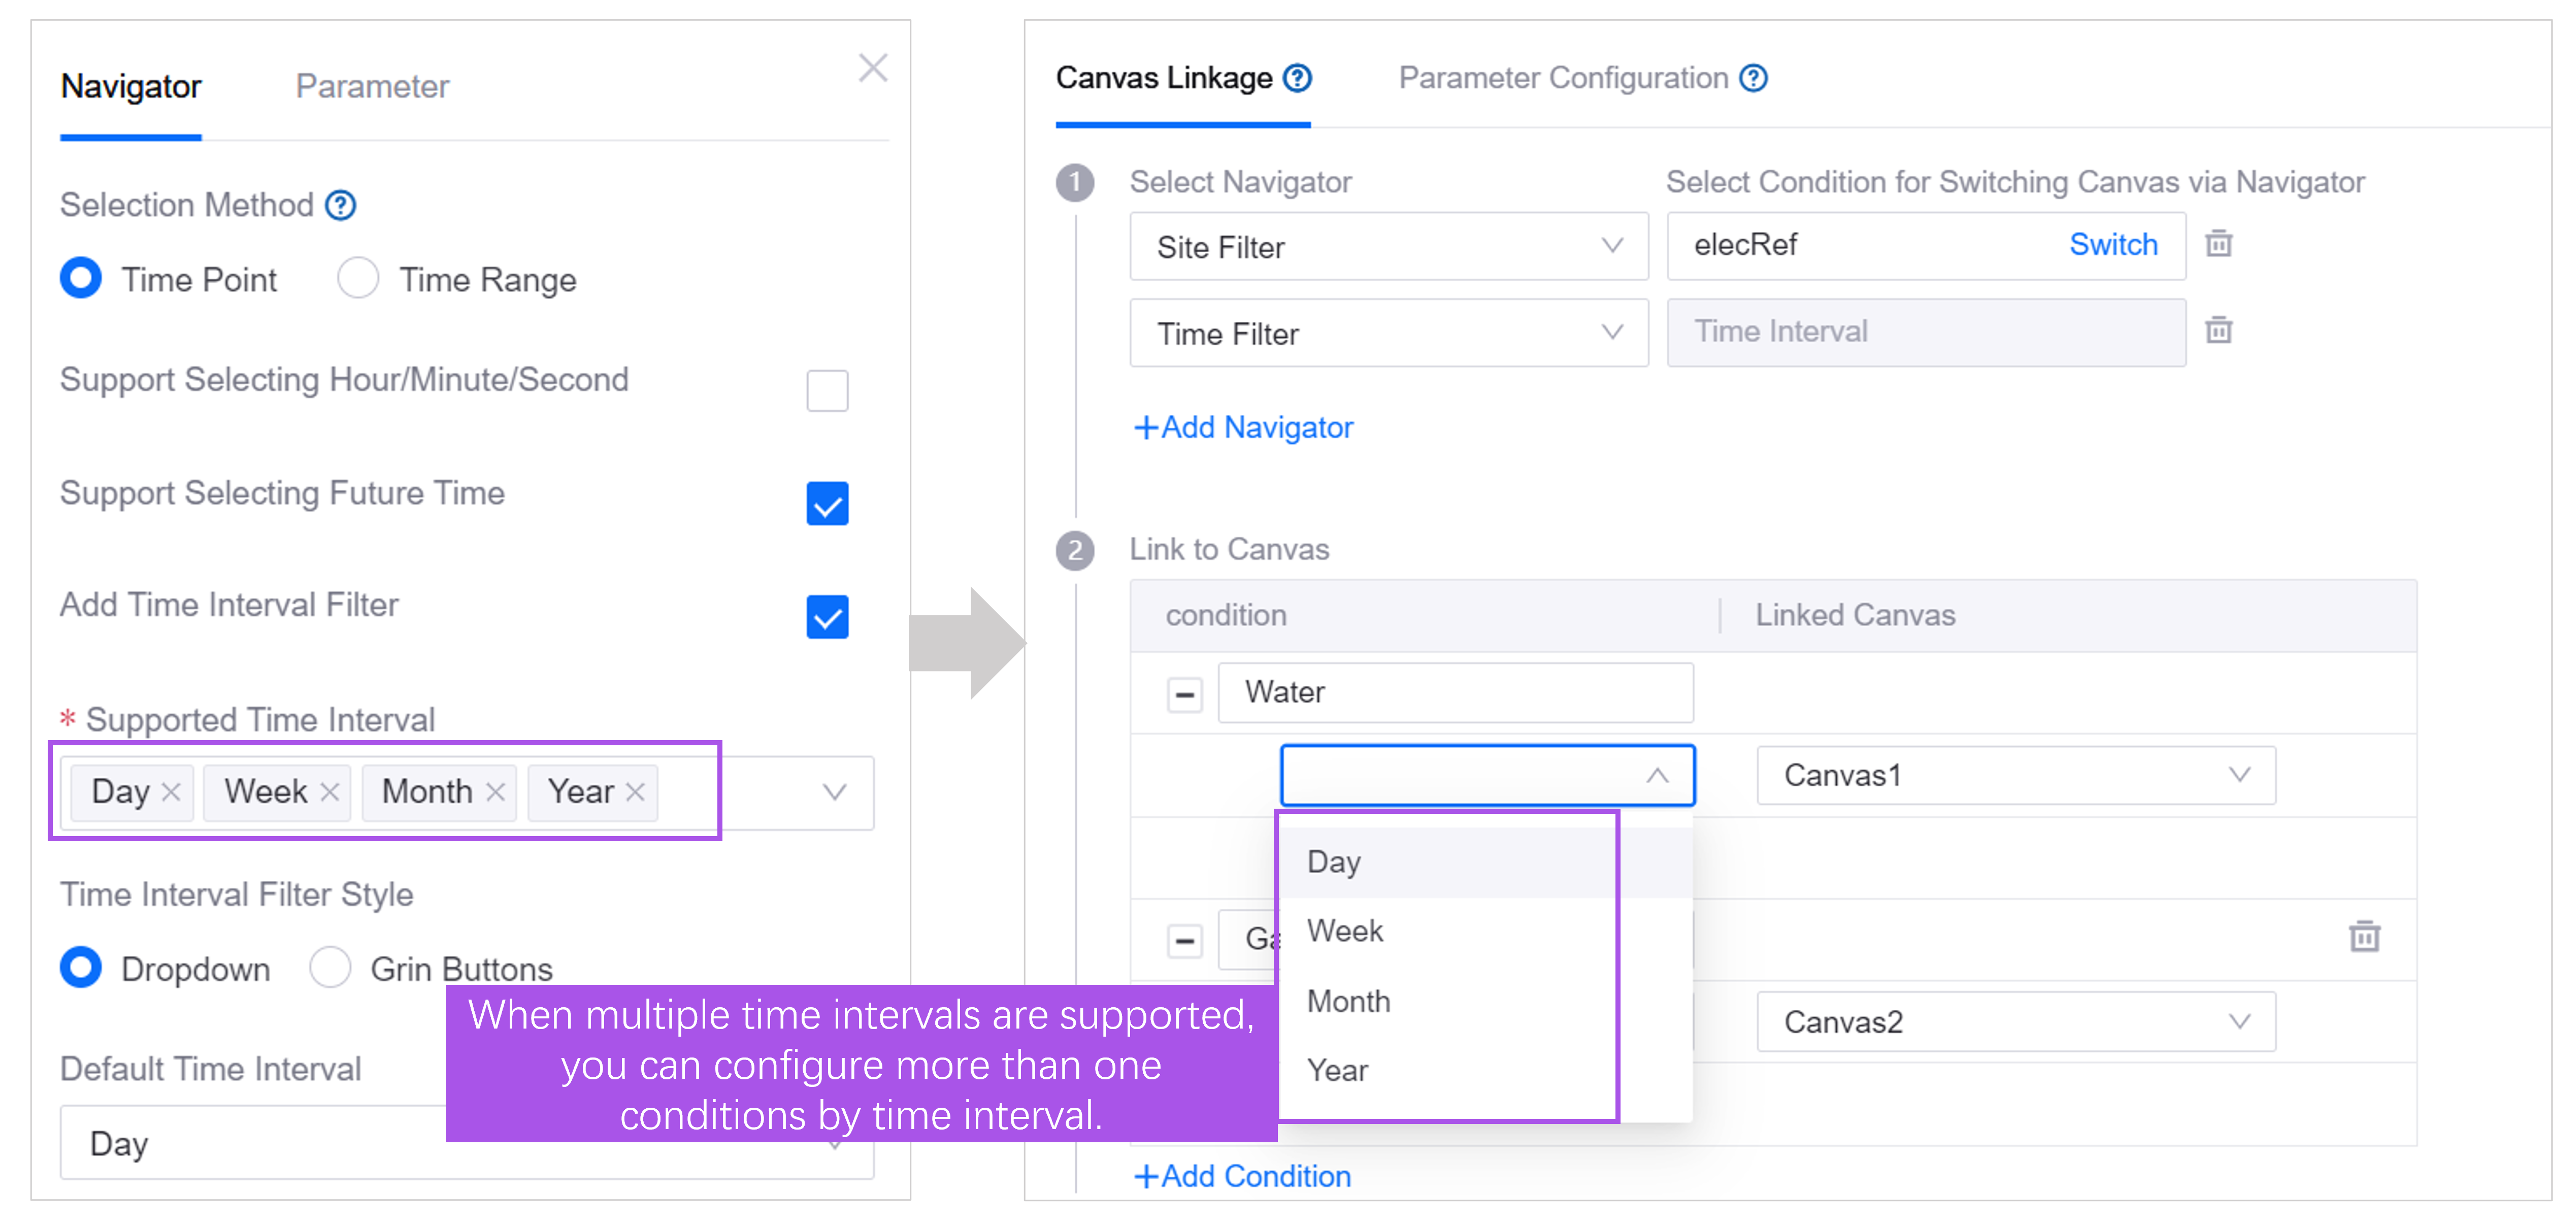
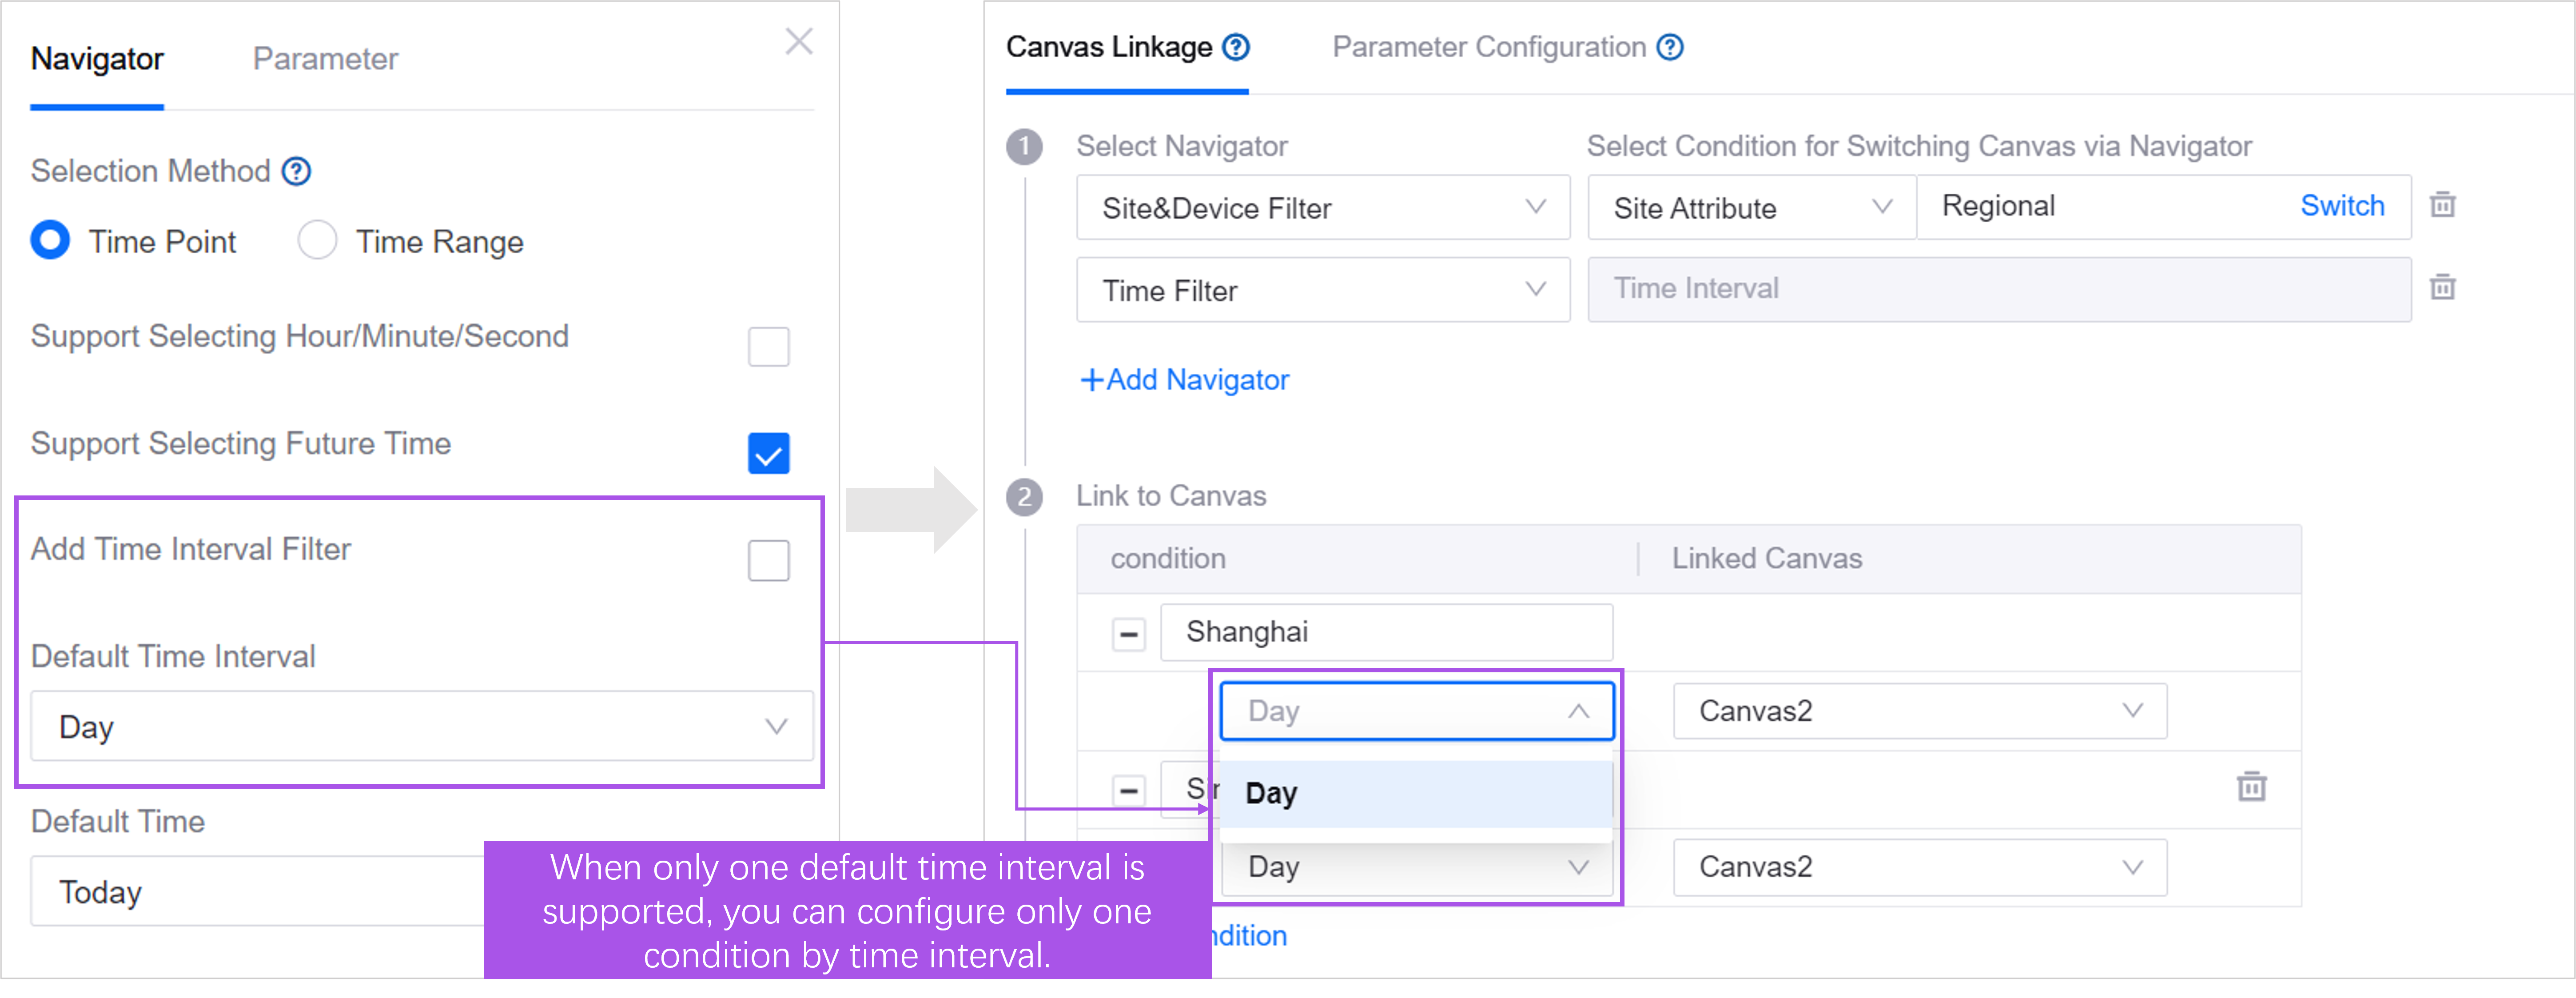
For time filters, the default condition is time interval. Users change the time intervals to switch canvases. The time interval options are determined in the configuration drawer of Time Filter in Navigation Configuration.
For navigators with tabs, tabs are the default condition. Switching between tabs triggers a corresponding canvas change.
For site/device filters without tabs, attributes will be the canvas switching condition. The canvas switches when the attribute value of any asset selected by the user matches a predefined value.
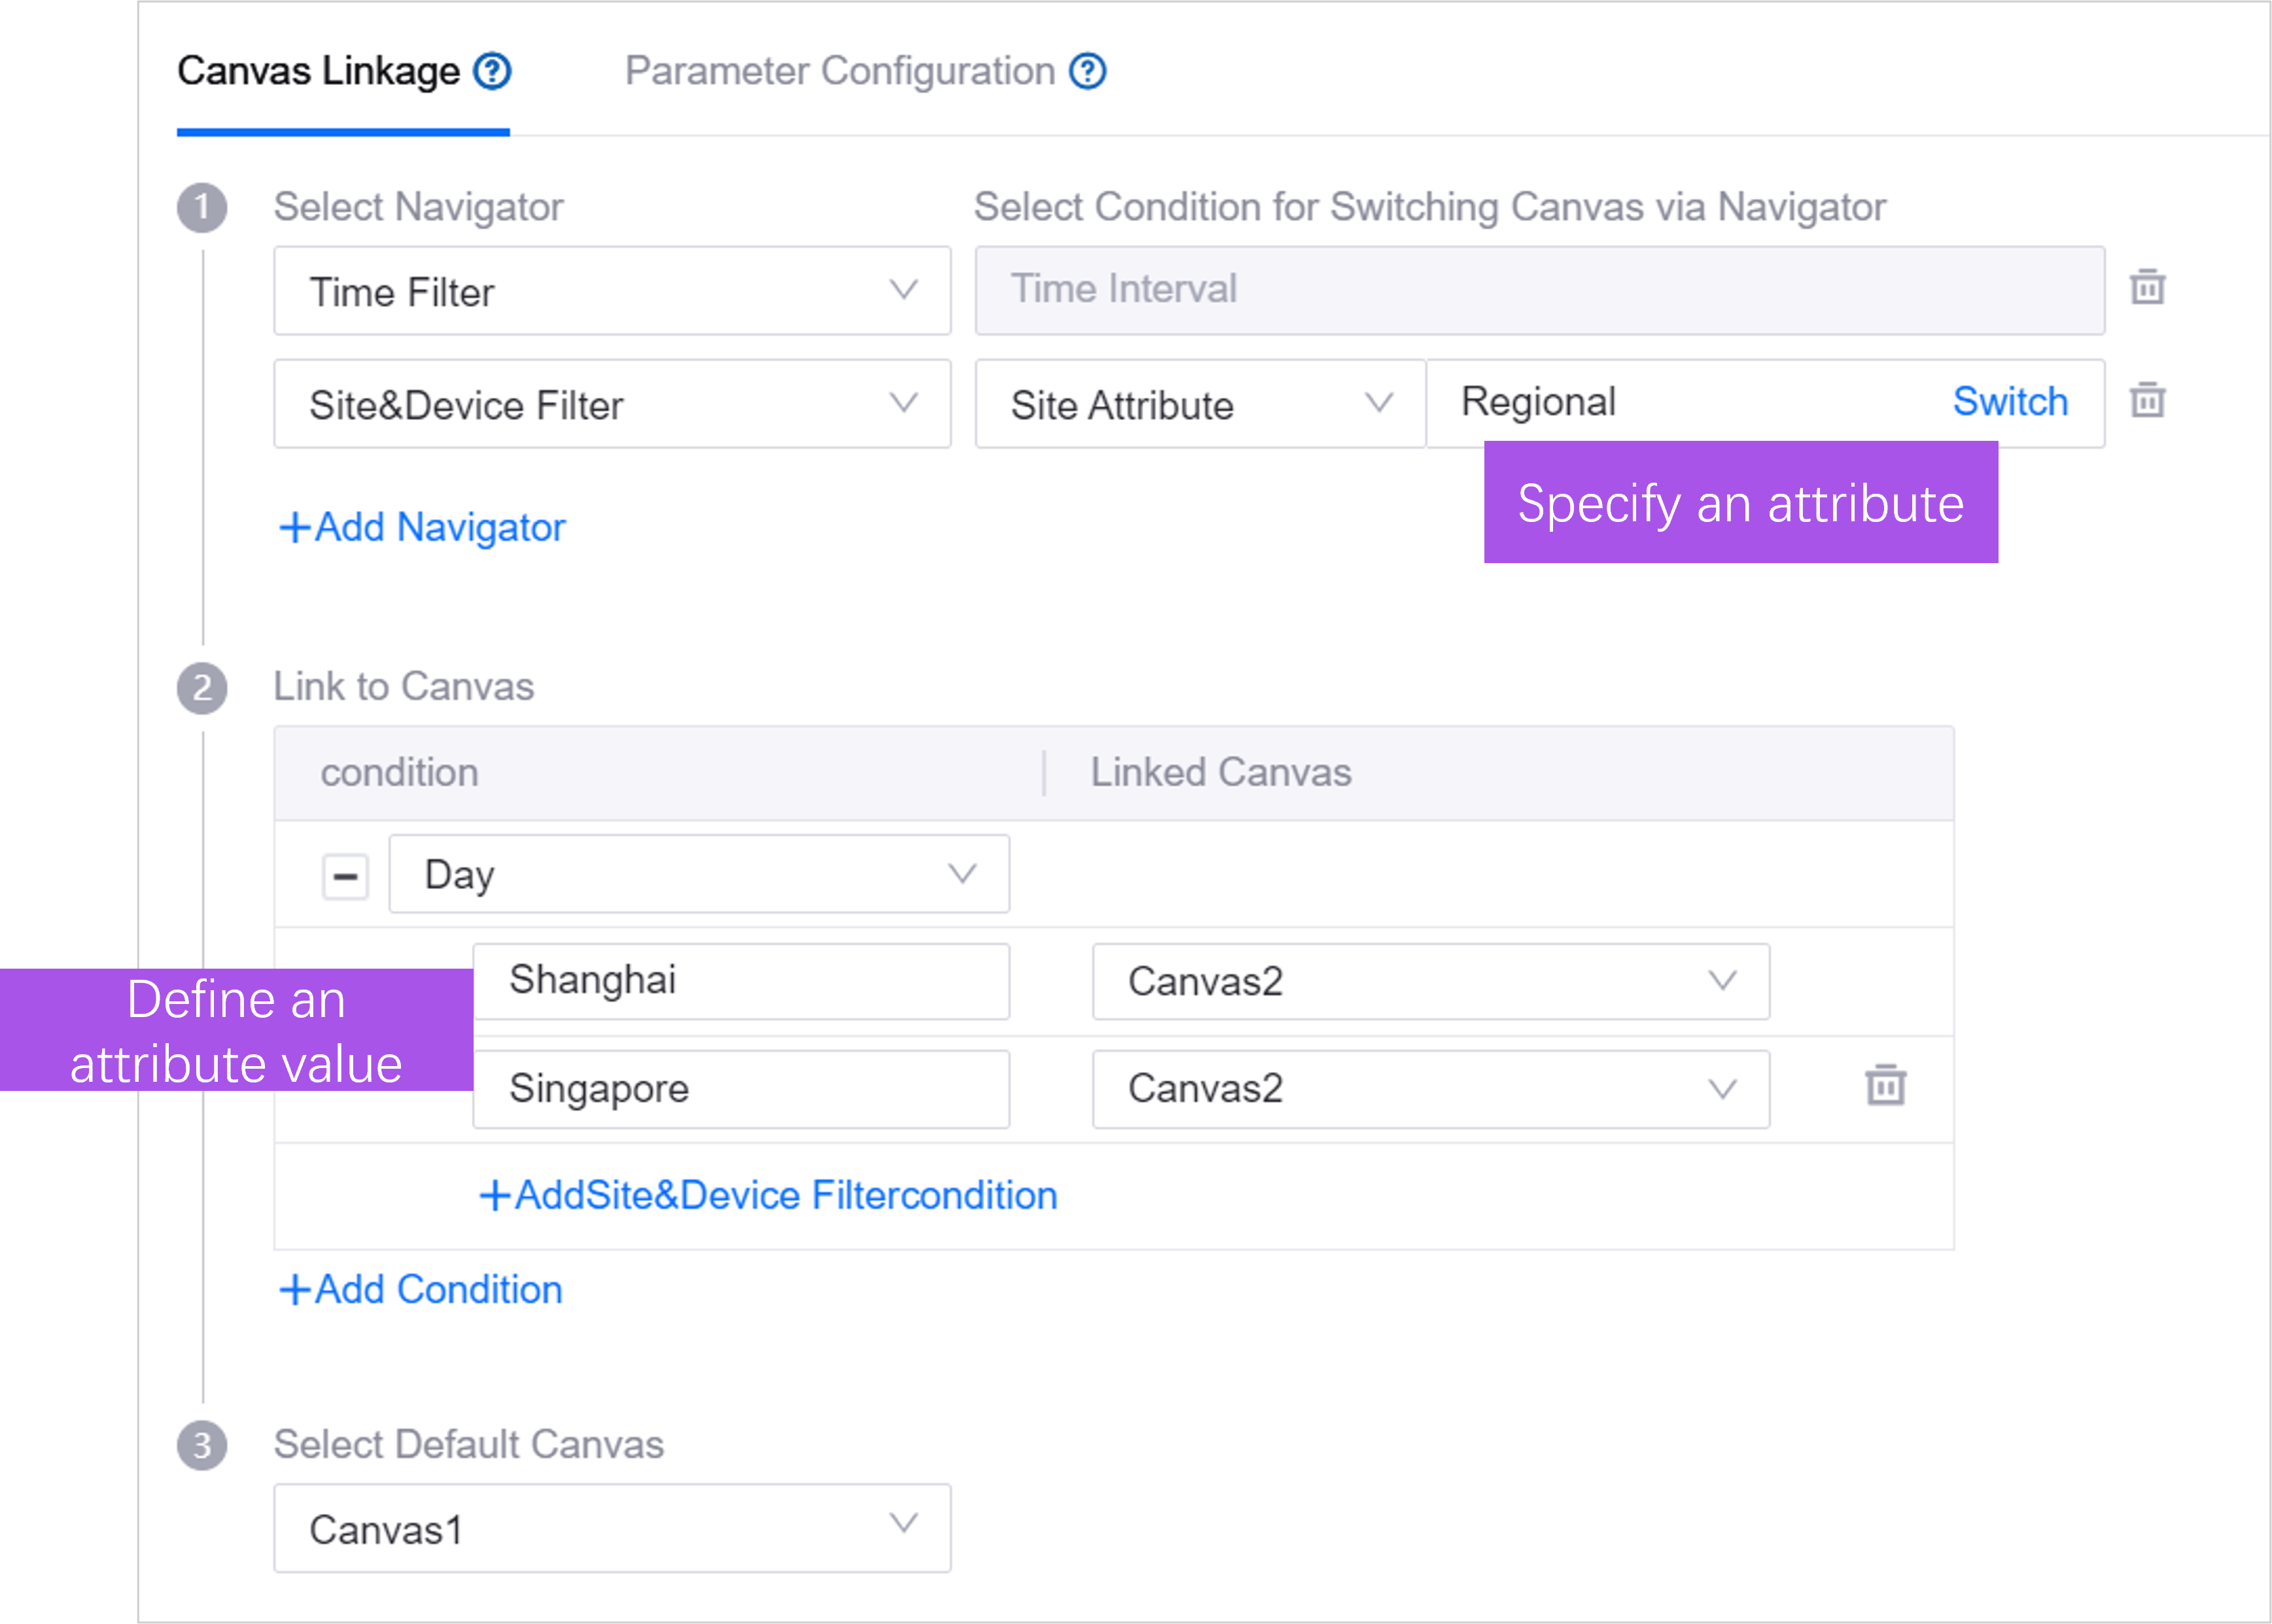
Associate a canvas for each condition. In the example above, to switch to Canvas 1, the user needs to select Day in the Time Filter and select an asset whose
Regionalattribute value isShanghai.Select a default canvas. When no asset is selected, or the selected assets do not meet the conditions defined in the above steps, the default canvas will be displayed.


If you have added more than one navigator to the page, follow the instructions below to configure linkages.
Example 1: Time filter + site filter with tabs

Follow the illustration below to link the filters, tabs, and canvases.

Example 2: Time filter + site and device filter

Follow the illustration below to configure linkages.

Linking Navigator and Widget
To enable dynamic data updates in widgets based on navigator selections, you need to configure linkages between navigator parameters and widget data in the Parameter Configuration tab. When users switch assets or time ranges in the navigator, widgets will request data from the data source using the output parameter value from the navigator. The returned data will then be displayed in the widgets. Follow the steps below to configure data linkage.

Select the canvas and layer that the widget is in.
Select Configure Data Linkage.
Set parameters and linkage conditions in the pop-up window:
Parameters from Navigator: Parameters from the filters, asset types, selection methods, etc. you defined in the Navigation Configuration step.
Linked Widgets: Select the widgets that need to be linked within the selected layer. Widgets that use the same data source can be selected in batches to improve configuration efficiency.
Linked Data Field: Select data items from the data source used by the widget. Data items include the following two types:
Parameter From Data Source: The request parameters given by the widget to the data source. They define the conditions for each request, such as the start time and end time of the data.
Data Field: The return parameters from the data source. The widget selects the required data field from these return parameters and displays them in the widget in the form of indicators, extensions, dimensions, etc.
Condition: The linked activity is triggered when the conditions between the navigator parameters and widget data are met.
<>: Indicates that the navigator parameter is within the range of the widget parameter value (including the endpoint value)
like: Indicates that the navigator parameters fuzzy match the widget parameter values. Wildcard characters % and _ are supported.
in: Indicates that the navigator parameter is in the value list of the widget parameter.
Select OK to establish the linkage.
If a linkage has been established in Canvas Configuration > Data Linkage Between Widget and Navigator, the linkage will also be displayed in the Linkage Configuration page.

After establishing necessary linkages, you can check all configuration items and get ready to publish the page.