Configuring Canvas, Layers, and Panels
In Canvas Configuration, you can add layers and widgets onto the canvas and configure data for each widget. To learn about the relationship between canvas, layers, and widgets, see DTV Key Concepts.
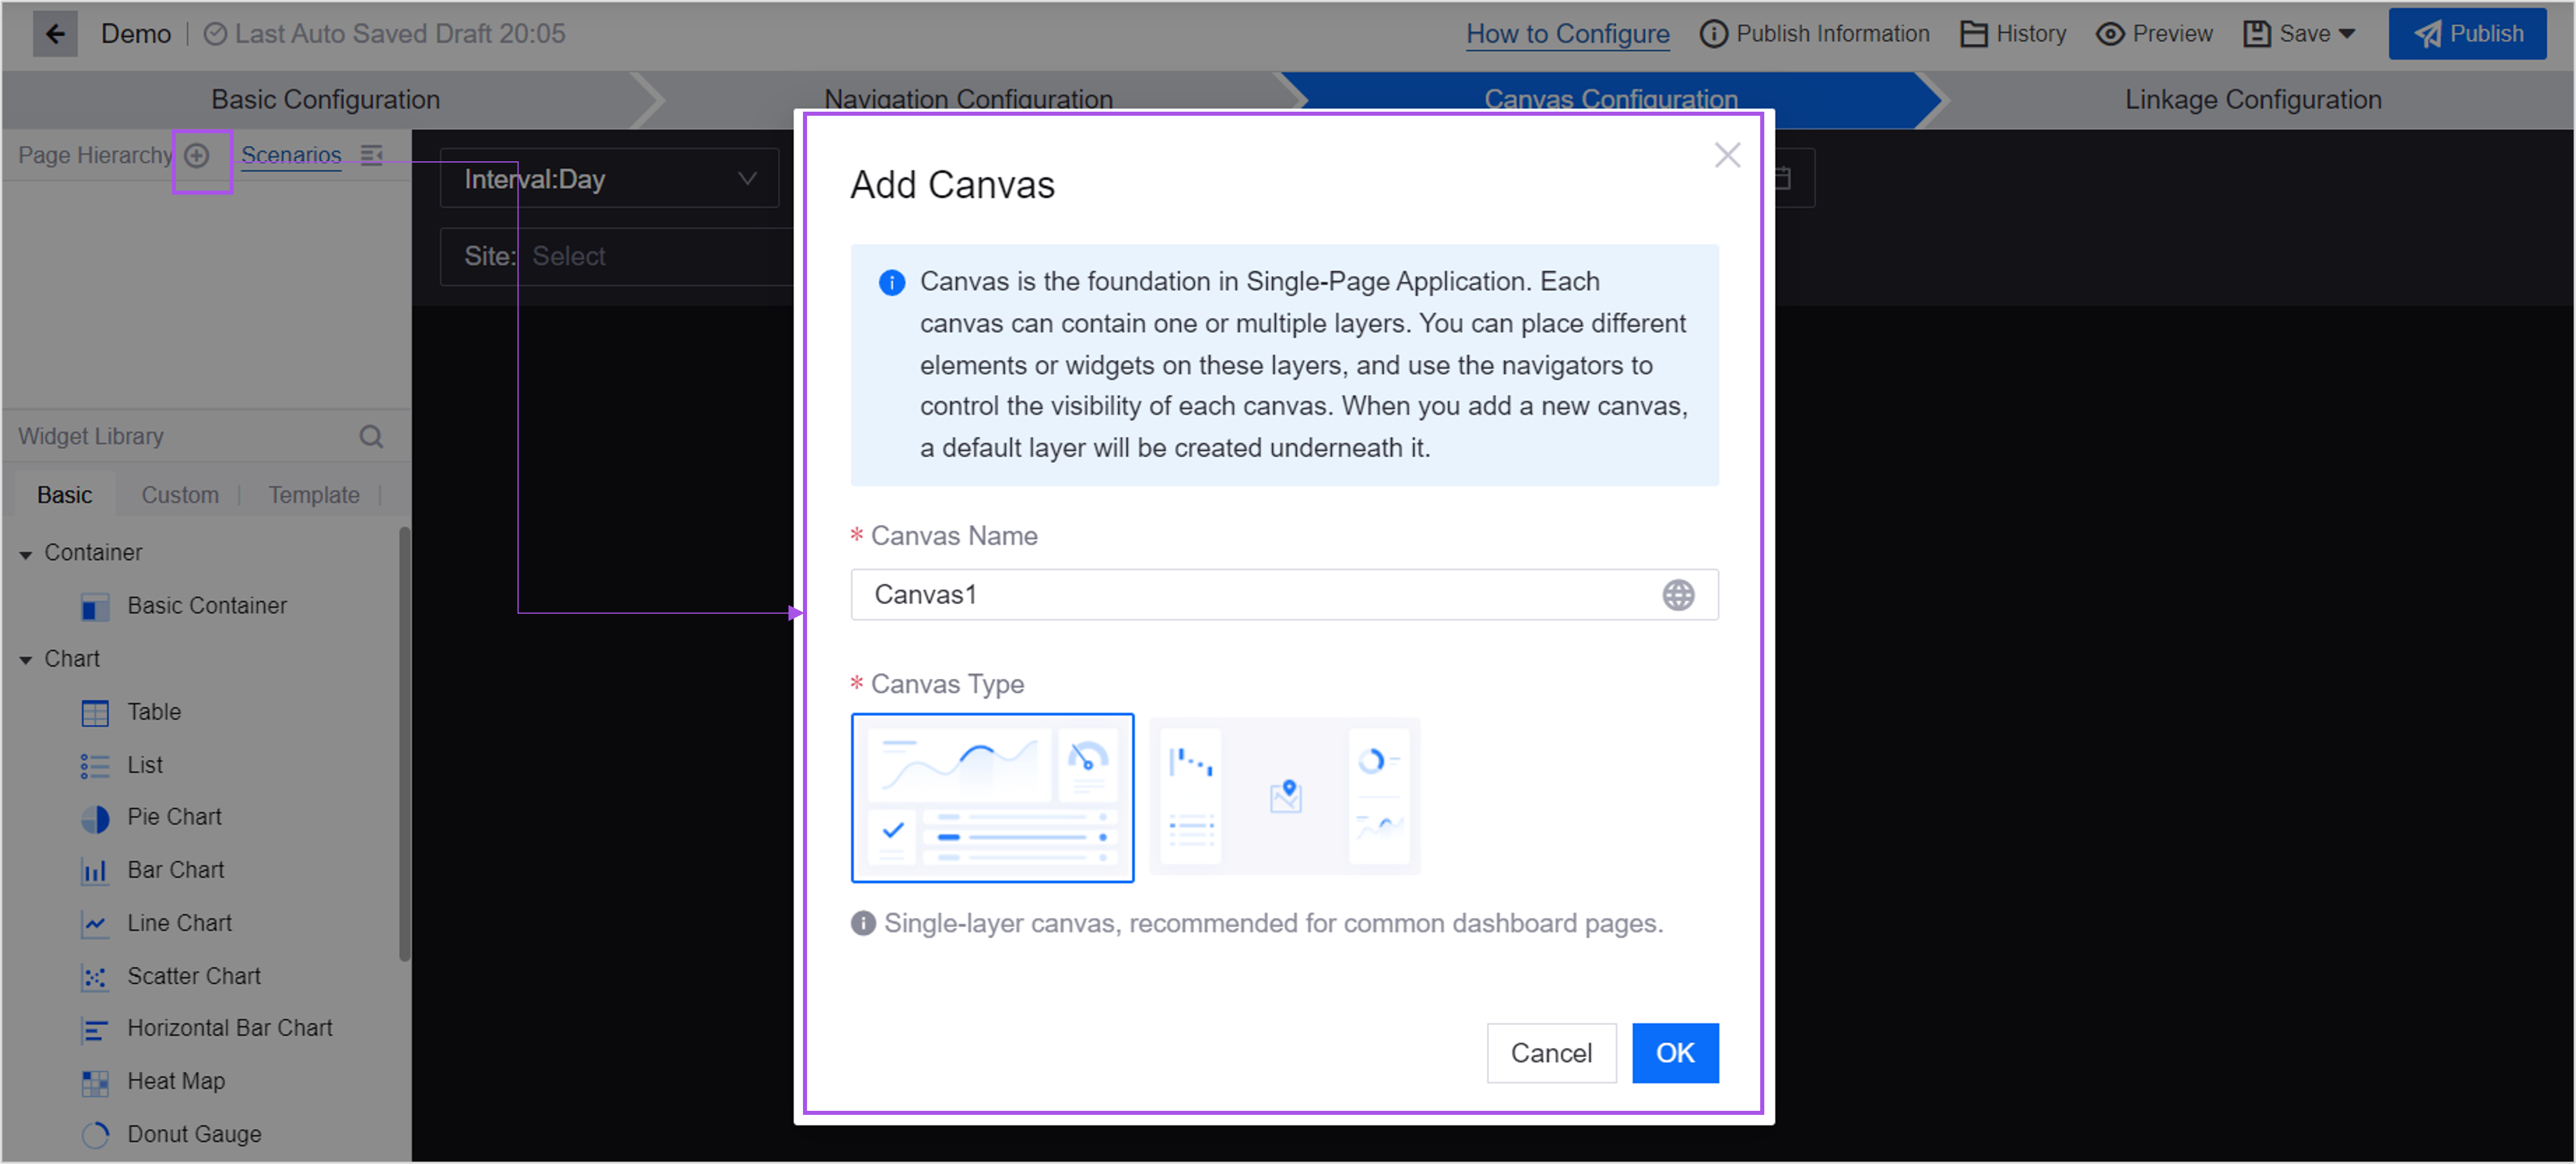
Step 1: Adding Canvas
You can add multiple canvases to a page. Canvases are divided into two types:
Single Layer Canvas: the canvas contains 1 layer by default. You can add another layer to the canvas if needed.
Multi-Layer Canvas: 2 layers are added by default.
Step 2: Configuring Canvas
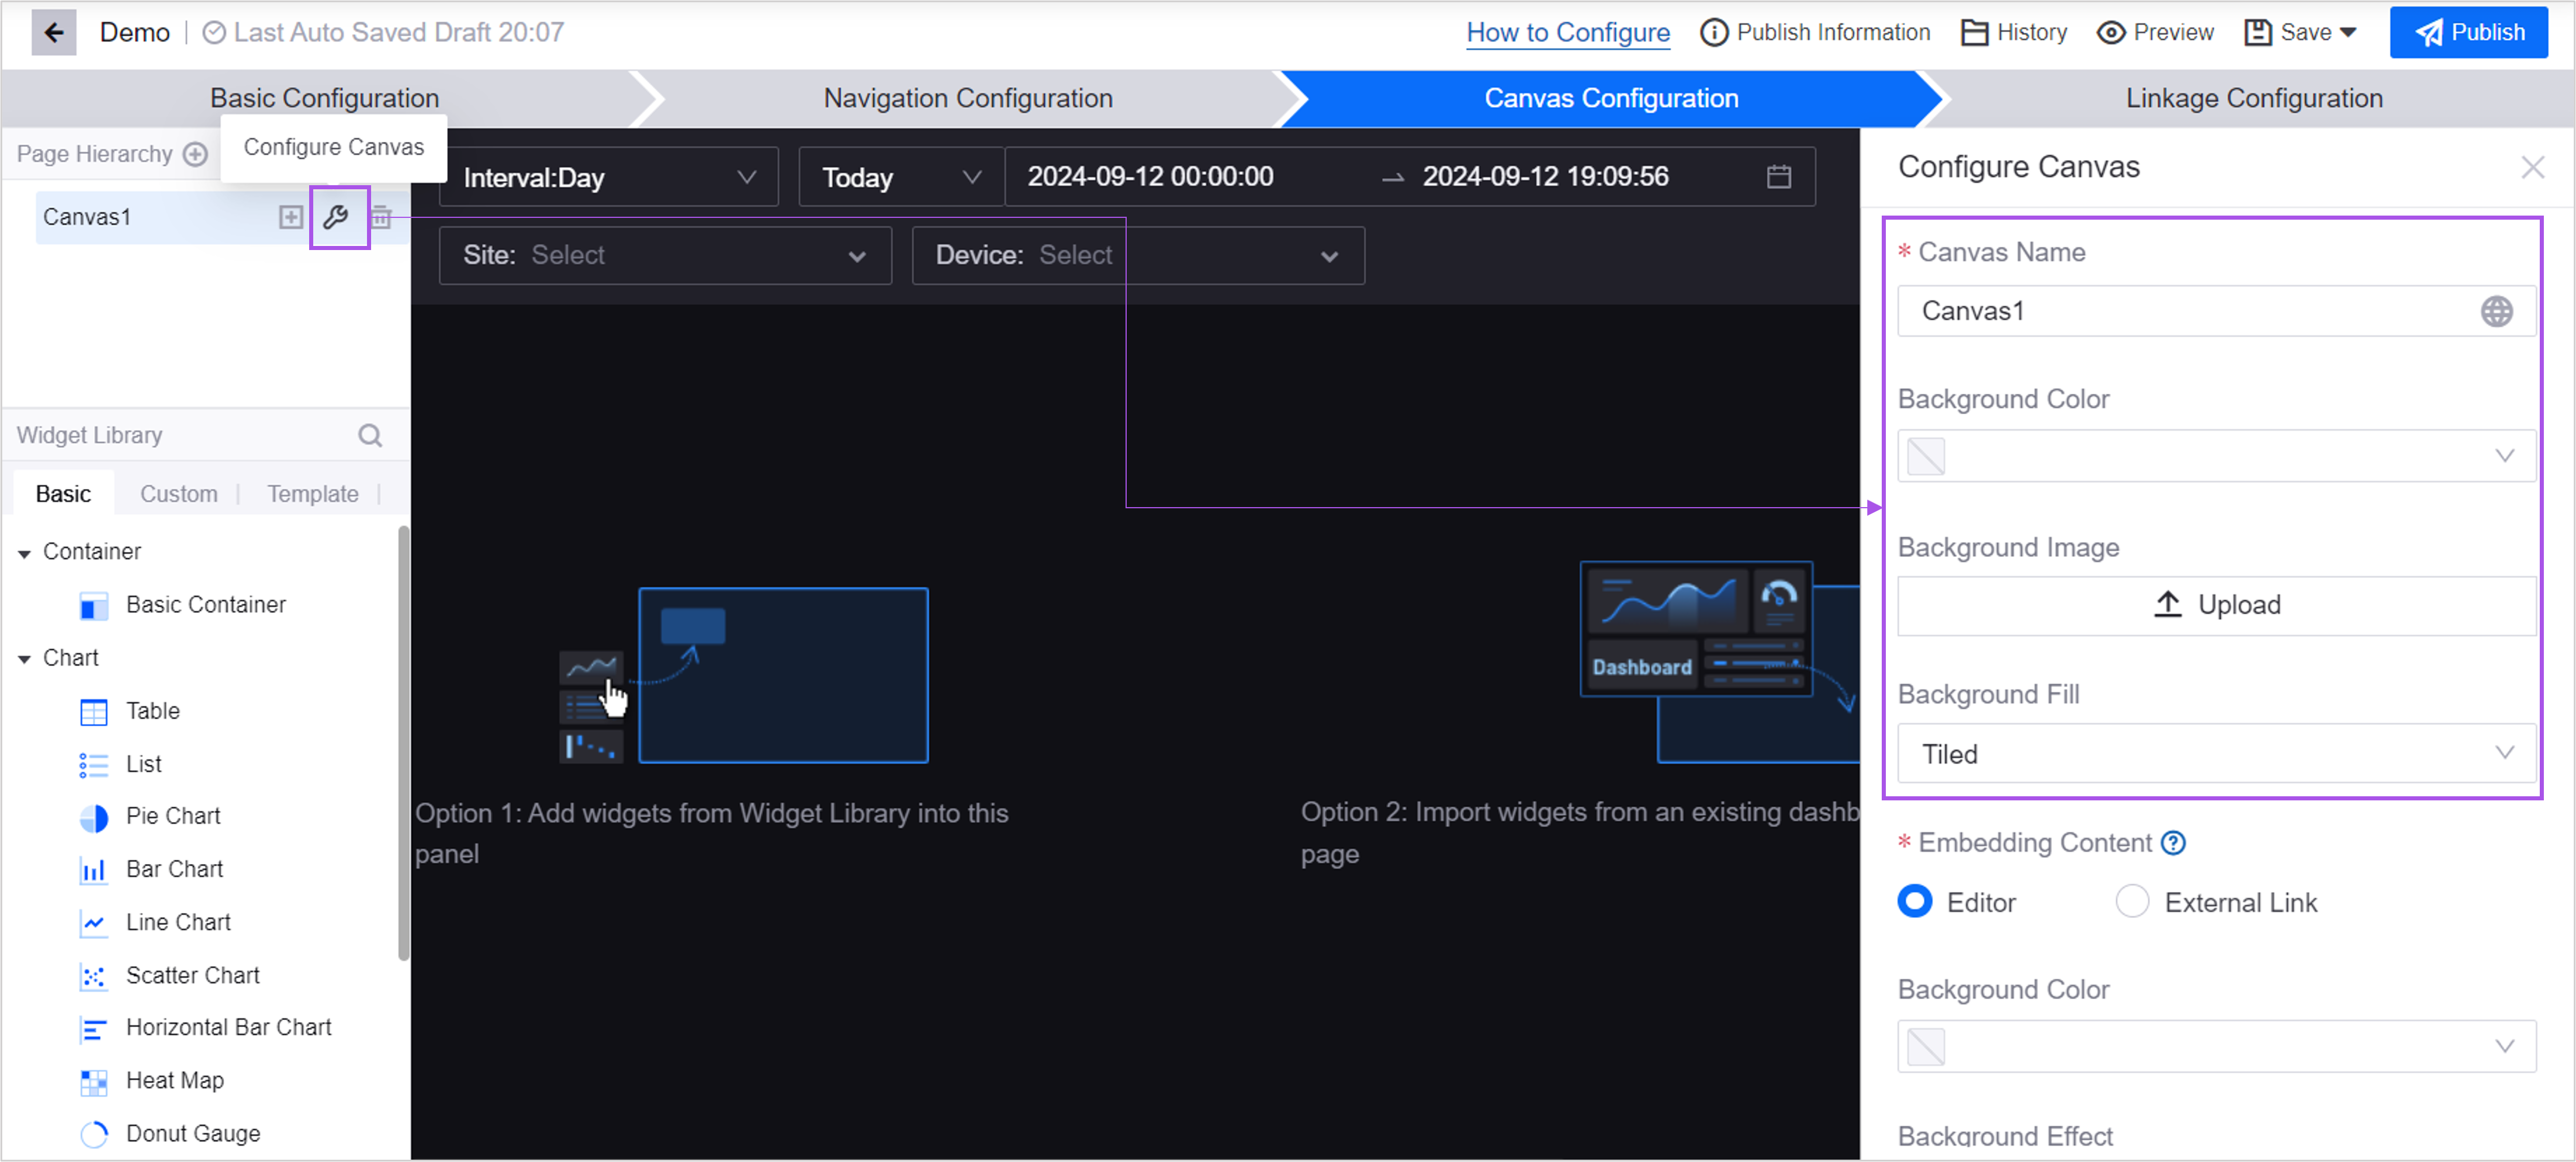
Select Configure Canvas, and set the canvas name, background color, filling method, etc. in the drawer that opens from the right.
If you select the checkbox of Enable Canvas Title Bar, you can then select  to set the title text, layout, background color, and other styles of the Canvas Title Bar. You can also choose to display the navigators in the title bar.
Step 3: Adding Layer (Optional)
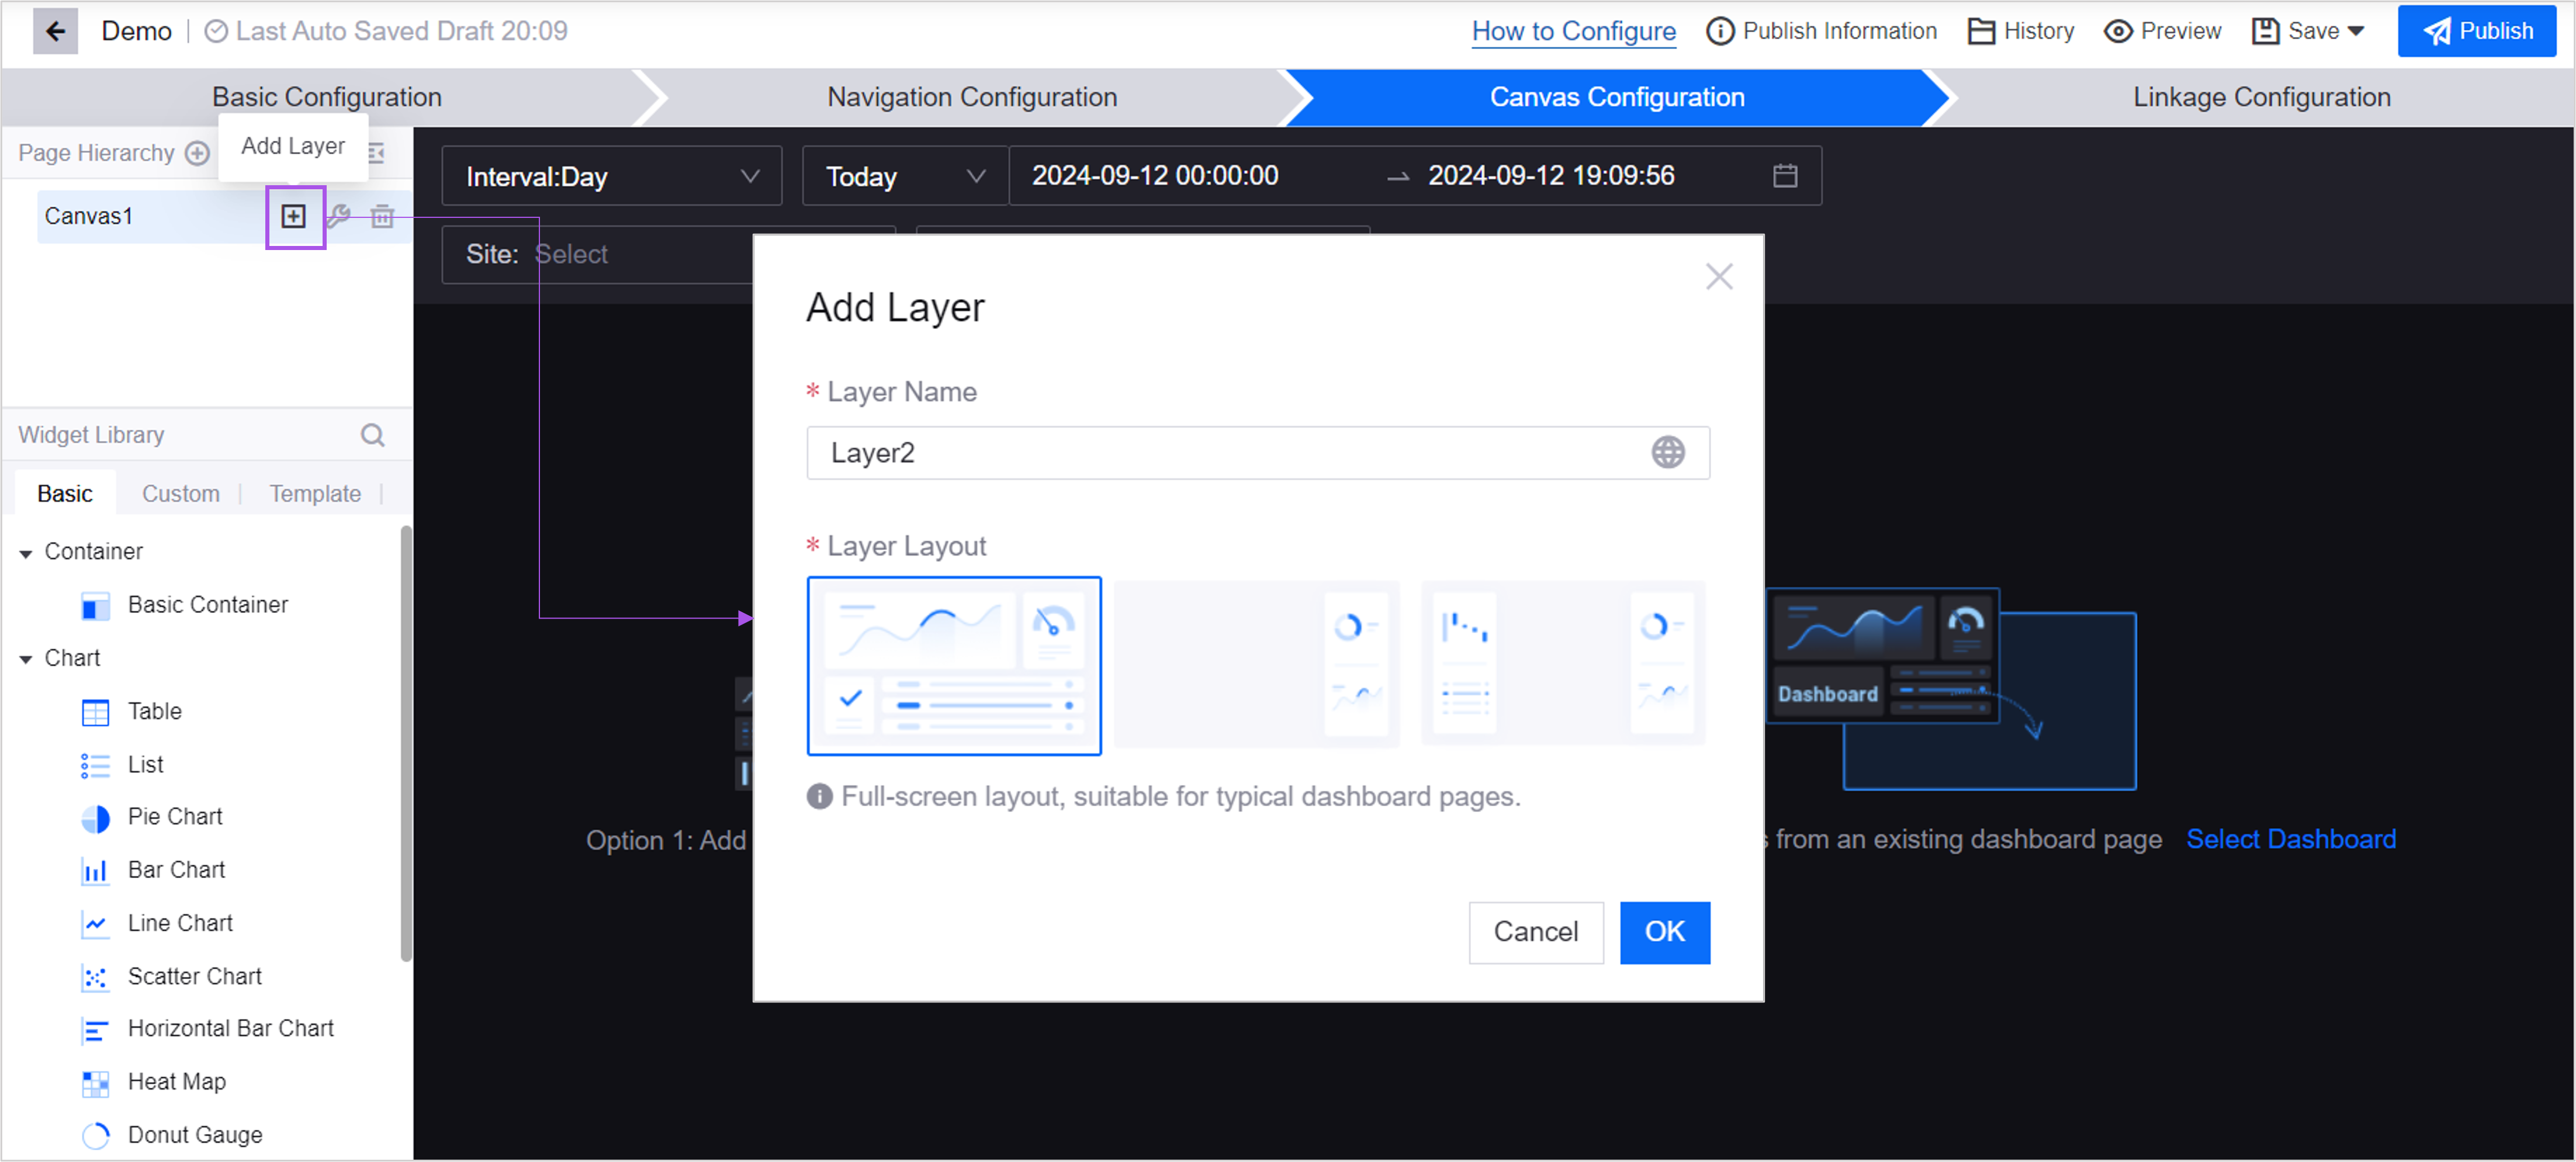
When you create a canvas, 1 or 2 layers are created by default. You can add additional layers to the canvas as needed. A canvas accommodates up to 2 layers.
Step 4: Configuring Layer & Panel
Select |Configure layer| of a target layer to enter its configuration drawer. You can modify the layout of the layer and style the panels on it.
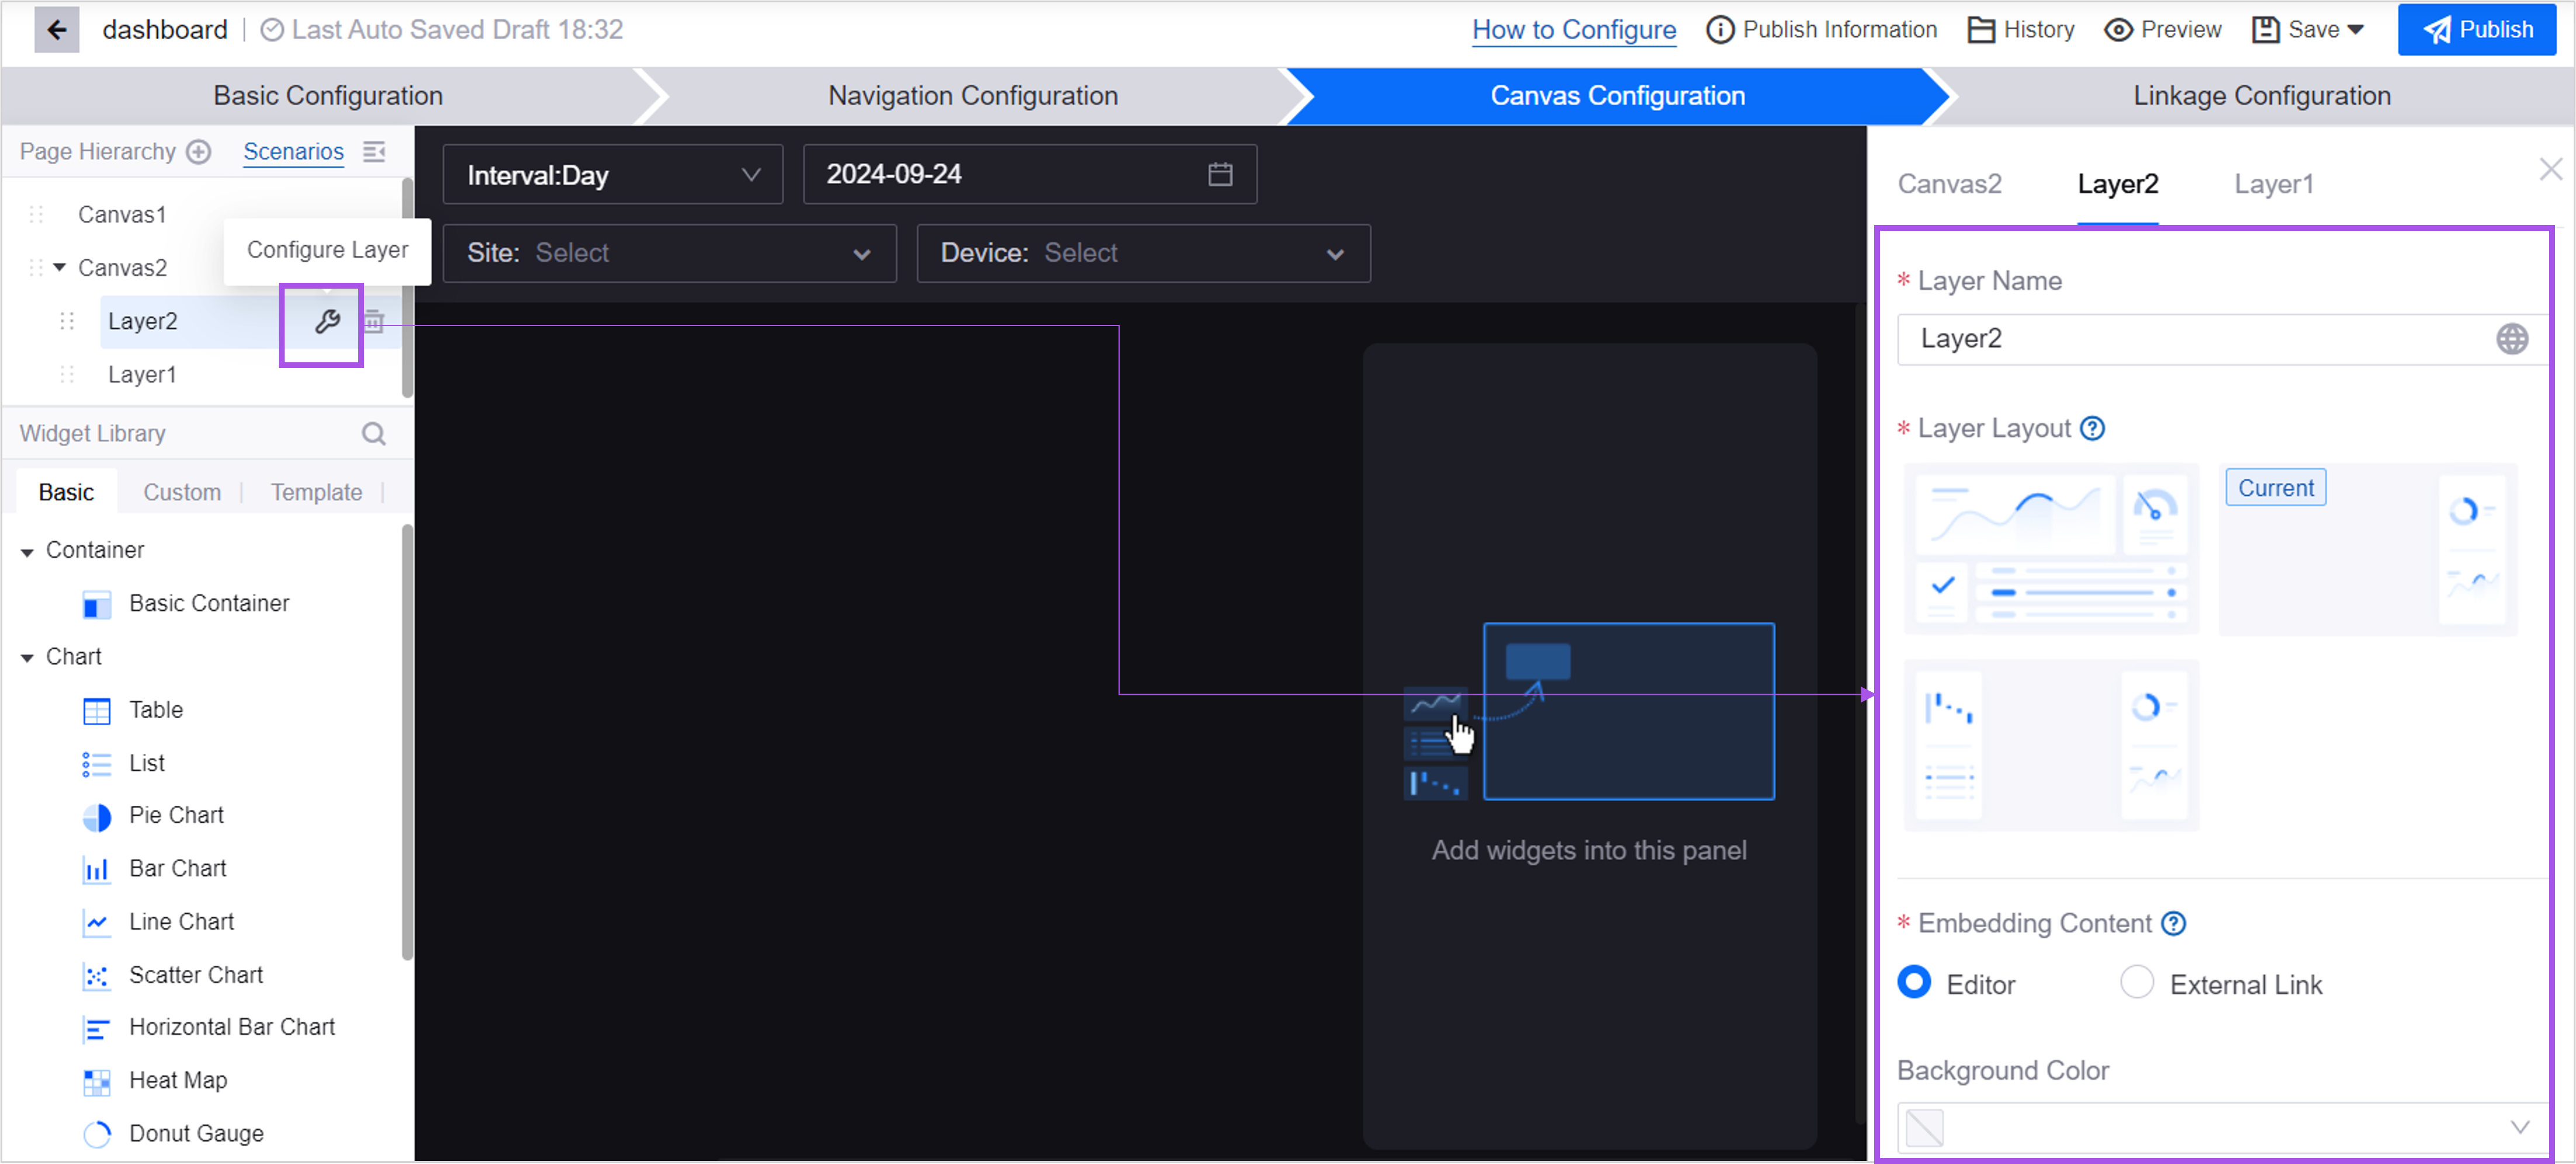
Follow the instructions below to configure layers and panels.
Layer Name
Fill in the custom name of the layer.
Layout
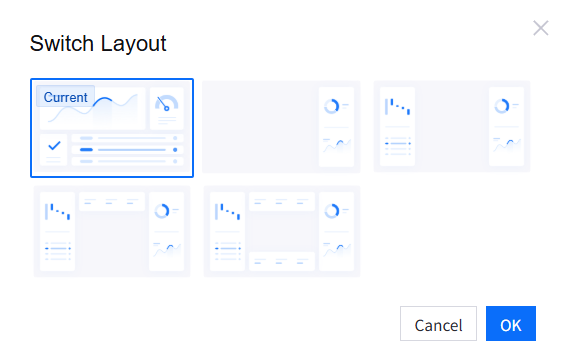
By default, a single-layer canvas has 1 layer with full-screen layout. In a multi-layer canvas, you can decide the layout for each layer. Select Switch to modify the layout. Be noted that once you apply a new layout, your previous configuration on the original layout will not be preserved.
Panel Ratio
You can adjust the panel ratio by setting up its width, height, etc.
Note
On a multi-panel layer, the configuration items below Panel Ratio are panel specific. Settings for one panel will not automatically apply to others. You need to switch panels to complete their configuration.
Hide This Panel
Select one panel (e.g. Top Panel) and check the box of Hide This Panel, you can remove this panel from the layer.
Embedding Content
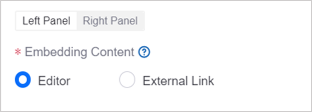
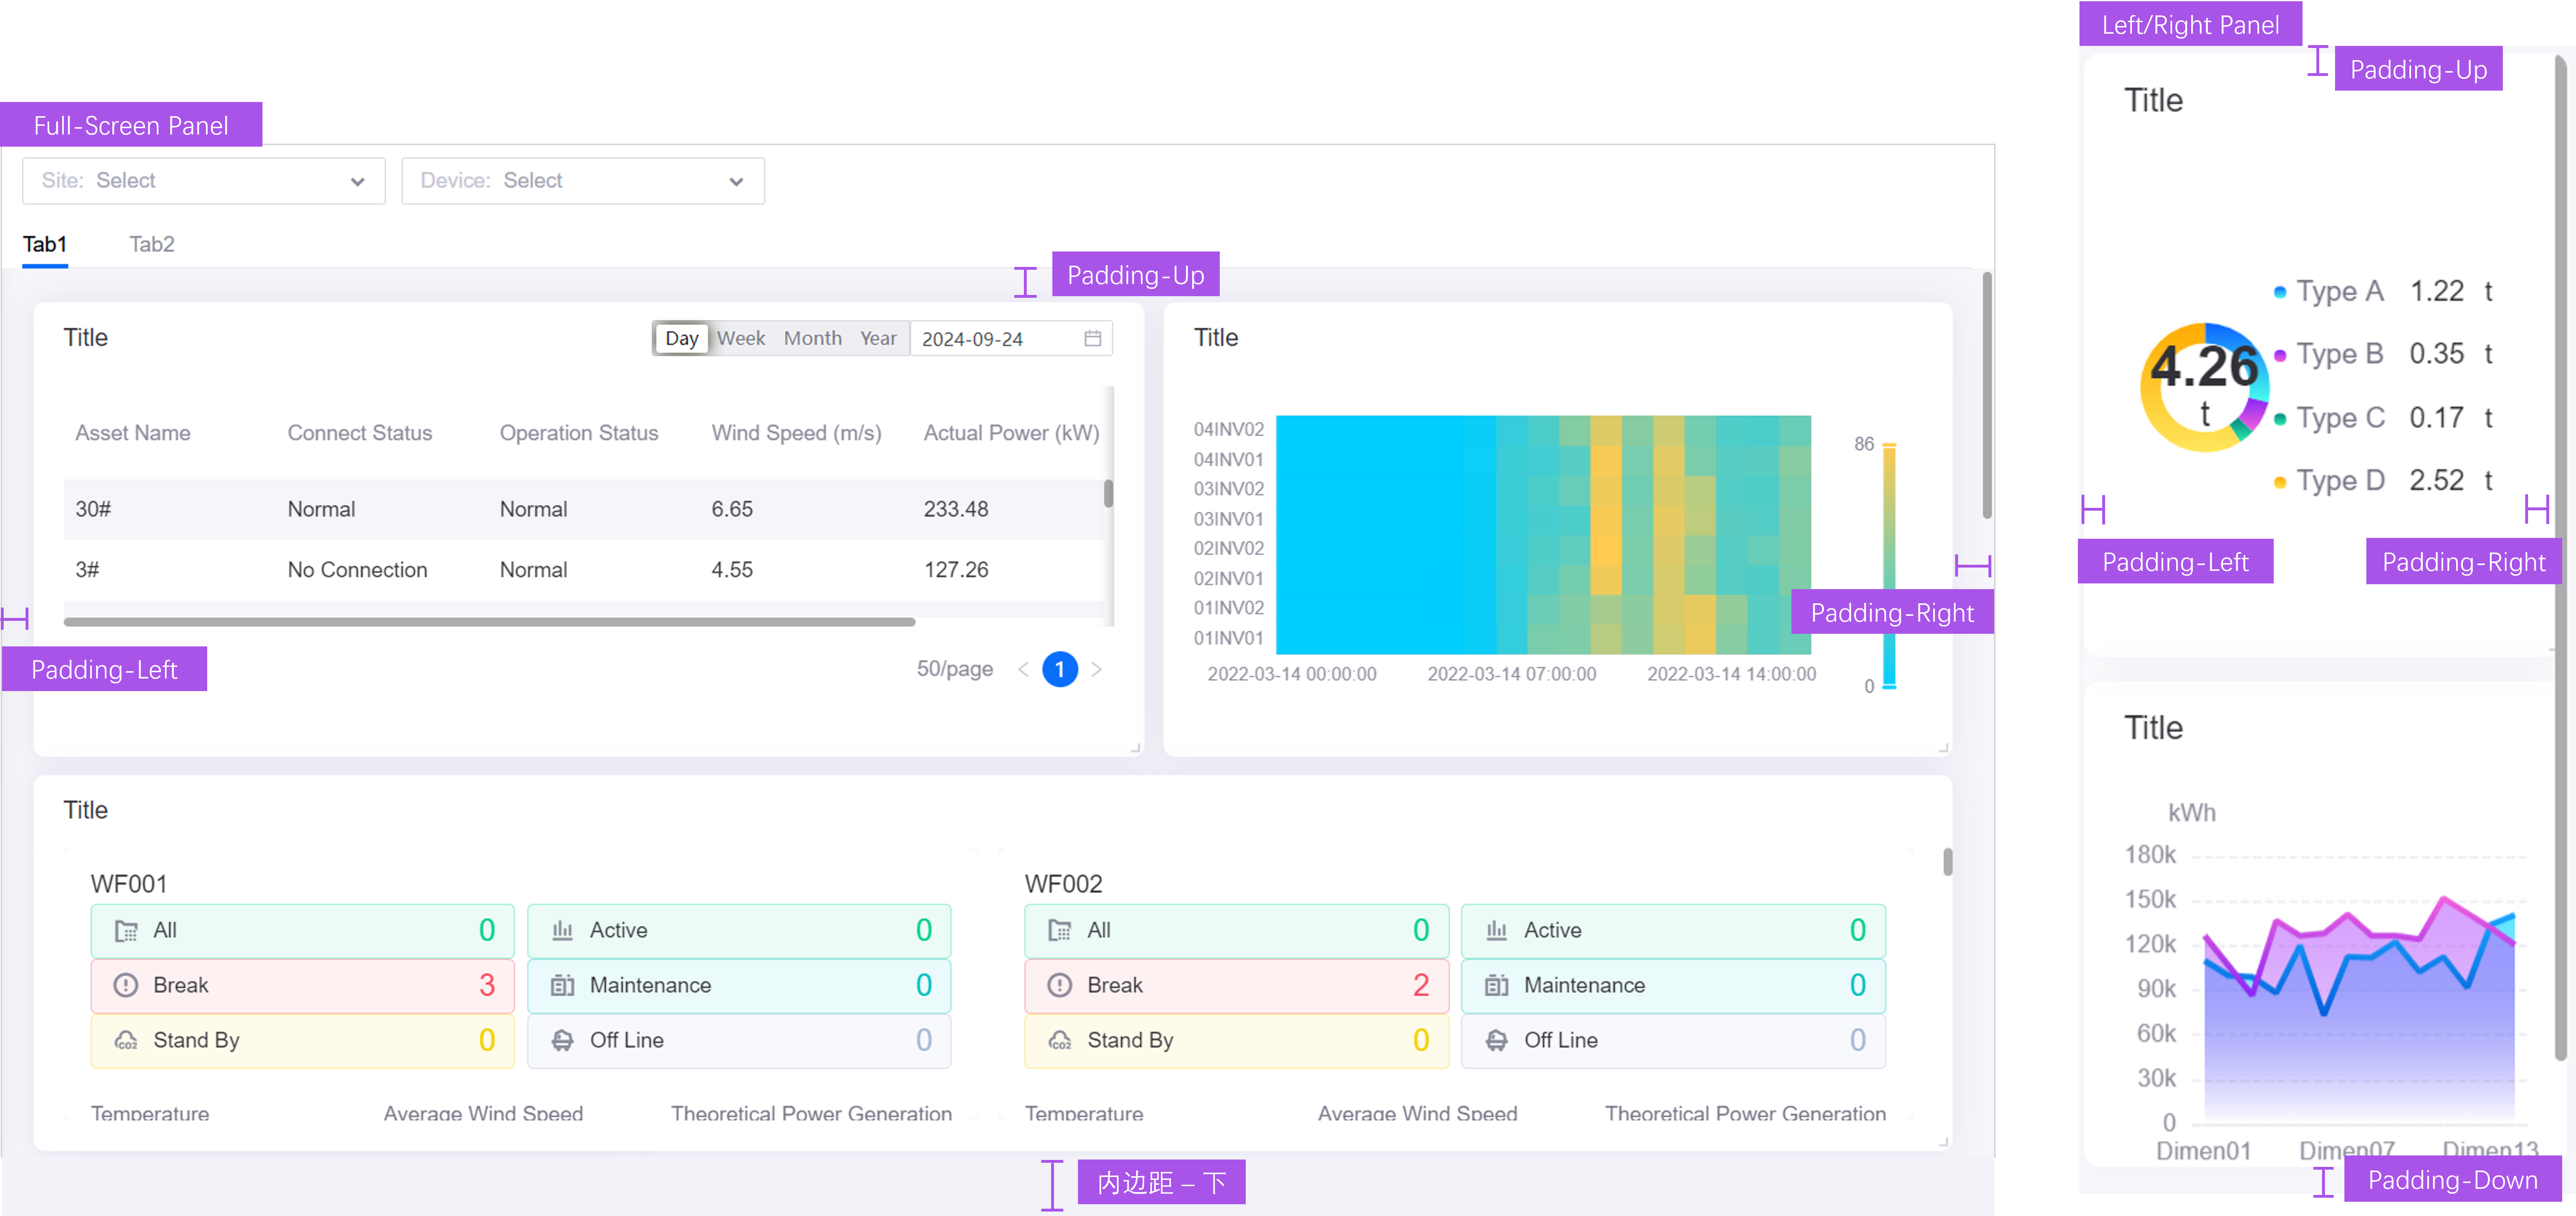
A panel is an individual area in a layer to present specific content. A panel can cover the entire canvas, or it can be a left/right panel occupying a small area of the canvas. Select one of the following options to be the source of its content.
Editor: Use the DTV editor. You can add widgets to the panel to achieve data visualization.
External link: Insert links of other DTV pages to use the panel as a display window. The embedded content cannot be edited on the current page.
Enable Rounded Panels
You can use rounded corners in your panel design.
Background Effect
Set the color of the panel. You can use colors of the current theme or any other colors you need.
Padding
Padding is the distance between the content and the panel border.
Grid Height and Grid Columns
DTV uses a grid system to measure the height, width, and position of the widgets, dividing the page into grids of the same size. You can customize the height of the grid, or choose Adaptive, allowing the system to calculate a dimension according to the screen height, the panel width and the grid number. For more information, see Managing Dashboards.
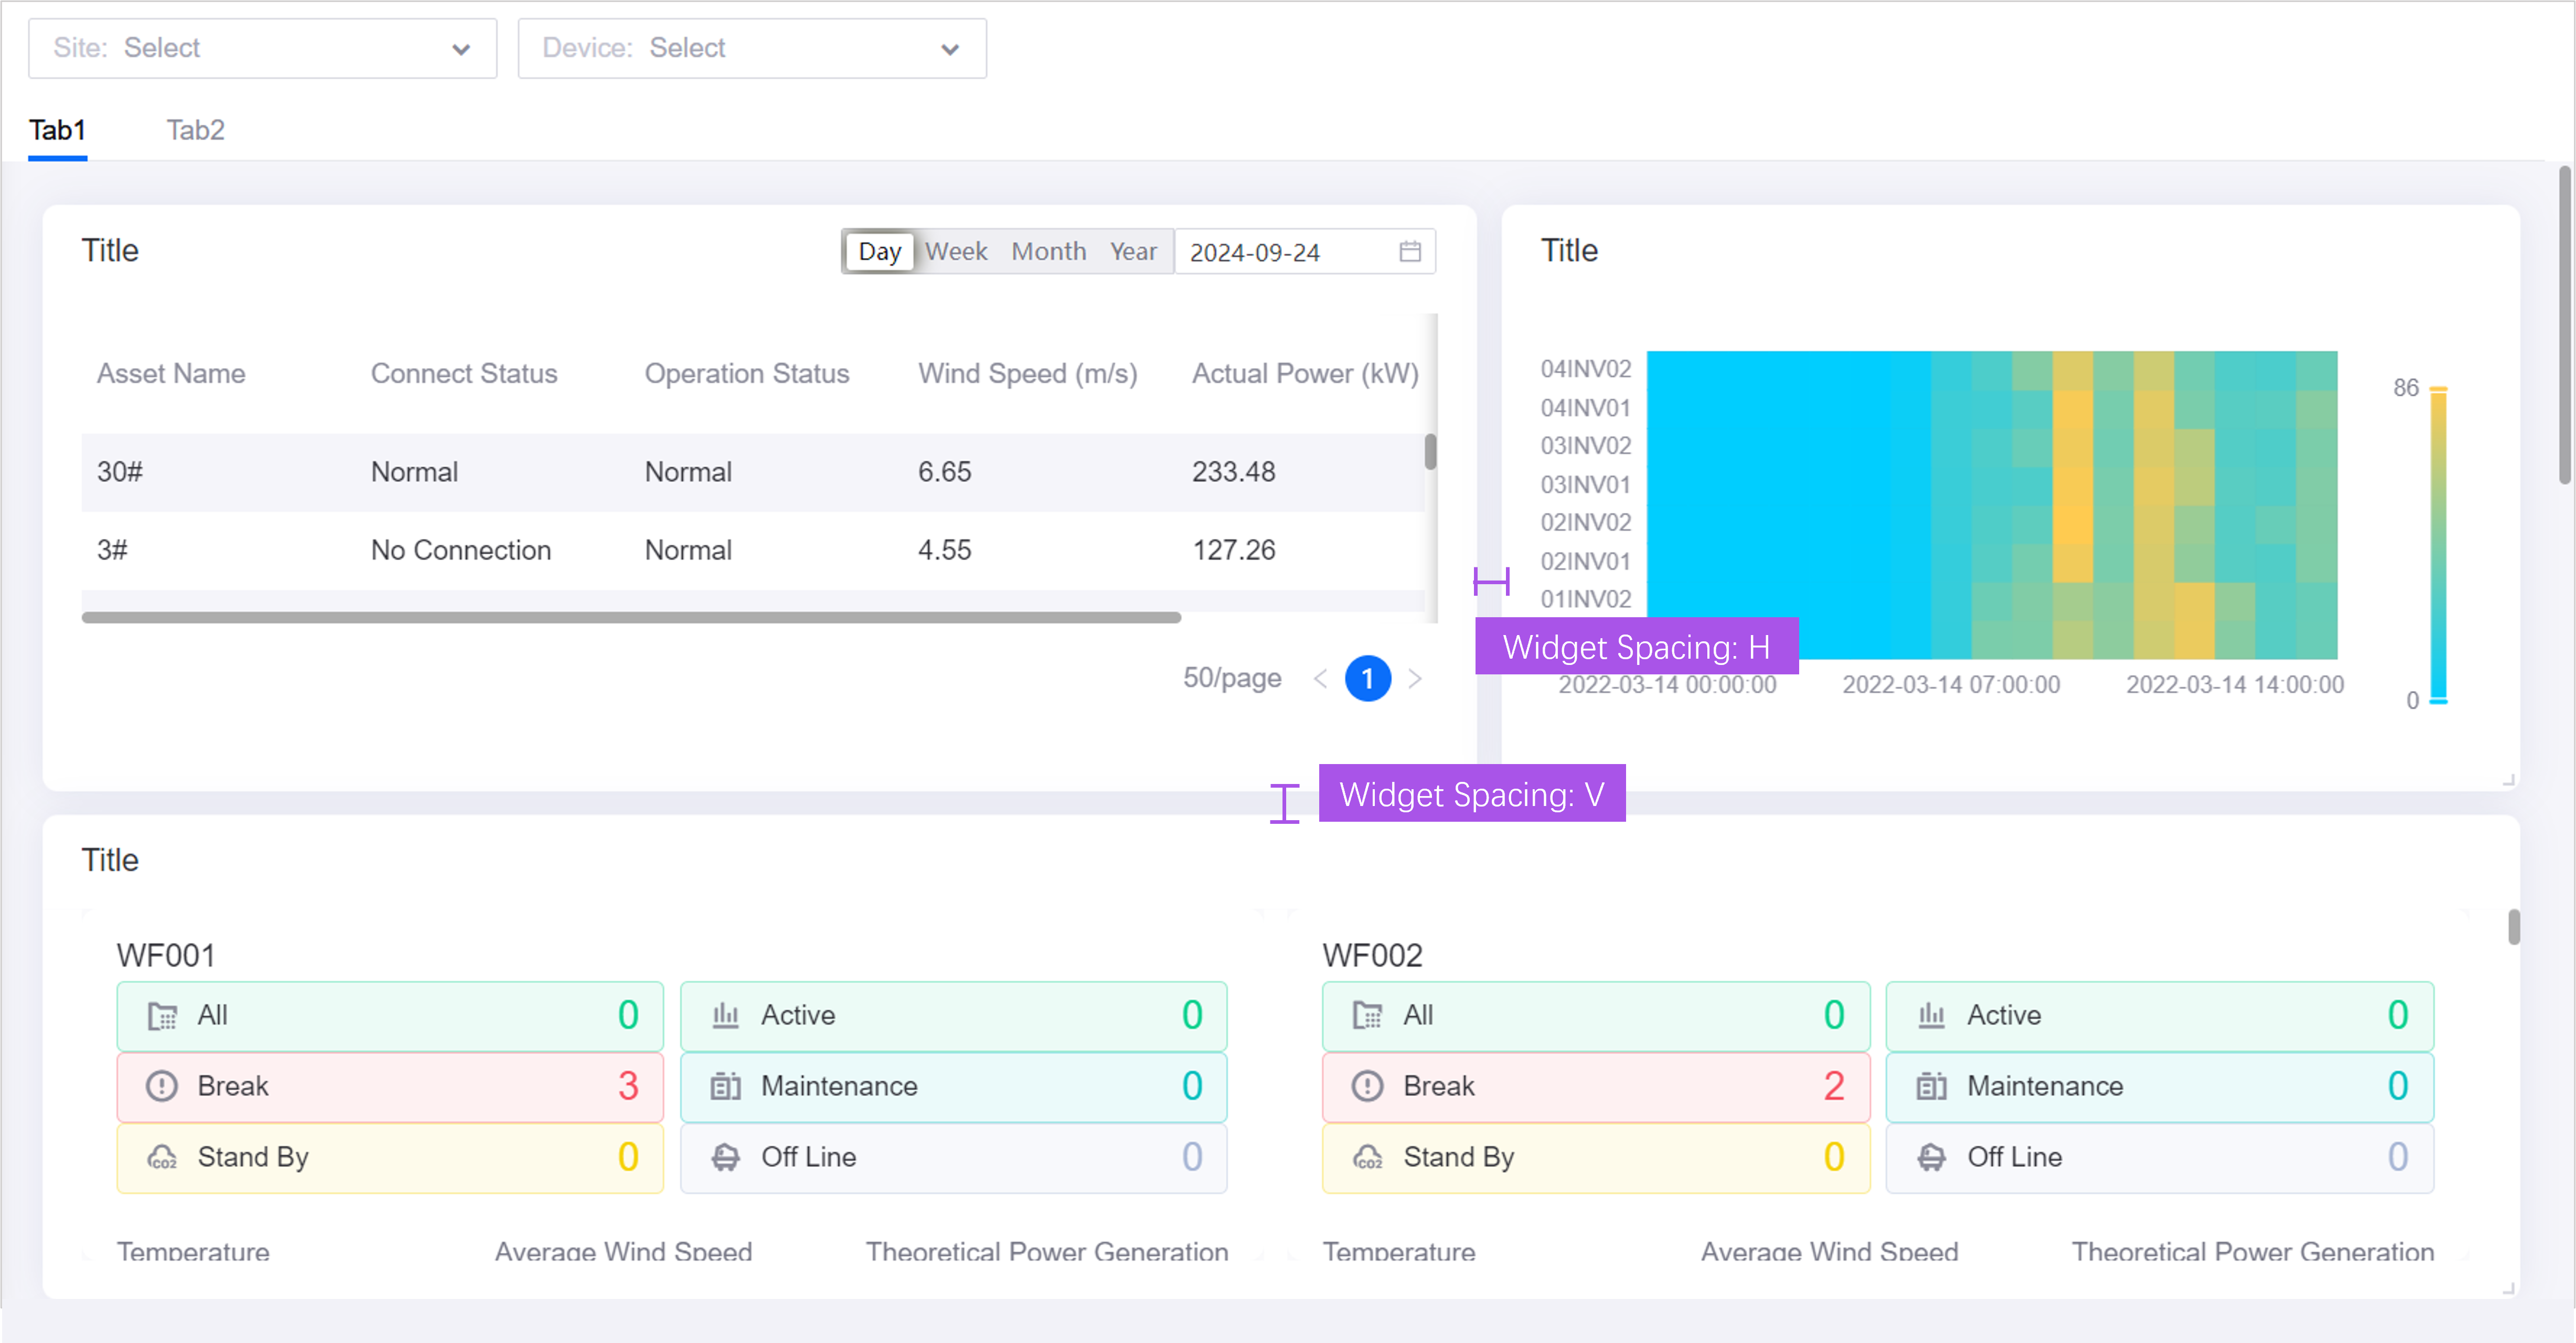
Widget Spacing
You can define widget spacing to adjust the space between the adjacent widgets.
Refresh Frequency
You can set the automatic refresh frequency of data on the page or choose not to refresh automatically.
Merge Request
If enabled, when more than one widget in the panel uses the same data source and the data is updated, multiple data requests will be merged into one request to improve efficiency. It is enabled by default.
Loading Priority
Specify the loading priority for the widgets in the panel. When the data amount is huge or the internet connection is unstable, the widgets will be loaded following the priority you define. Widgets of the same priority will be loaded at the same time. If no priority is given, all widgets will be loaded simultaneously.
After completing the above settings, you can move on to add and configure widgets.