Managing Service Requests
Managers and operators can perform operations such as filtering, processing, transitioning and assigning service requests.
Prerequisites
Before starting, make sure the current account has the required asset permissions, action permissions, and menu groups including Service Requests. If not assigned, contact the application administrator.
Filtering Service Requests
In the service request list, service requests can be filtered using various filter conditions.
Note
- The list page defaults to showing all service requests created within the last 30 days.
- After modifying the filter conditions, you need to select Apply to enable the filters. Select Reset to restore the default filter conditions.
- If you apply multiple filter conditions at the same time, the query results will display the results which satisfy all of them.
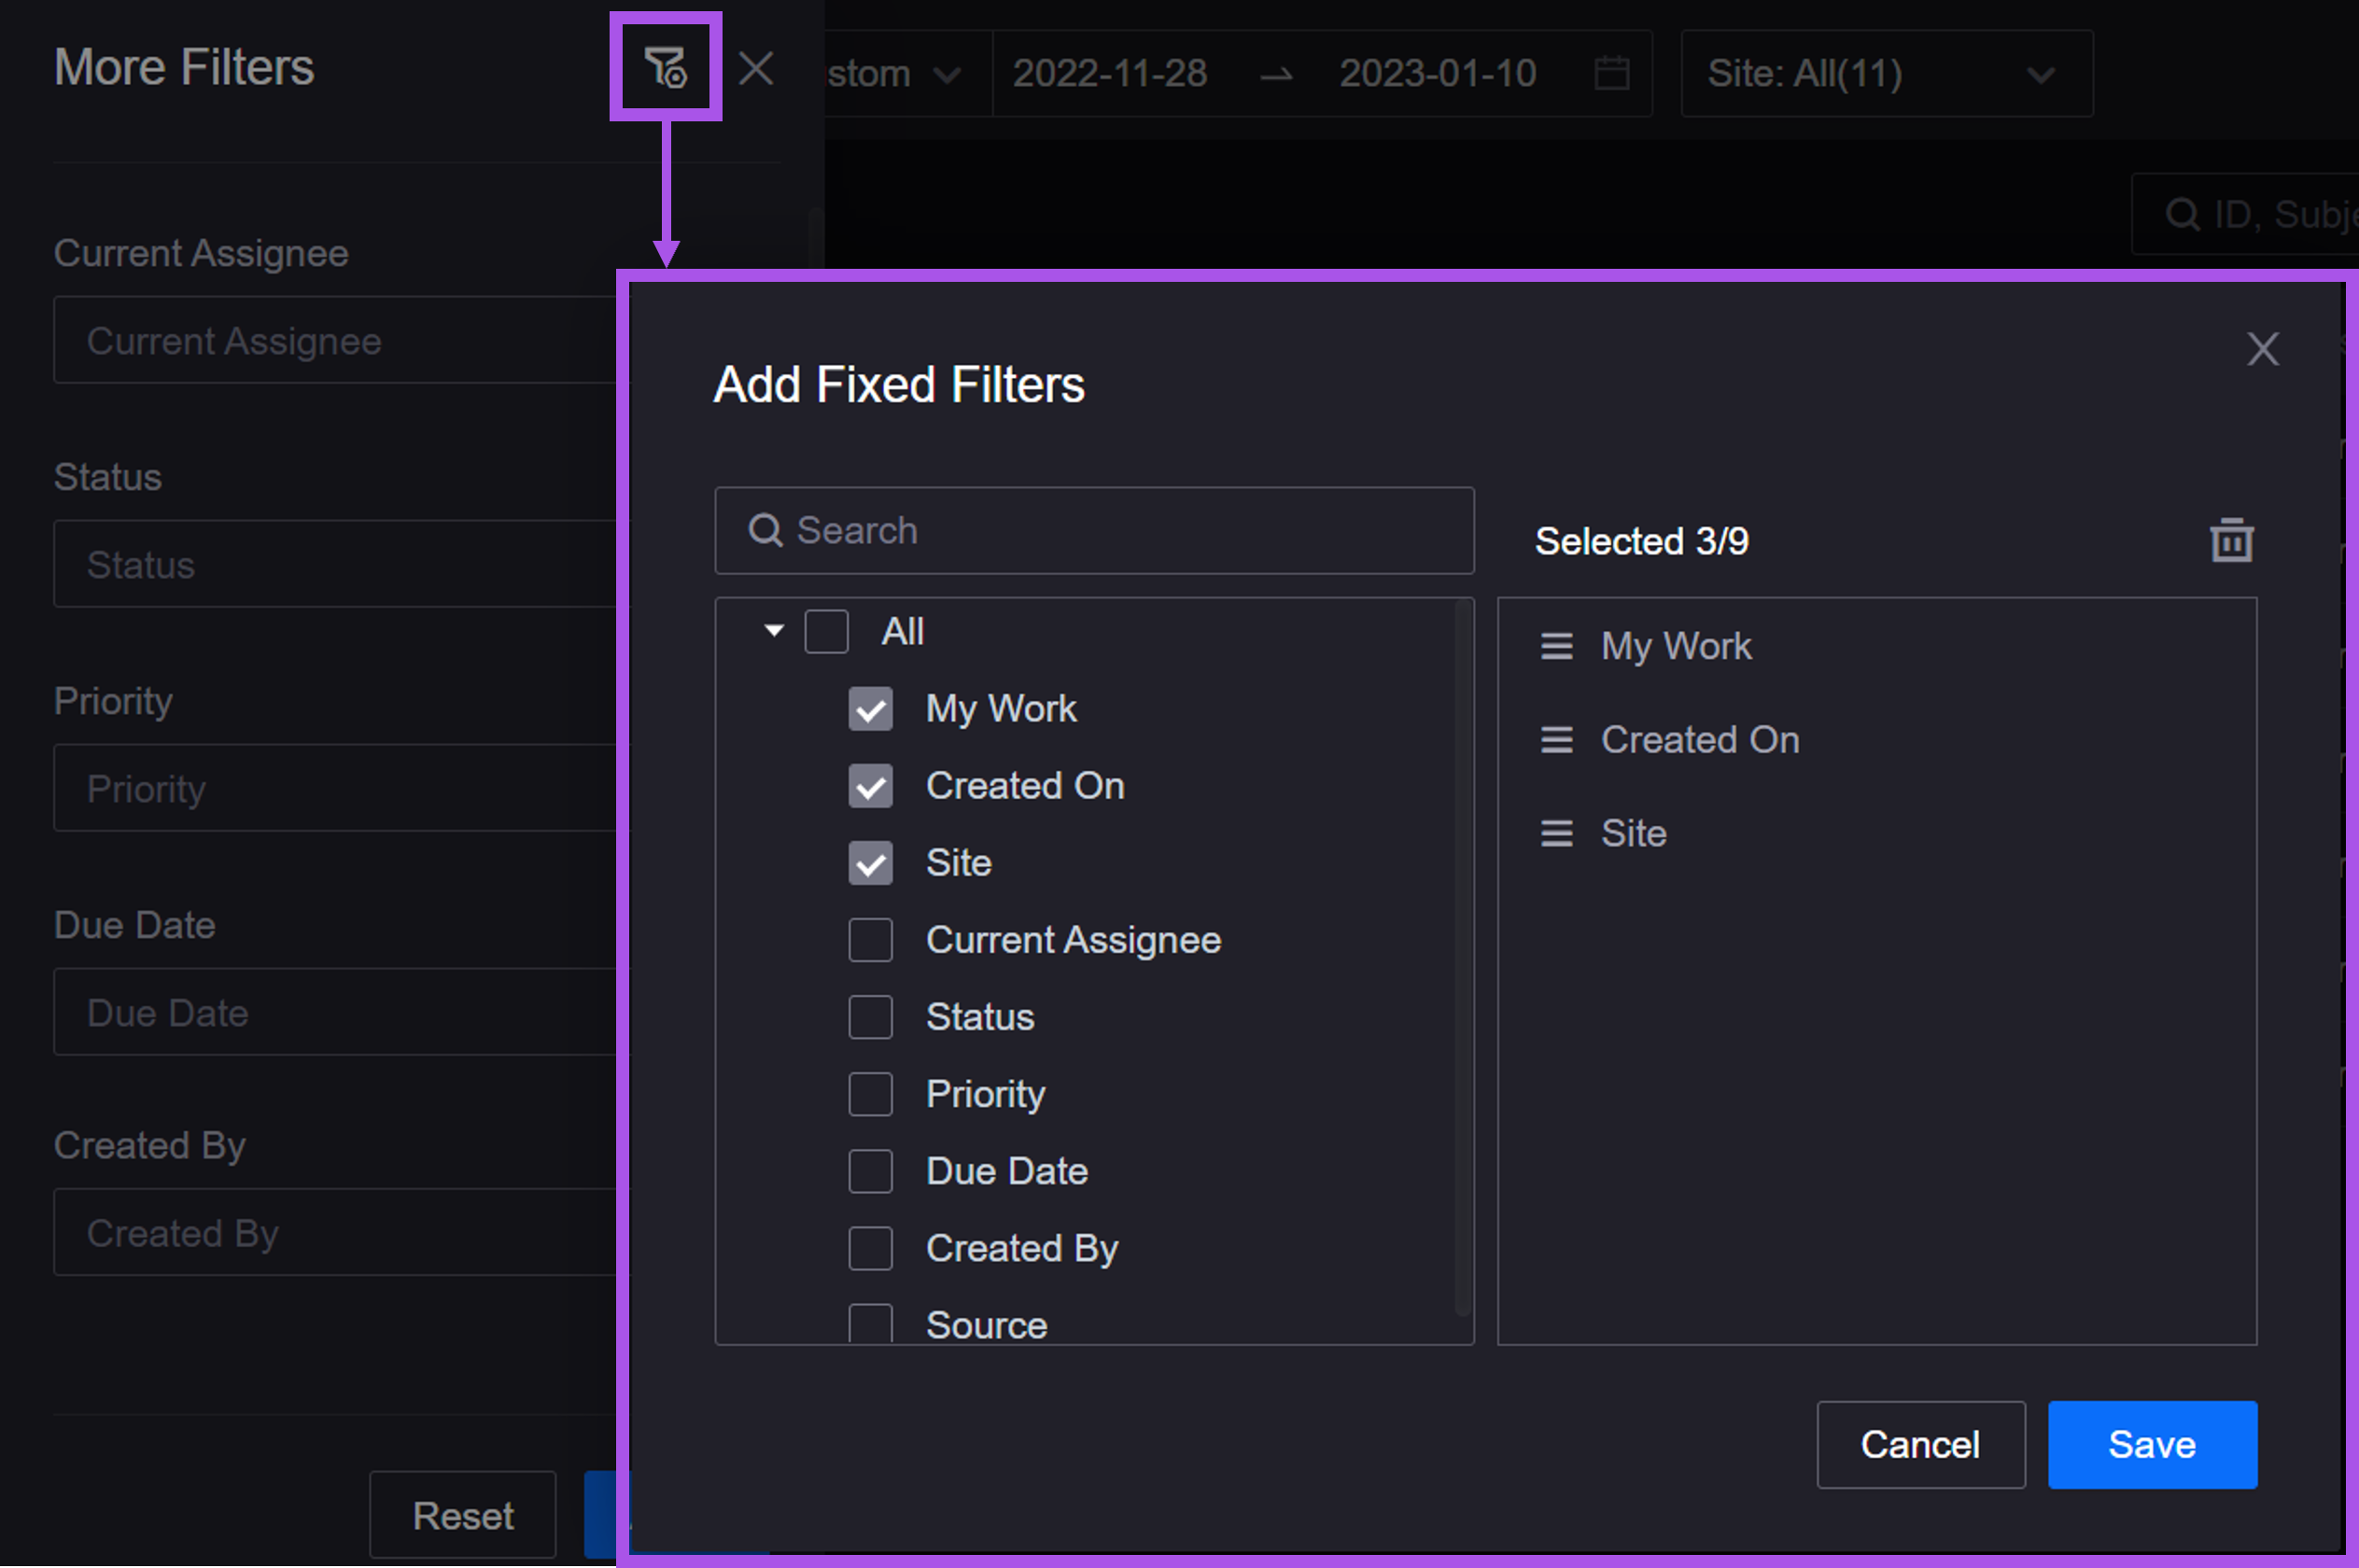
Configuring Fixed Filter
On the Service Requests list page, you can place commonly used filters in the Fixed Filters. The specific steps are as follows:
- In the left navigation bar, select the Service Requests menu to enter the service request list.
- Select the More Filters button
 on the left side of the fixed filter bar.
 - In the More Filters menu, select the configuration button
 to open the pop-up window.
 - Select the filter items that need to be added to the fixed filter bar.
- Click Save.
Note
The Created On and Site cannot be changed.
Processing Service Requests
Operations such as editing, transitioning, and assigning can be performed on the service request. The specific steps are as follows:
- In the left navigation bar, select the Service Requests menu to enter the service request list.
- Find the target service request and select Process to enter the service request details page.
Editing
On the service request details page, you can edit the following:
- Subject: the service request title.
- Details: display information such as the site, device, and description linked with the service request.
- Files: display attachments contained in service requests. Users can view and delete existing attachments or upload more attachments.
- Linked Records: display service requests and work orders linked with the current service request. Select Link to link other tickets in the pop-up window, or select the delete button
 to delete the existing link.
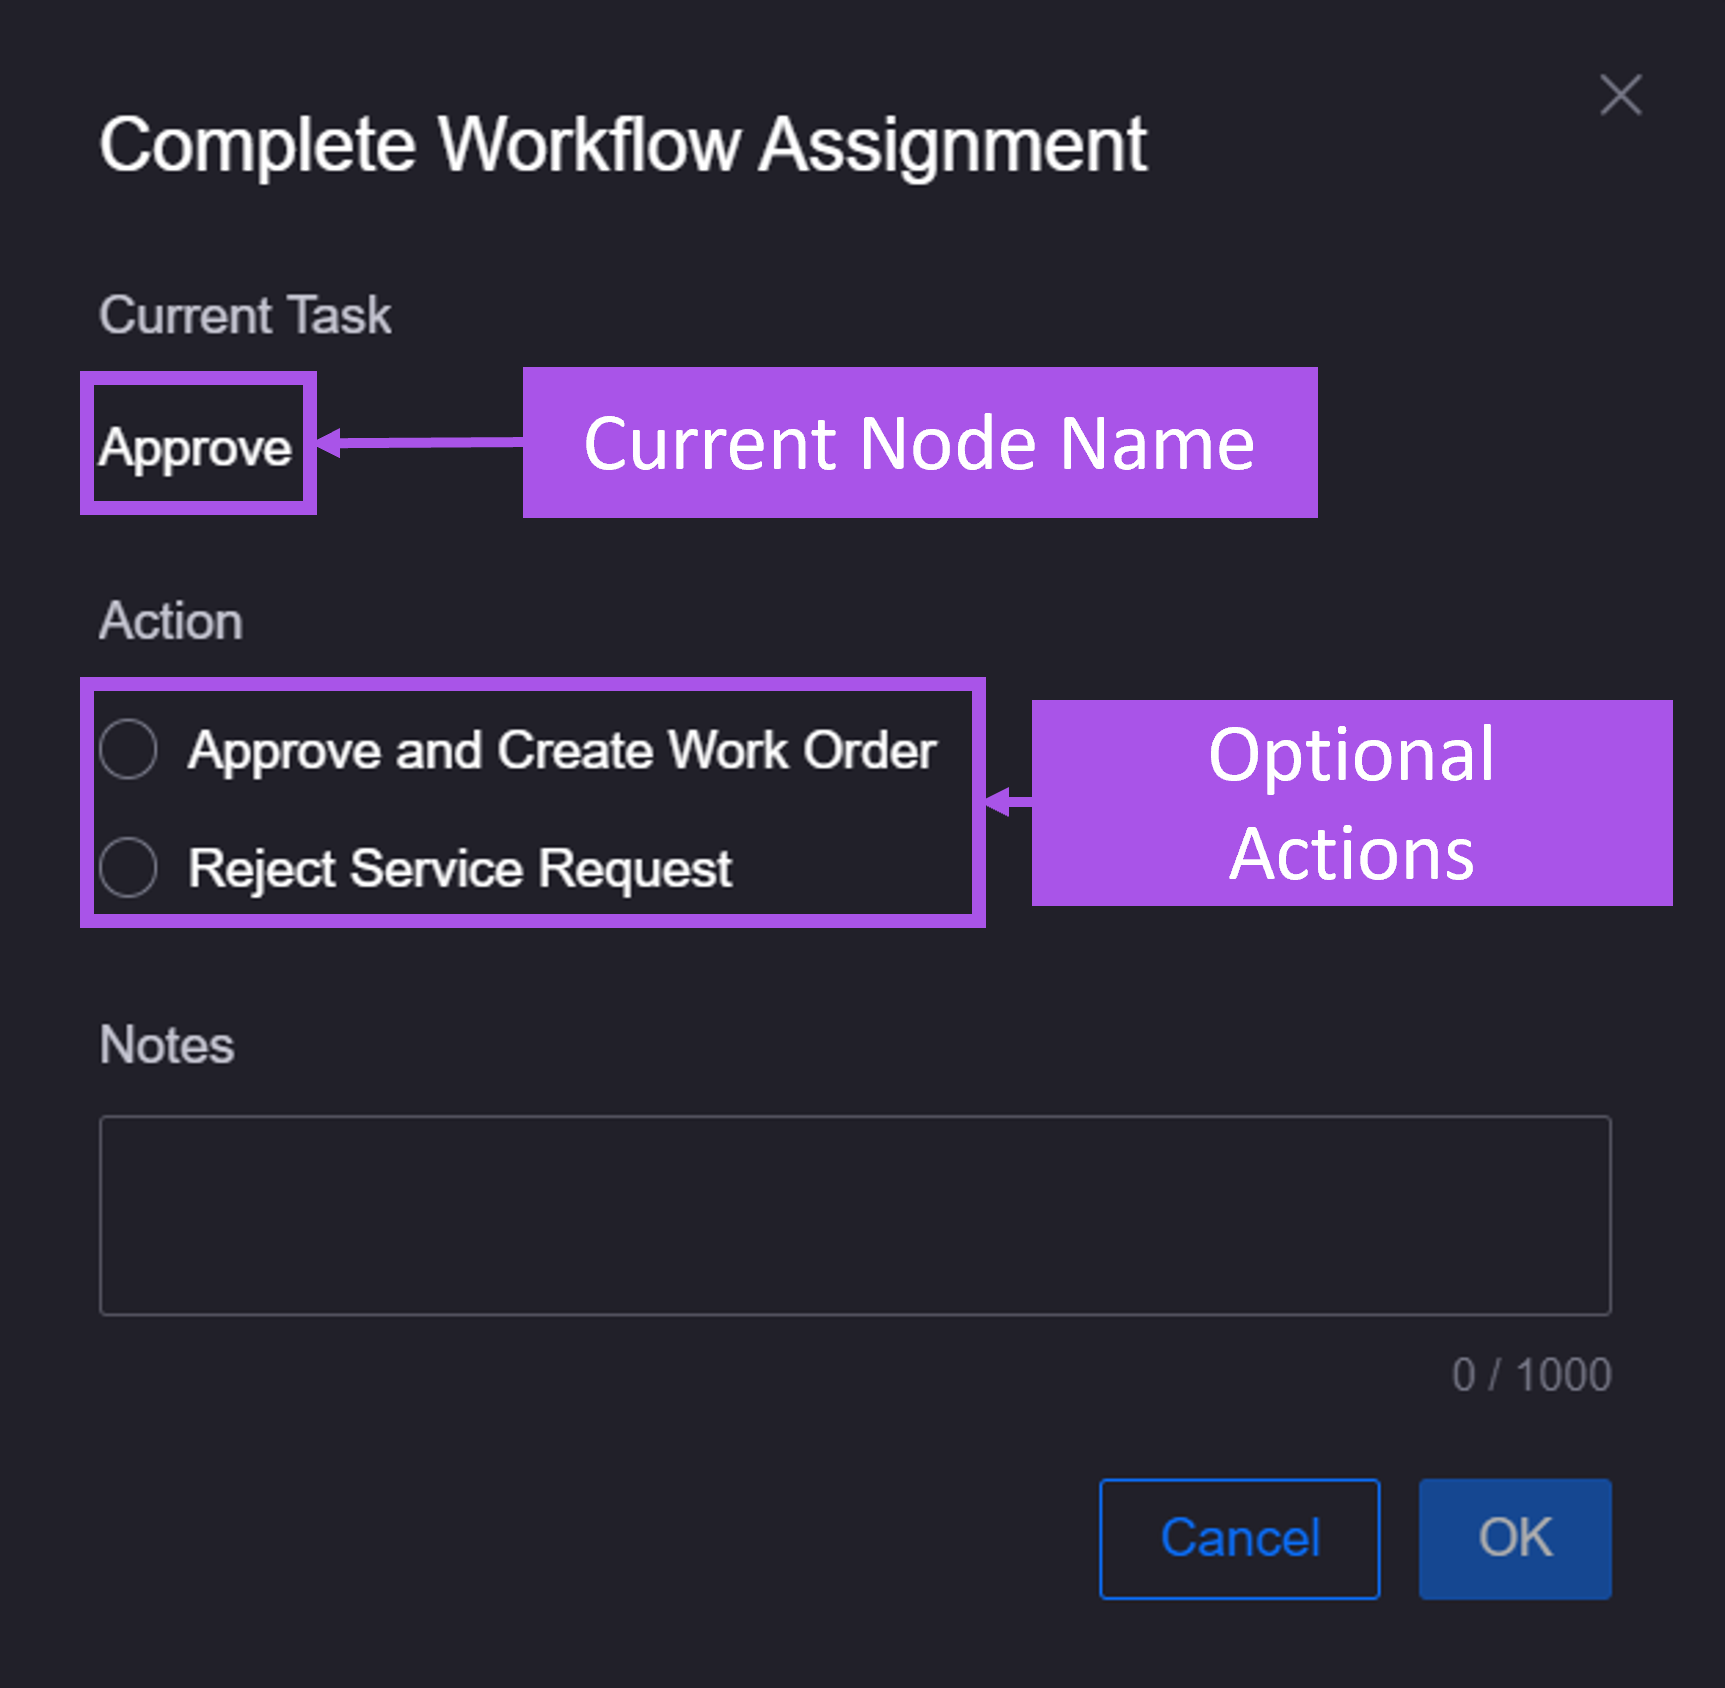
Transitioning
The transition allows you to end the current ticket node and push the ticket to the next node of the workflow. The specific steps are as follows:
- Select Transition to open the pop-up window.
- Select an action and enter a note.
- Select OK.
Note
If the service request has an unclosed follow-up work order, it cannot be transitioned to the closed status.
Saving
Select Save  to save edits to the service request.
Note
Only the assignee of the current node can edit and save.
Assigning
You can assign the current ticket node to another user or group. The specific steps are as follows:
- Select Assign
 to open the pop-up window.
 - Assign the task to a user or group, or select Me to assign the current ticket to yourself.
- Select OK.
Note
This operation only affects the assignees of the current node. If a subsequent node is assigned to another user or group in the workflow, when transferred to the next node, the node’s assignee will be updated based on the workflow settings.
Aborting
Aborting service requests. Once aborted, the service request status changes to Aborted and the service request workflow is terminated.
- Select Abort
 to open the pop-up window.
 - Select Abort.
Note
If a service request has been aborted, you can select Restart in the upper right corner to restart the workflow and restore it to the original node.
Deleting
Deleting service requests. Once deleted, service requests cannot be restored. The specific steps are as follows:
- Select Delete
 to open the pop-up window.
 - Select OK.