Managing Shift Schedules
EOC supports to view and manage shift schedules in unified list, including: implement batch scheduling, view scheduling calendar, etc.
Prerequisites
Before you start, make sure that the user account has been assigned the required permissions. If you need to be assigned, please contact the Organization Admin.
Implement batch scheduling
After the scheduling plan is created successfully, you need to implement batch scheduling. You can implement scheduling by the following steps.
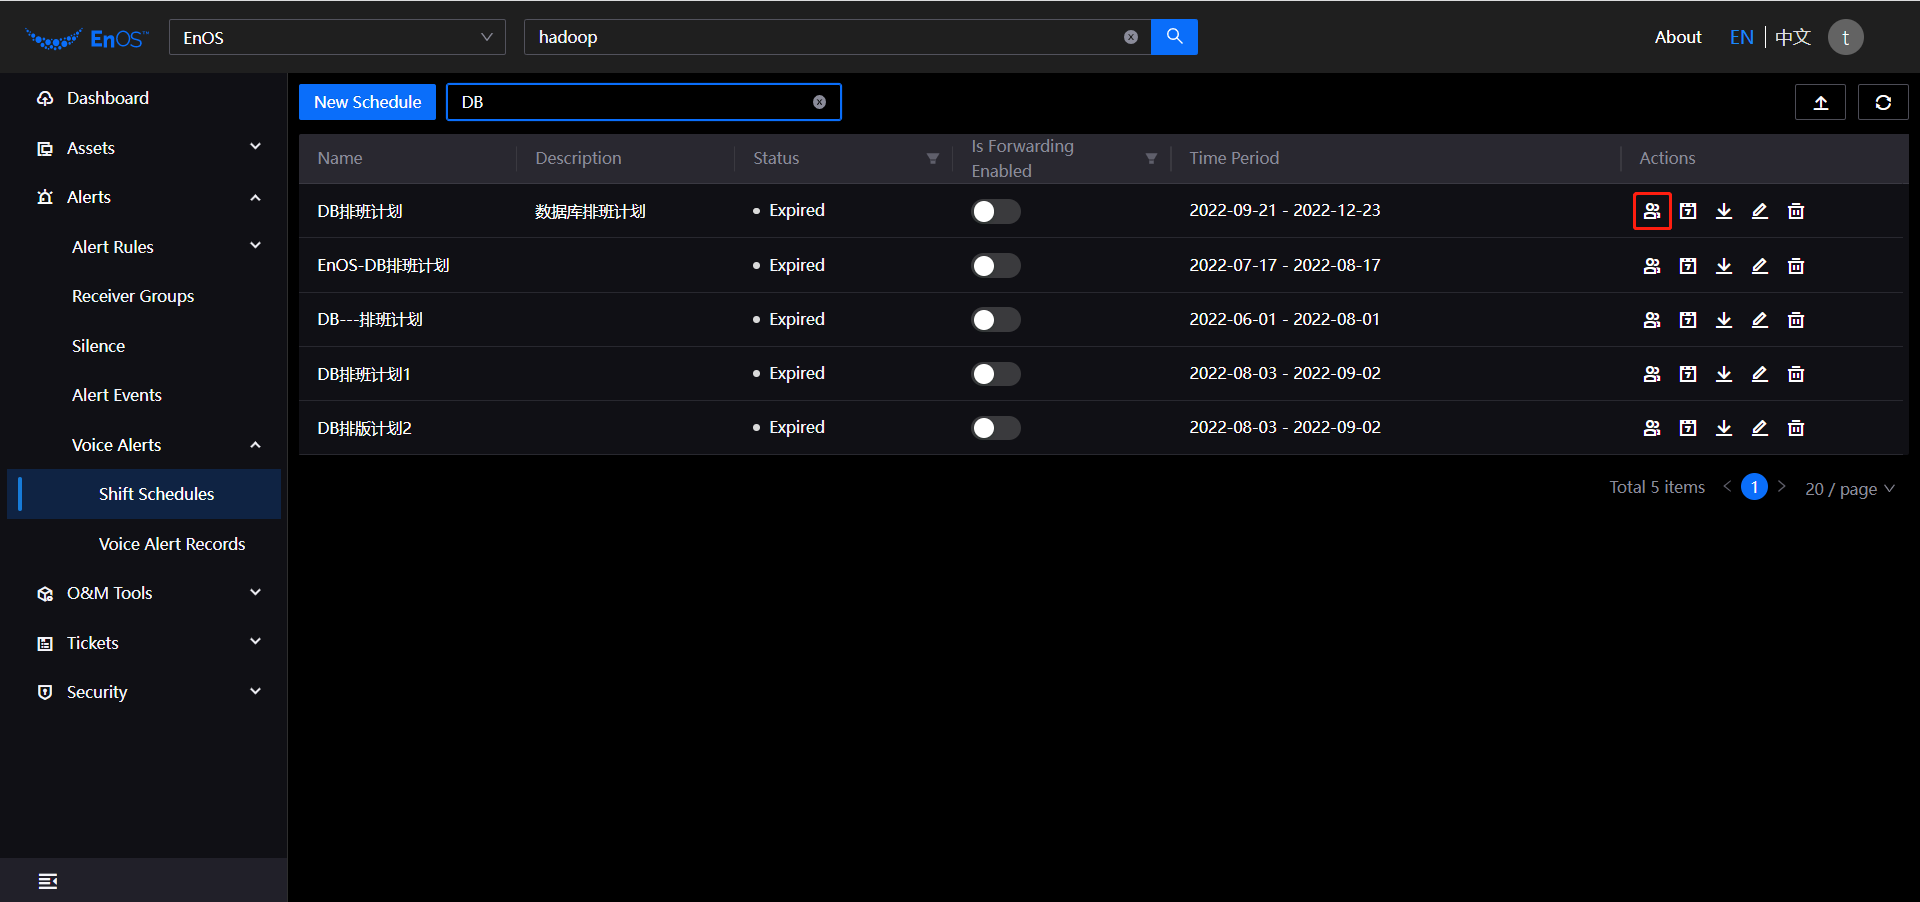
Log in to the EOC and select Alerts > Voice Alerts > Shift Schedules in the left navigation bar.
On the schedule plan list page, select the target plan and click
 .
.
On the batch scheduling page, complete the scheduling configuration.
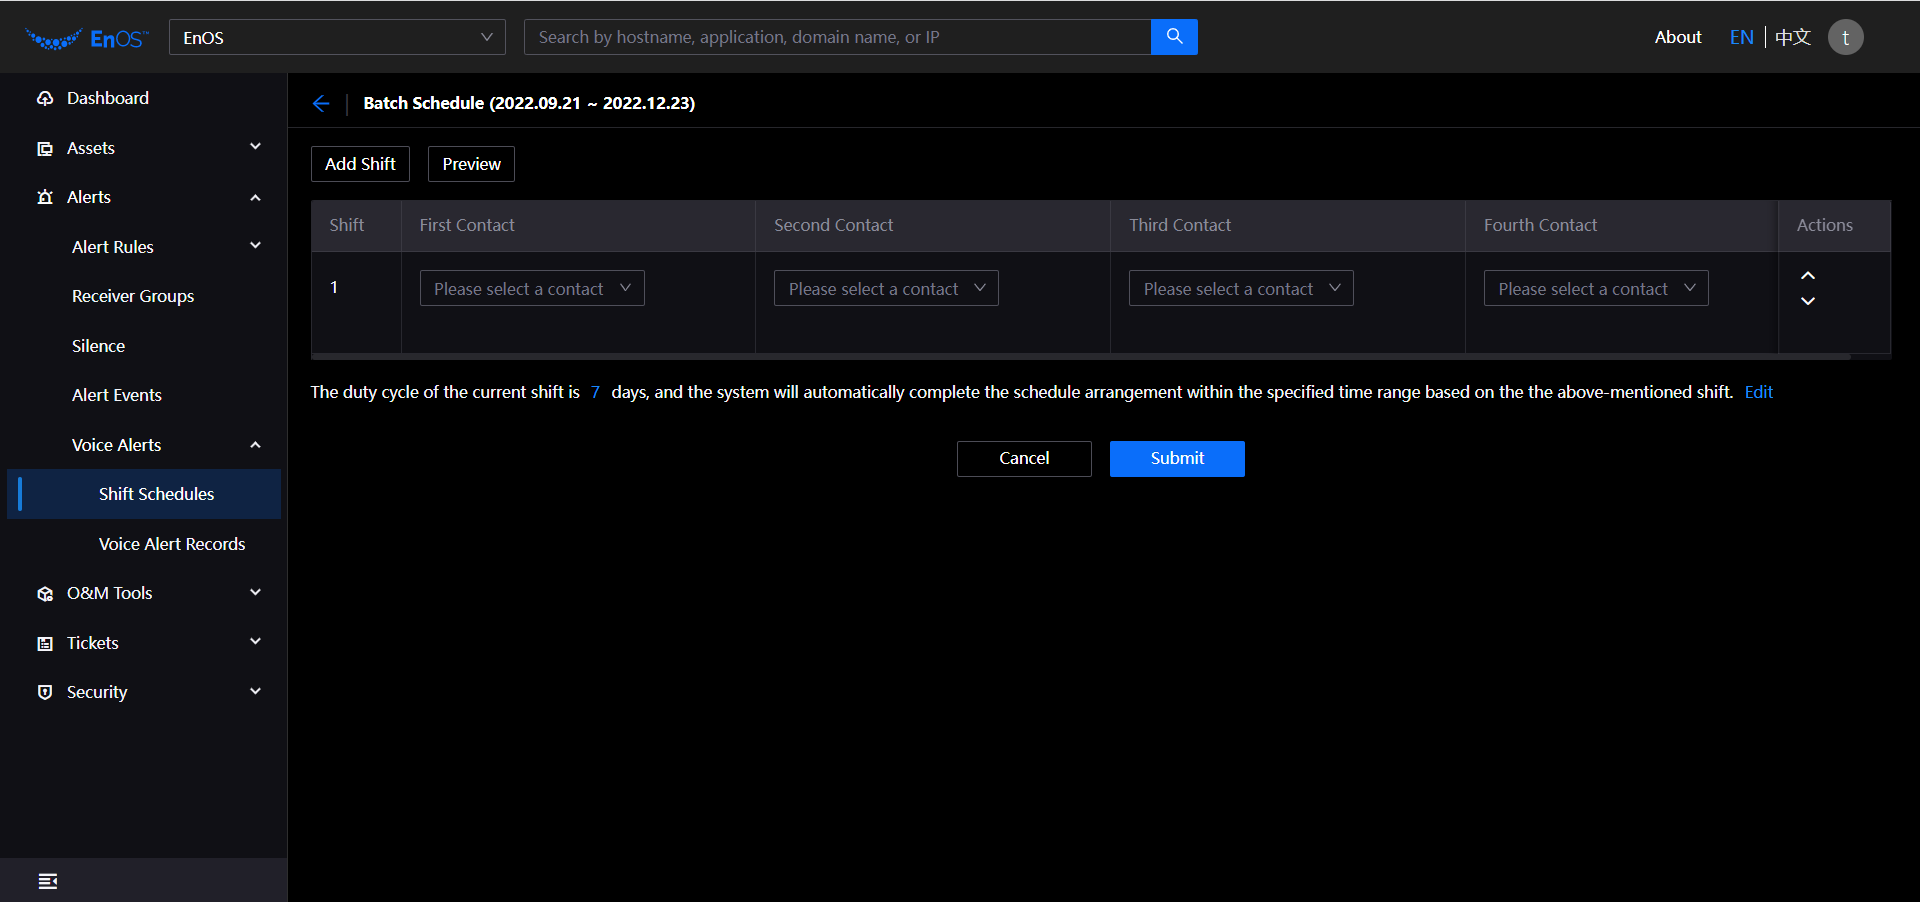
Shift Information: In the current shift, select the corresponding contact person.
Click Add Shift to add the number of shifts to the scheduling plan.
Click the actions
 to change the order of the shift contacts.
Click
 to delete the shift.
Click Edit to set the duty cycle of the current shift, which can be set from 1 to 7 days.
Click Preview to view the automatically generated scheduling calendar.
Click Submit to complete automatic scheduling.
Viewing Scheduling Calendar
You can view the schedule calendar by the following steps.
Log in to the EOC and select Alerts > Voice Alerts > Shift Schedules in the left navigation bar.
On the schedule plan list page, select the target plan and click
 .
.On the scheduling calendar page, you can take the following actions.
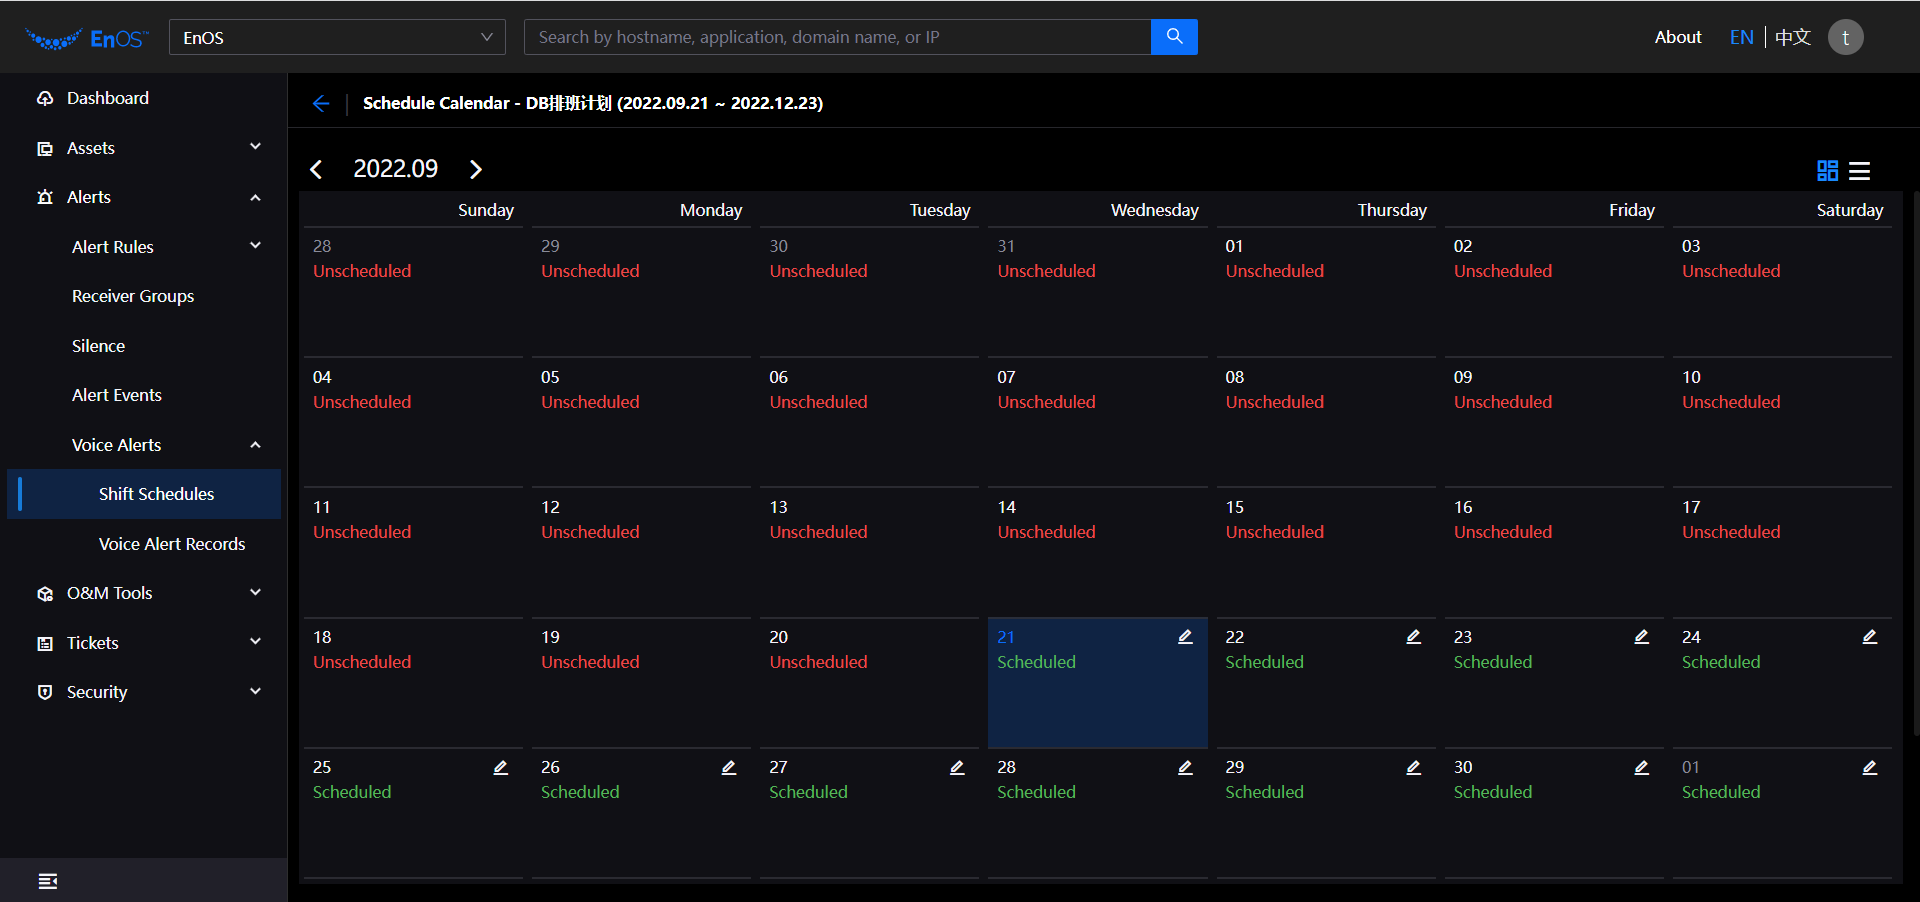
Mode Switch: Click
 to switch the calendar/list mode.
Schedule Details: Hover mouse over Scheduled/Unscheduled to view information about the scheduled contacts at the current time.
Edit Schedule: Click
 to modify the schedule, select the contact you need to modify, and click Submit to finish the modification.
Editing Shift Schedules
You can edit the schedule by the following steps.
Log in to the EOC and select Alerts > Voice Alerts > Shift Schedules in the left navigation bar.
On the schedule plan list page, select the target plan and click
.On the edit scheduling plan page, complete the changes to the basic information.
Name: Enter the name that needs to be modified.
Description: Enter the description to be modified.
Product Line: Select the product line that needs to be modified.
Time Range: Select the time range to be modified.
Click Next Step to complete the change of forwarding policy information.
Time Range: Select the time range to be modified.
Security: Select the security level to be modified.
Number of Retries: Enter the number of retries to be modified.
Click Submit.
Deleting Shift Schedules
You can delete the schedule by the following steps.
Log in to the EOC and select Alerts > Voice Alerts > Shift Schedules in the left navigation bar.
On the schedule plan list page, select the target plan and click
.The system will pop up confirmation notification, click OK to delete it.
Importing Scheduling Calendar
You can import the schedule calendar by the following steps.
Log in to the EOC and select Alerts > Voice Alerts > Shift Schedules in the left navigation bar.
On the schedule plan list page, select the target plan and click
 .
.