Managing Hosts
EOC supports to view and manage the full lifecycle of hosts in unified list, including: start/stop, restart, delete, change instance specification, add disk, expand disk and other functions.
Prerequisites
Before you start, make sure that the user account has been assigned the required permissions. If you need to be assigned, please contact the Organization Admin.
Viewing Host Details
Both online and offline hosts can be viewed in detail by the following steps.
Log in to the EOC and select Assets > Hosts in the left navigation bar, the host list shows all hosts that the current user is entitled to view.
Enter a specific hostname, product or IP in the search box to quickly locate the target host.
Click the hostname of the target host to access the host details page, which shows the details of the current host.
Actions such as start/stop host: Provides the way to operate the host. For more information, see Managing Hosts。
Property: Shows host-related properties, including instance information, disk information, operating system, network information, and additional information.
Relationship: Shows the association information between the host and the business topology.
Change History: Records the changes history of the host. If you have permission, click Ticket ID to go to the ticket details page to view information.
Associated Alert Rules: Record the alert rules associated with this host. Click Rule Name to go to the detail page to view the more information about host alert rules.
Starting Instance
Note
The offline hosts do not support starting host instances.
When the instance cannot provide services normally, such as in a stopped state, if it is necessary to use the host, you need to start the host instance first. The instance can be started by the following steps.
Log in to the EOC and select Assets > Host in the left navigation bar.
On the host page,
Start a Single Host : Select the target host by hovering the mouse over the icon
 and then click Start Instance.
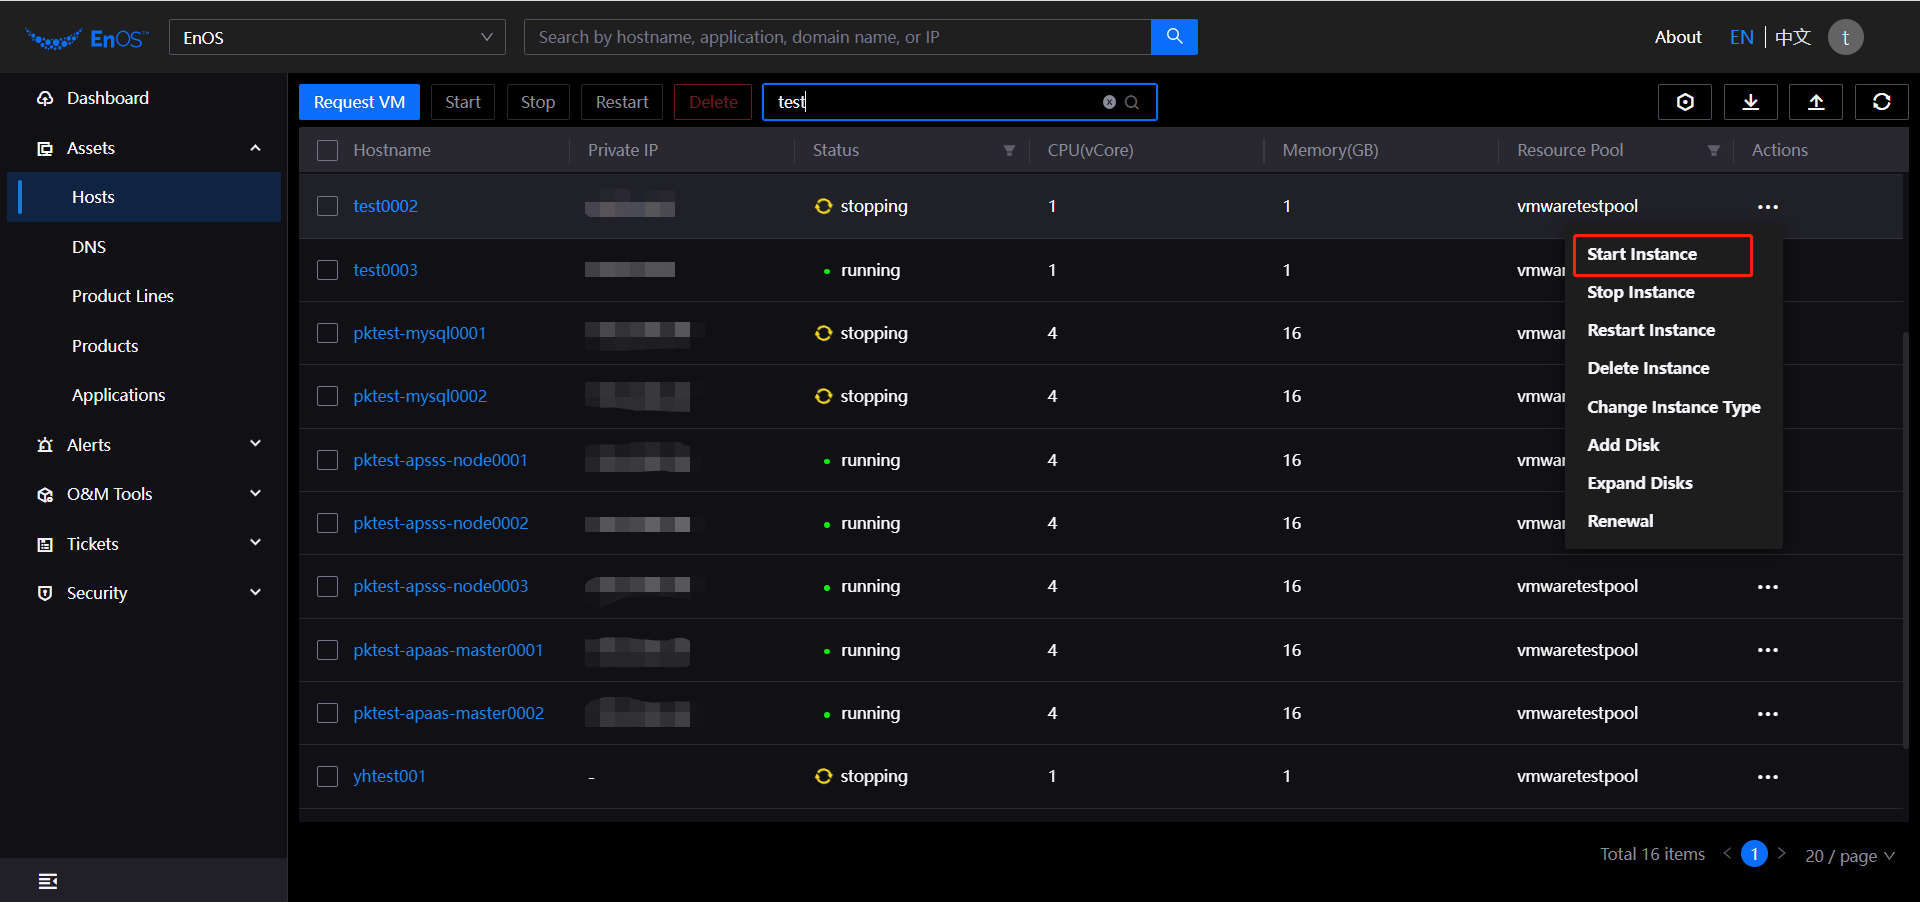
Batch Start Hosts : Select multiple target hosts and click
 , then click Start.
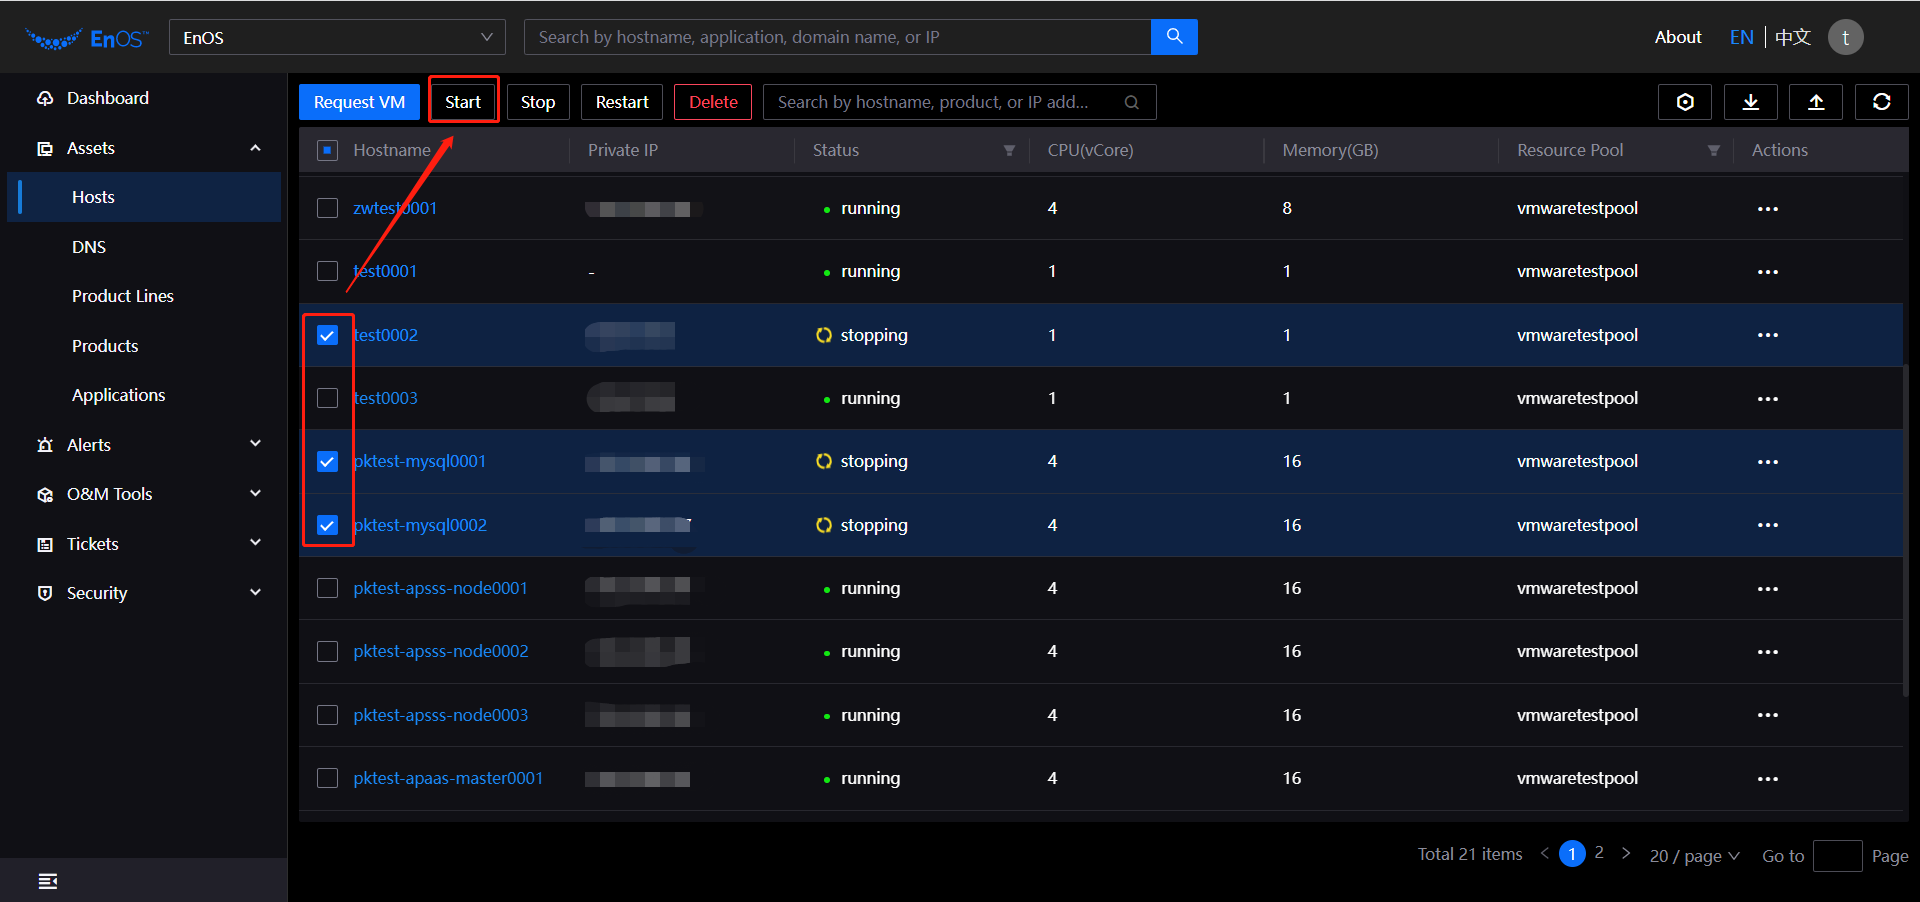
The system will pop up confirmation notification, click OK and the operation will be executed, and the host status will be updated.
Stopping Instance
Note
Stopping the host instance will interrupt the corresponding services.
Offline Hosts do not support stopping host instances.
You can stop instances by the following steps.
Log in to the EOC and select Assets > Host in the left navigation bar.
On the host page,
Stop a Single Host : Select the target host by hovering the mouse over the icon
and then click Stop Instance.Batch Stop Hosts : Select multiple target hosts and click
, then click Stop.
The system will pop up confirmation notification, click OK and the operation will be executed, and the host status will be updated.
Restarting Instance
Note
Offline Hosts do not support restarting host instances.
After the instance has been modified, it must be in the running state and then be restarted. The instance can be restarted by following the steps below.
Log in to the EOC and select Assets > Host in the left navigation bar.
On the host page,
Restart a Single Host : Select the target host by hovering the mouse over the icon
and then click Restart Instance.Batch Restart Hosts : Select multiple target hosts and click
, then click Restart.
The system will pop up confirmation notification, click OK and the operation will be executed, and the host status will be updated.
Deleting Instance
Note
The data will not be recovered after deleting, so please be careful.
You can delete instances by the following steps.
Log in to the EOC and select Assets > Host in the left navigation bar.
On the host page,
Delete a Single Host : Select the target host by hovering the mouse over the icon
and then click Delete Instance.Batch Delete Hosts : Select multiple target hosts and click
, then click Delete.
The system will pop up confirmation notification, click OK and the operation will be executed, and the host status will be updated.
Changing Instance Type
Note
The offline host does not support modifying the instance specification online, and it needs to be re-imported after the offline changes are completed.
You can change instance type by the following steps.
Log in to the EOC and select Assets > Host in the left navigation bar.
On the host page, select the target host by hovering the mouse over the icon
and then click Change Instance Type.On the change instance type page, complete the specification information change.
Instance Type: Select an instance type that you want to modify.
Comments: Enter the reasons why the type needs to be modified.
Click Submit and generate the ticket. After approval, the instance type will be updated.
Adding Disk
Note
The offline host does not support adding disks online, you need to re-import them after the offline change is completed.
When there is not enough storage space for your instance, you can add disks. Disks can be added by the following steps.
Log in to the EOC and select Assets > Host in the left navigation bar.
On the host page, select the target host by hovering the mouse over the icon
and then click Add Disk.On the add disk page, complete the new disk information.
Disks: Click Add Disk, select the new disk property and enter the capacites and quantities of disks.
Comments: Enter the reason why the new disk is needed.
Click Submit and generate the ticket. After approval, the number of disks is increased.
Expanding Disk
Note
The offline host does not support expanding disks online, you need to re-import them after the offline change is completed.
You can expand the disks if the system disk or data disk has not enough space for use. Disk expansion can be done by the following steps.
Log in to the EOC and select Assets > Host in the left navigation bar.
On the host page, select the target host by hovering the mouse over the icon
and then click Expand Disk.On the expand disks page, select the disk that needs to be expanded.
Click Next to complete the disk specification configuration.
Type: Select the disk type.
Capacity: Enter the disk size. The disk size should between 30 GB and 2000 GB.
Comments: Enter the reason for the disk expansion.
Click Submit and generate the ticket. After approval, the disk is expanded.
Renewaling
Note
The offline host does not support online renewal, and the imported host is long-term by default.
You can manually renew an instance to extend the use of the associated resources at any time before the instance is automatically released. Renewals can be done by the following steps.
Log in to the EOC and select Assets > Host in the left navigation bar.
On the host page, select the target host by hovering the mouse over the icon
and then click Renewal.On the renewal page, complete the renewal information.
Duration: Select the time to be lasted, and it is extended backwards by default according to the current time.
Comments: Enter the reason for renewal.
Click Submit and generate the ticket. After approval, the asset expiration time is extended.