Managing Users
The OU administrator can perform the following management operations for users in the organization.
Add an existing user to the enterprise or organization, or create an account for a new user and add the user to the enterprise or organization.
Batch import users with an Excel file.
Remove an existing user from your enterprise or organization.
Assign a role to a user or remove a user’s role.
Assign an organization structure to a user or remove a user from an organization structure.
Add a user to a user group or remove a user from a user group.
Prerequisites
The OU administrator has created the organization structures, roles, and user groups in the Admin Console.
Add/Import/Remove Users
Add a User
Log in to the Application Portal and go to Admin Console > User.
Click the Add User button and type the user’s email address to search for the user. If an account corresponding to this email address already exists in the system, you can directly select the user and add the user to the enterprise or organization.
If the user account does not exist, you can click Create a user account to create an account.
Edit the account name (mailbox prefix by default) and click Submit. Once submitted, the account cannot be modified.
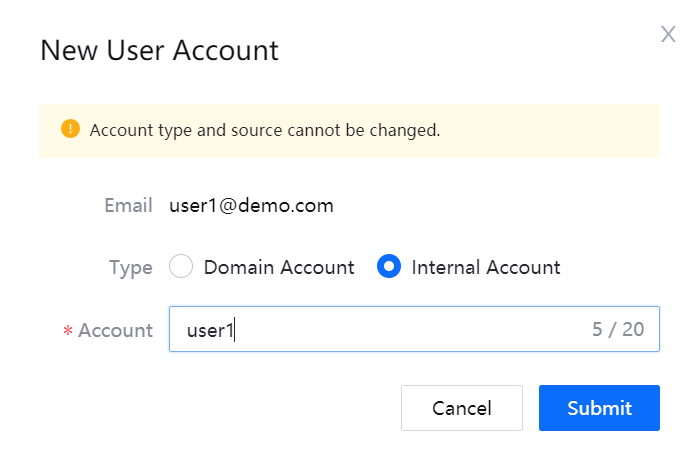
After creating the account, the user will receive a notification email containing a link to set the account password.
Batch Import Users
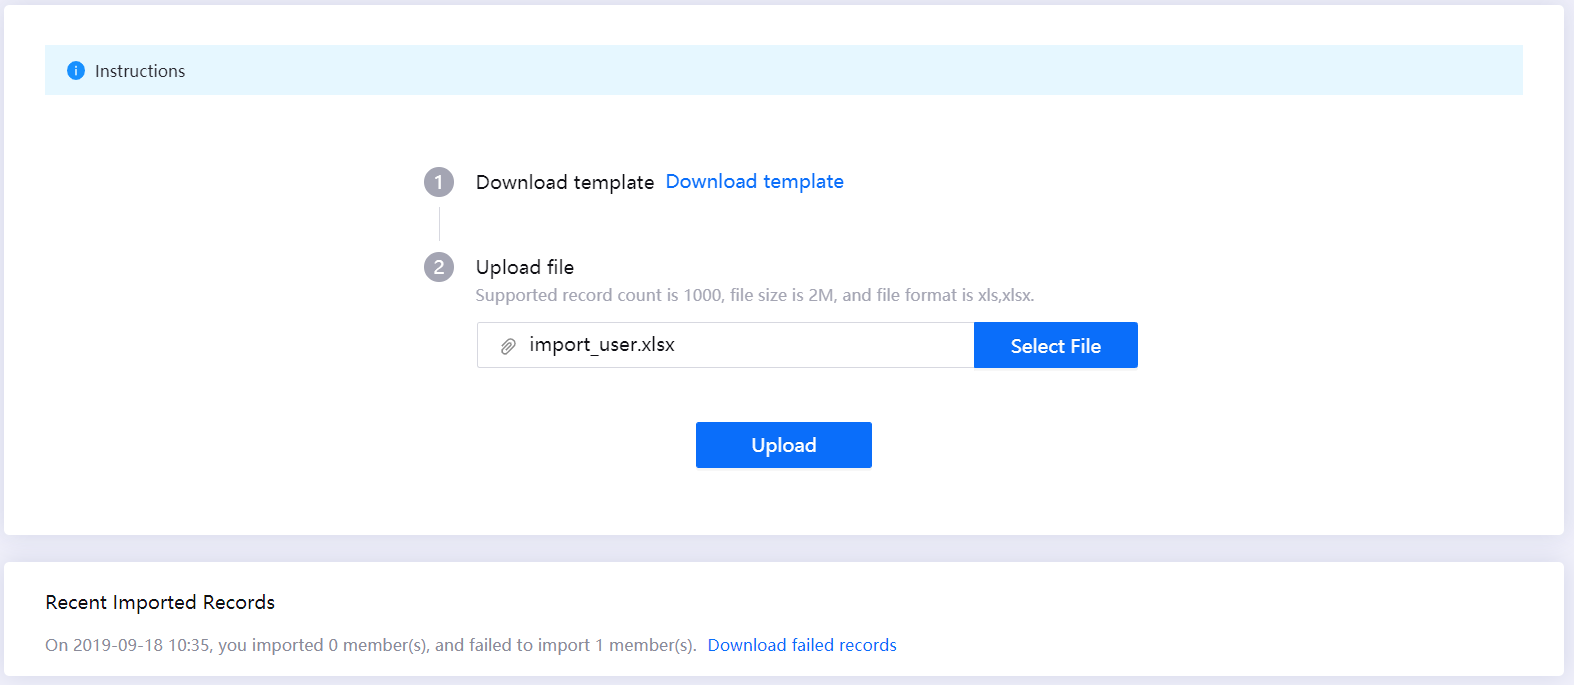
Log in to the Application Portal and go to Admin Console > User. Click the Batch Import button.
Click Download template to download the template and edit the information of users to be imported in batch by following the instructions in the template file.
Upload the edited template file and view the import results. If the import fails, click Download failed records, modify the file, and then upload it again.
Remove a User
Log in to the Application Portal and go to Admin Console > User. In the list of users, find the user to be removed.
Click the Remove from Enterprise/Organization icon
 for the user, and click Confirm.
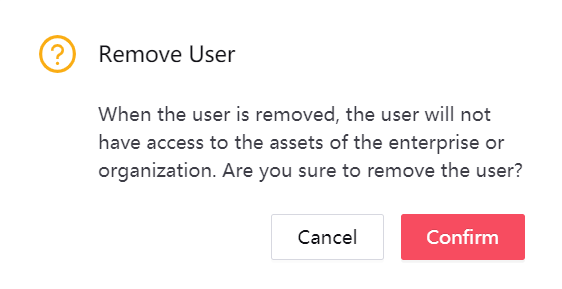
After removing the user, the user will no longer be part of the enterprise or organization.
Manage User Details
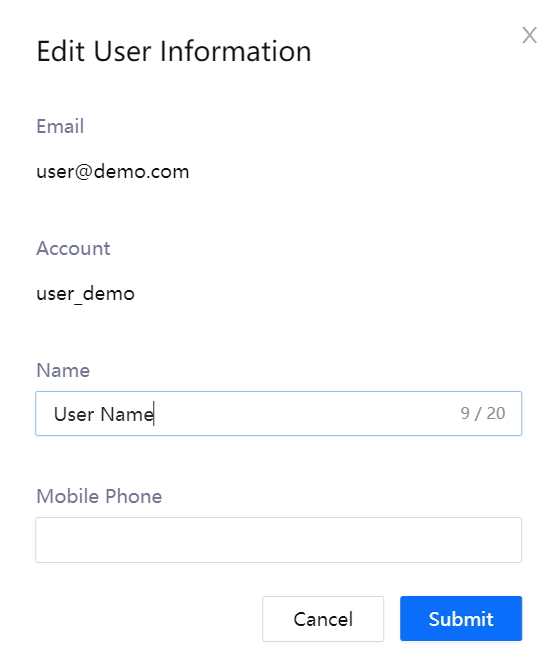
Log in to the Application Portal and go to Admin Console > User. In the list of users, click the Manage icon ![]() of the user.
of the user.
Edit User Information
On the User Details page, click the Edit button to edit the user’s name and phone number.
Click the Submit button.
Reset User Password
On the User Details page, click the Reset Password button and the Confirm to confirm the action
The system will send an email to the user for resetting the password.
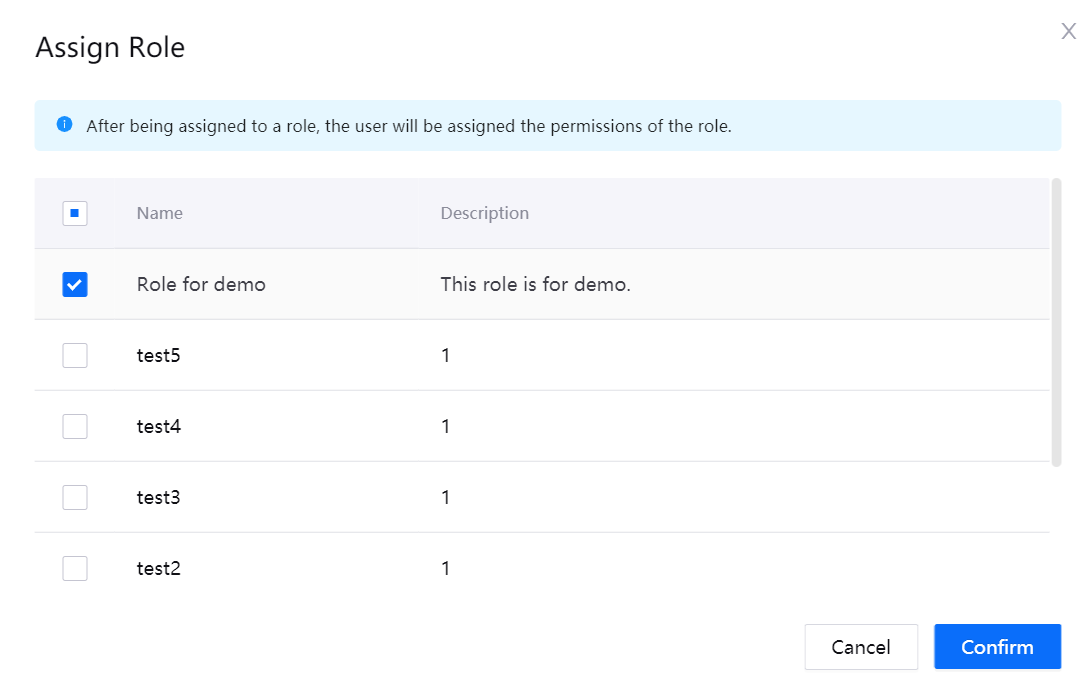
Assign a Role to a User
Click the Assign Role button to select one or more roles to assign to the user, and click Confirm. Once a role is assigned, the permissions corresponding to that role will be granted to the user.
Remove a User’s Role
In the list of assigned roles, find the role to be removed.
Click the Remove Role icon
and click Confirm.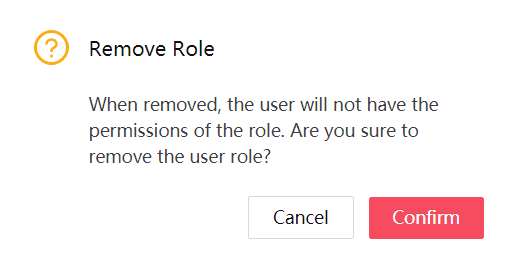
After a role is removed, the user will no longer have the permissions for that role. That role can be reassigned to the user if needed.
Assign Organization Structure to a User
On the User Details page, click the Assign Organization Structure button.
In the pop-up window, select one or more organization structures to assign to the user (if you select a parent node, any subordinate node under it cannot be checked, but the permissions of the subordinate node are granted by default), and click Confirm.
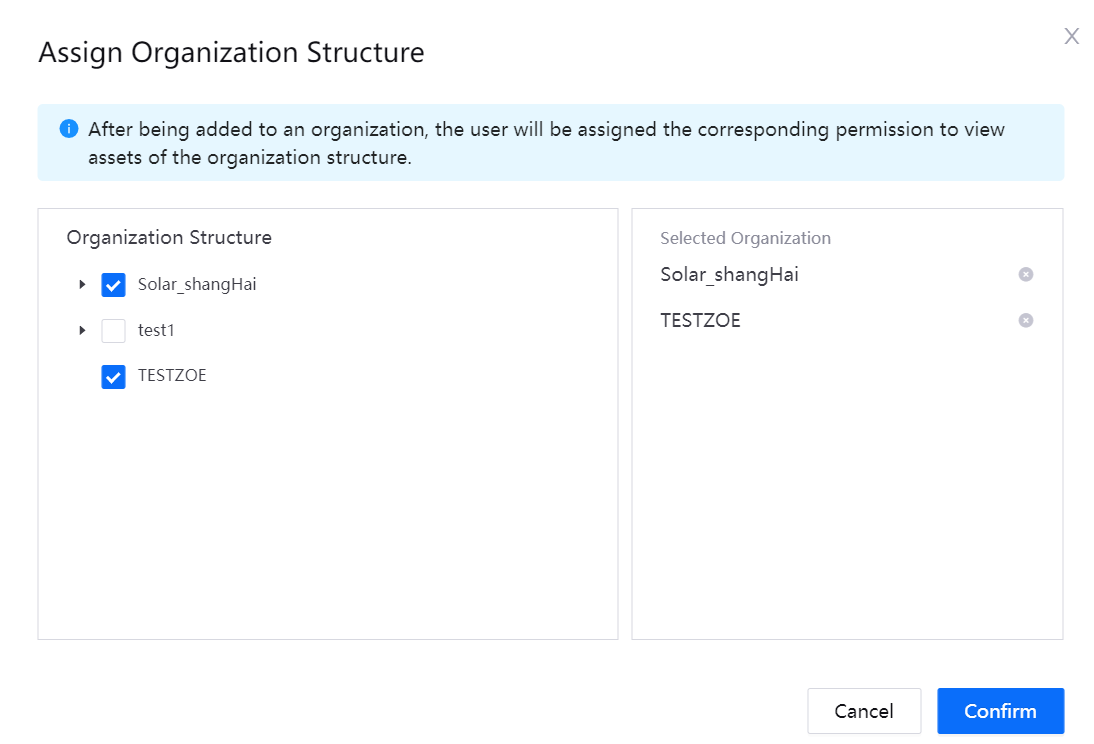
After a user joins an organization structure, the corresponding permissions to view assets in the organization structure are granted to the user.
Remove a User from an Organization Structure
In the list of assigned organization structures, find the target organization structure.
Click the Remove from Enterprise/Organization icon
and click Confirm.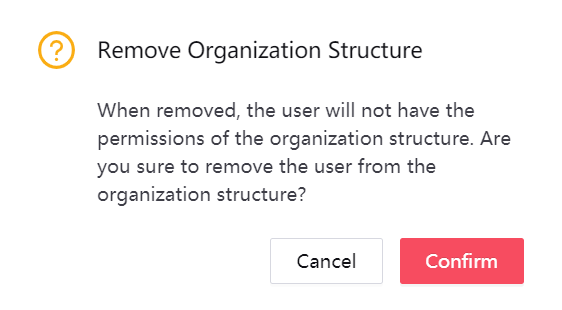
Once removed from the enterprise or organization, users will no longer have the permissions related to the organization structure. That organization structure can be reassigned to the user if needed.
Add a User to a User Group
On the User Details page, click the Assign User Group button.
In the pop-up window, select one or more user groups to add the user to, and click Confirm.
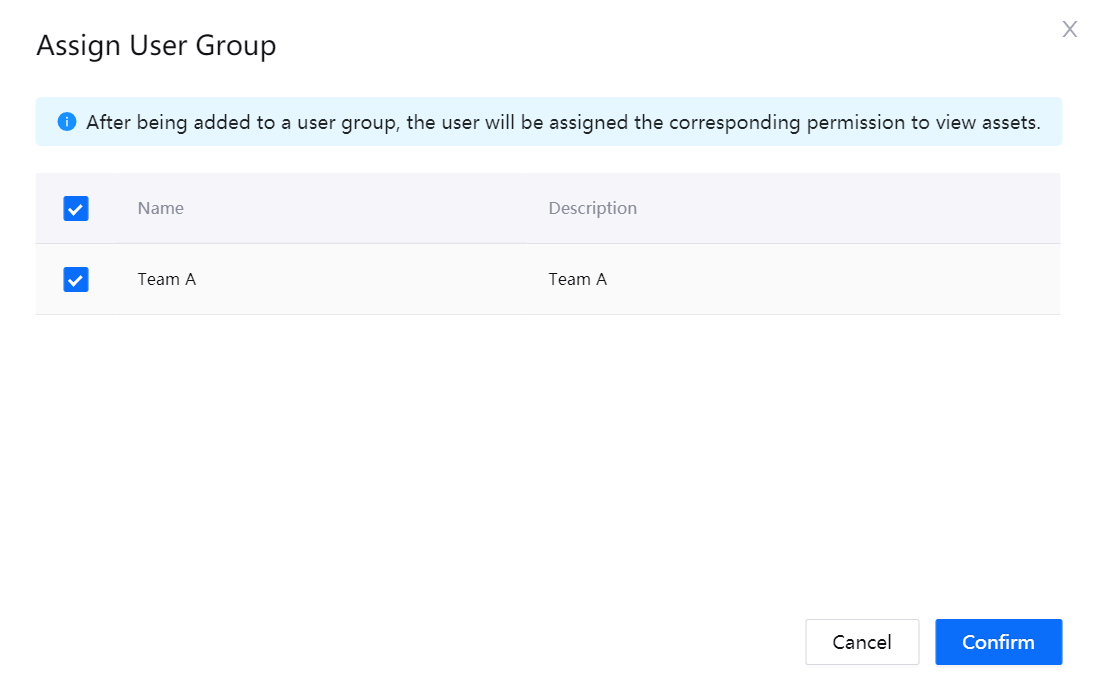
After a user joins a user group, the corresponding permissions to view assets in the user group are also granted.
Remove a User from a User Group
In the list of assigned user groups, find out the user group to be removed.
Click the Remove from User Group icon
and click Confirm.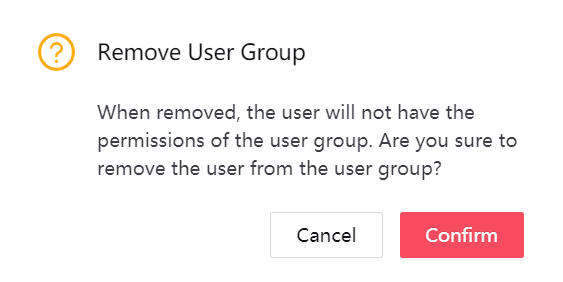
Once removed, the user will no longer have the permissions granted for that user group. The user can be added back to the user group if needed.