Workflow
There are two types of flows in Device Data Integration Service:
Cloud flow: An integration flow that is fully managed in the cloud, from creation, design, publish, all the way to deletion.
Remote flow: An integration flow that is created and can be managed in the cloud, and needs to be exported to be deployed and run on-premise. You can use remote flows to transfer data to the cloud when the data source in the local environment can not be directly accessed the cloud due to data security or network restrictions, etc.
The process below mainly refers to the process for cloud flow.
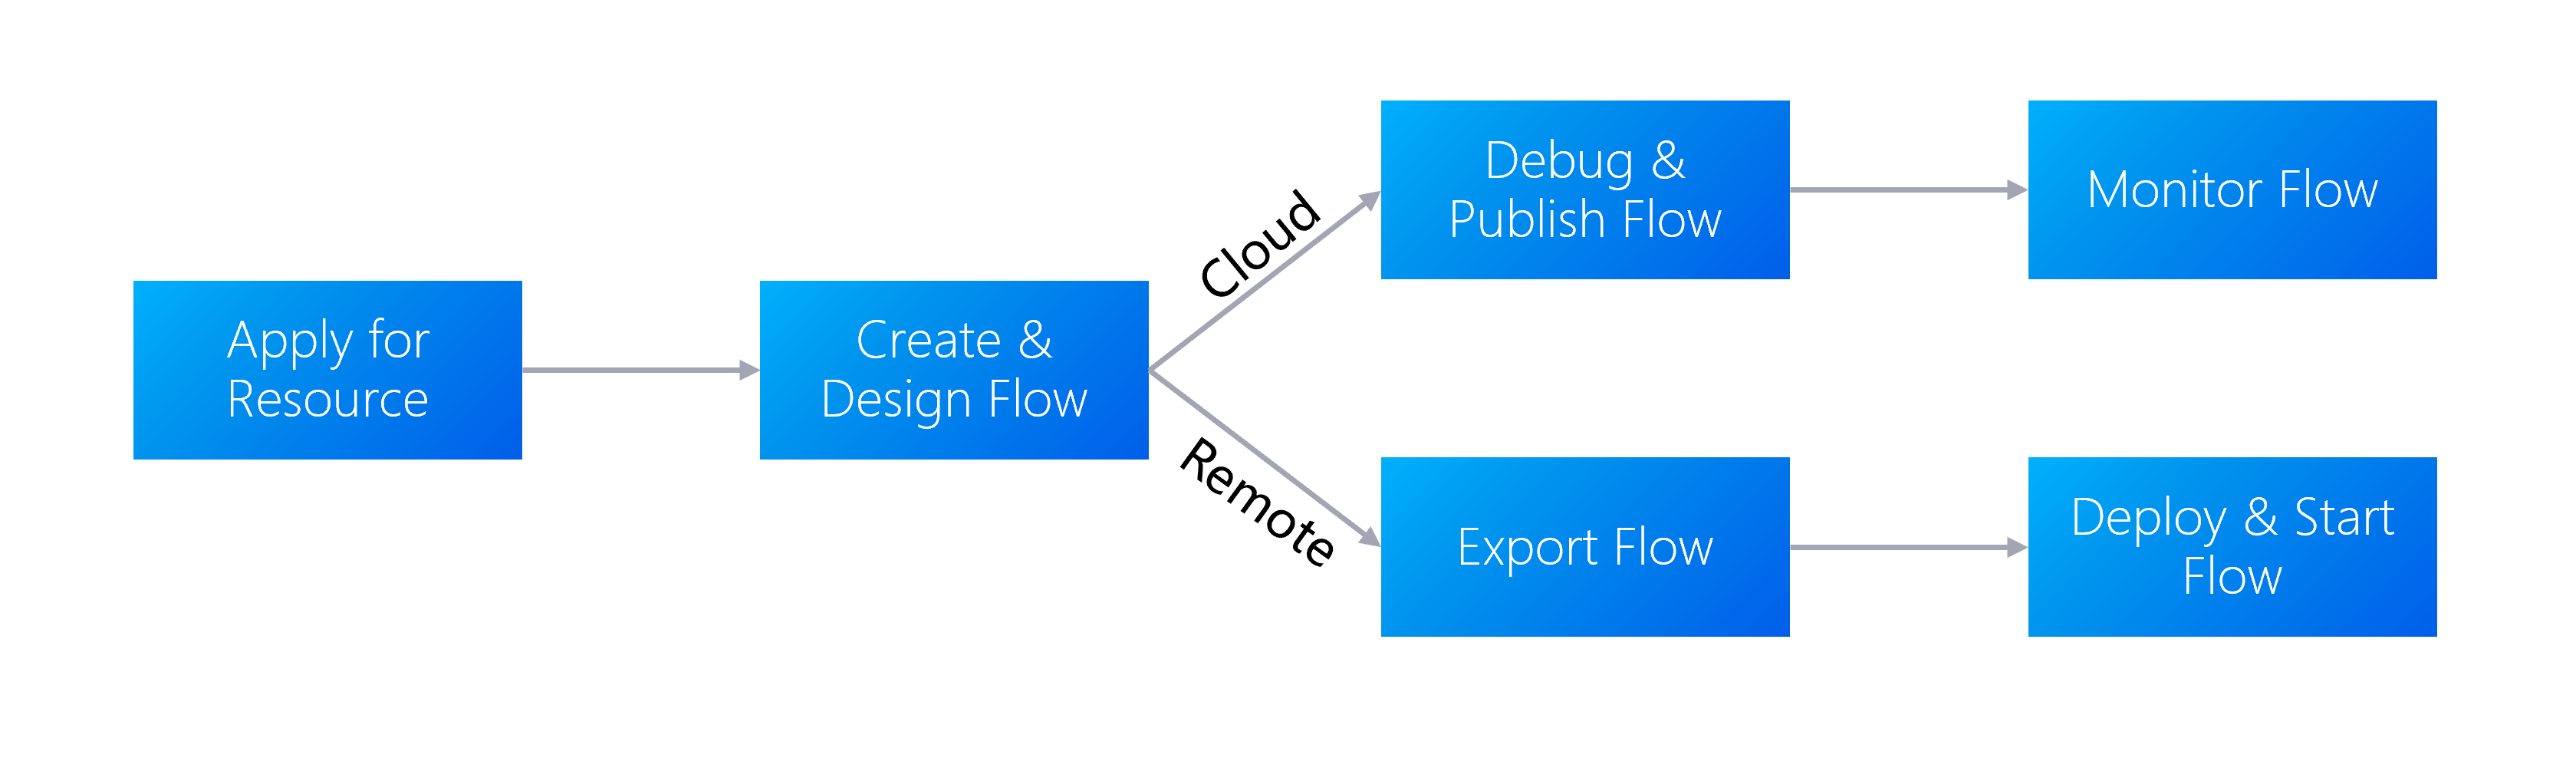
Step 1: Applying for Resource
Before designing and deploying integration flows, ensure that your OU has requested for the Data Integration resources at EnOS Management Console > Resource Management. The resource specification determines the performance of integration flows. For more information about requesting for the Data Integration resources, see Data Integration Resource.
Step 2: Creating and Designing Flow
Flows can be created from scratch or from templates. For more information, see Integration Template and Creating Flows.
After creating a flow, use the Flow Designer to design your flow, where every flow can consist of multiple nodes, which are categorised into the following types.
Subflow
Input
Logic
Action
EnOS
External
Enterprise
System
Custom
For more information about the node types, the nodes under them, and which nodes can be used for which type of flow, see Nodes Overview.
Nodes have entry points and exit points, which you can assemble into a flow by connecting one node’s exit with another’s entry. For complicated or periodic tasks, the Timer or Advanced Task Manager nodes can be used to periodically trigger the flow.
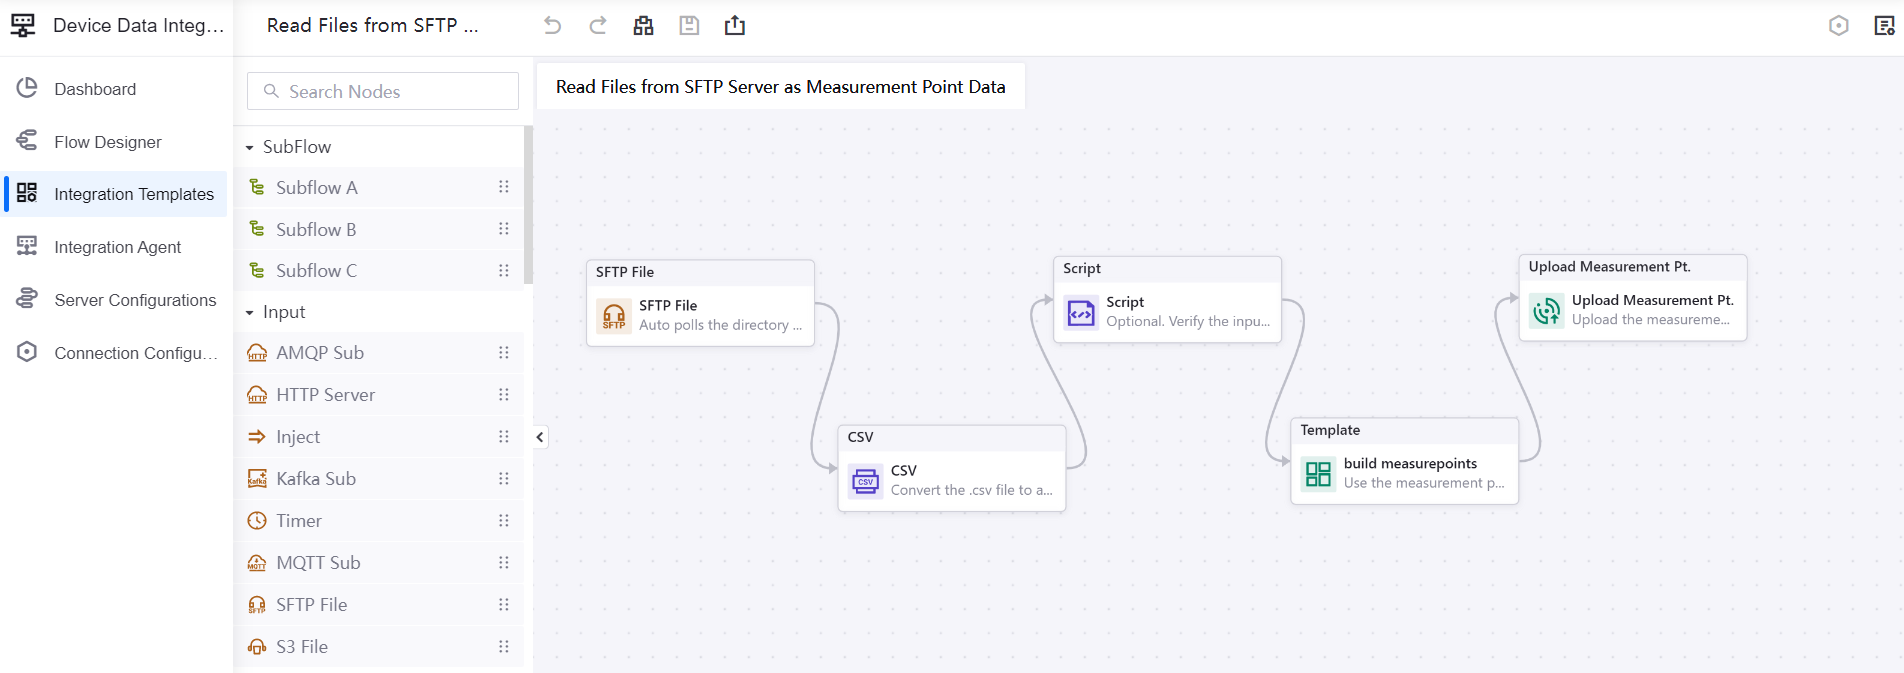
An example of an integration flow is given below. It connects an SFTP server with SFTP File that polls the SFTP server and downloads CSV files of device data, and sends the files to the CSV node, where the CSV files are converted into JSON format. The converted data is then verified and filtered via Script and the measurement points are uploaded and integrated to the corresponding EnOS device measurement points via the Upload Measurement Point node.
Step 3: Debugging and Publishing Flow (Cloud Flow)
There are two ways to debug a flow.
Before it is published: There are some instances where you can debug your flow before it is published to ensure that it can work as intended, such as testing the connectivity of servers via nodes like the MQTT Sub node or via Connection Configurations, and testing whether your written script works using the Script node.
After it is published: The flow begins to run and logs indicating success/failure are provided. Note that the Debug switch needs to be switched on in order for logs to show. For more information, see Viewing Cloud Flow Logs.
Before publishing a flow, you need to allocate the resources that you have applied for it first. For more information, see Publishing Cloud Flows.
Step 4: Monitoring Flow (Cloud Flow)
Monitoring flows enables you to have a better perspective of the health status of your flows, ensuring that the flows are functioning well, preventing downtime and faults. Device Data Integration Service provides several methods to monitor different aspects of the flow.
Dashboard: Enables you to view the resource usage and flow operation status such as the total cloud flows created, total number of runs, etc. to have a better perspective of the overall flow health status. For more information, see Monitoring Cloud Flows.
Alerts: Enables you to configure alerts to promptly notify the operations personnel when situations occur. For more information, see Configuring Cloud Flow Alerts.
Runtime Status: Enables you to monitor a flow’s CPU and memory usage. For more information, see Monitoring Runtime Status.
Step 5: Exporting Flow (Remote Flow)
You can export flows as application launchers that can be used at end stations (remote flows). For more information, see Exporting as an Application Launcher.
Step 6: Deploying Flow On-premise (Remote Flow)
After exporting, you can edit and run the script in the application launcher to start, run, and stop the remote flows. For more information, see Starting and Stopping Remote Flows.