Creating and Uploading Customized Nodes
Other than using the standard nodes provided in the Flow Designer, you can also develop customized nodes from scratch to tailor them to your needs.
To develop and upload a customized node, you need to first create a Maven project, define the parameters, configure a YAML file, then pack the code to a JAR package and compress the JAR and the YAML file to a ZIP file, finally upload the ZIP file. The integration framework used is Camel, and the JAR package needs to follow Camel specifications.
Prerequisites
You need to download JDK and install IDEA and Maven to configure Java environment. JDK version 1.8.0 and Maven version 3.X are recommended.
You need the verification code from the OU Admin’s email or mobile to complete uploading.
Step 1: Create a Maven Project
Create a Maven project from archetype com.enosiot.enos:orch-component-archetype:1.0.1.
If it cannot be found, add the archetype.
GroupId: com.enos-iot.enos
ArtifactId: orch-component-archetype
Version: 1.0.1
Repository: https://git.eniot.io/iotdev/poc/custom-nodev2

Define the project details, such as Name, GroupId, and ArtifactId, etc.

Add the following Maven properties.
Name
Value
Description
name
CustomNode
Used for the automatic generation of component class names.
scheme
custom-node
Camel SPI, used by Camel to discover components based on scheme.
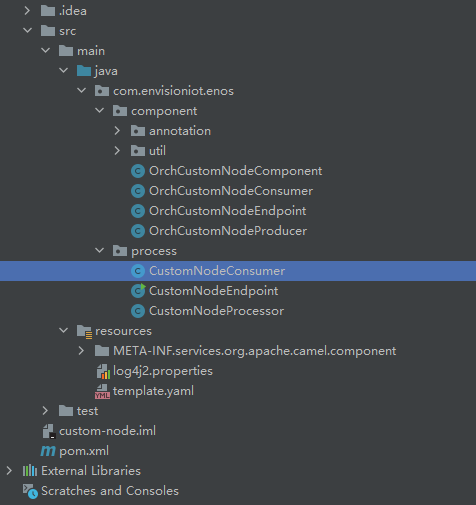
4. When the project is successfully created, the code structure is as per the following.
Step 2: Define the Parameters
Define the parameters of the node and the getter/setter method in the
/process/CustomNodeEndpointclass. The value of the parameters can be dynamically passed in from the front end.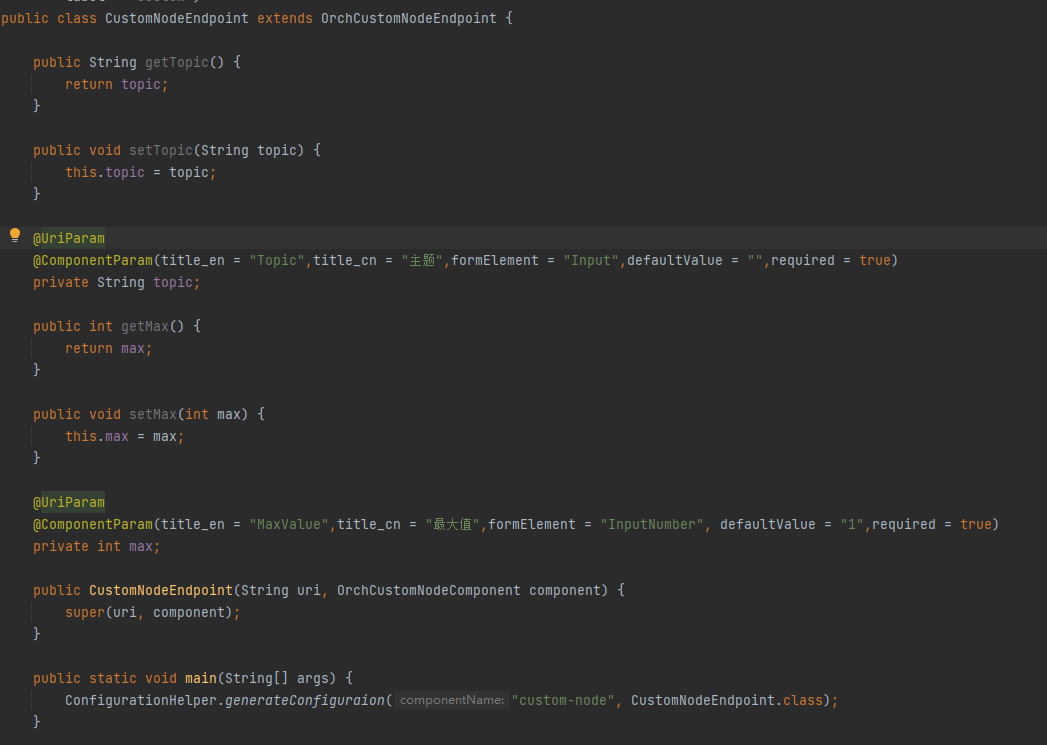
With the above parameters, you will create a customized node with an Input field and an InputNumber field.
Note
You need to add description information to the parameters.
@UriParamdescribes the parameter as the element parameter, and@ComponentParamhelps to create the node UI configuration file.Execute the main function and the
custom-node.yamlfile will be generated in the root directory. The YAML file will be uploaded later. You can also edit the YAML file as required. For more information about element samples, see Custom Nodes.You can add more processing logic as required.
If the node needs to implement data processing operations such as Logic/Action, the processing logic for the node input data is implemented in the
processmethod of the/process/CustomNodeProcessorclass.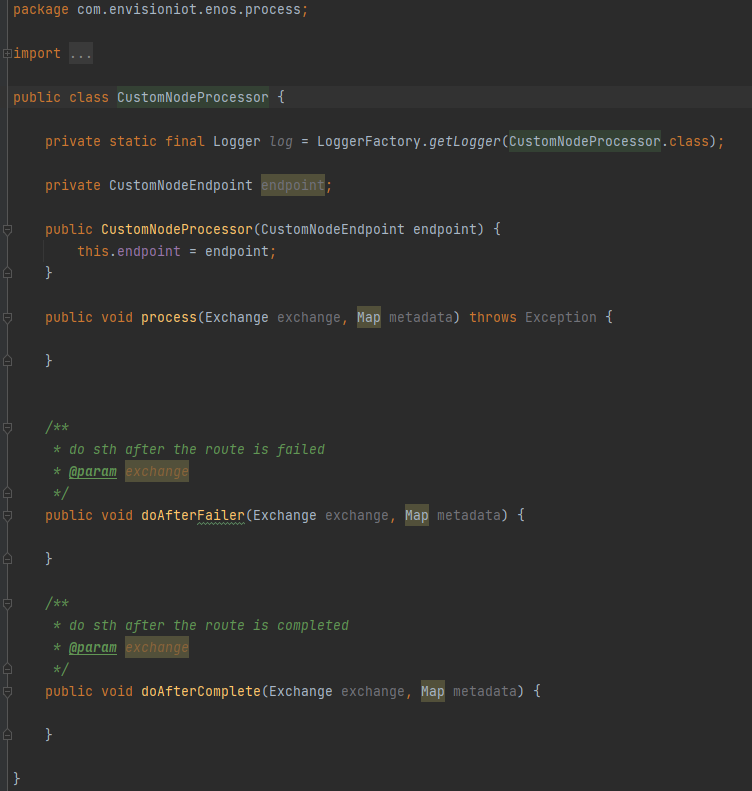
If the node is used as an Input node that is used to trigger a flow, implement the flow triggering logic in the
doStartmethod of the/process/CustomNodeConsumerclass.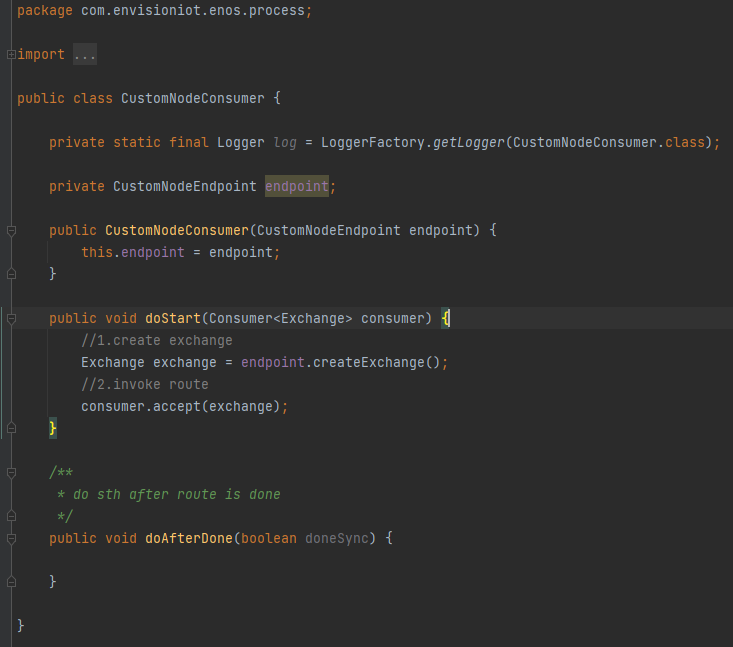
If the node is used to trigger the event after the process is failed or completed, implement the flow triggering logic in the
doAfterFaileranddoAfterCompletemethod of the/process/CustomNodeProcessorclass.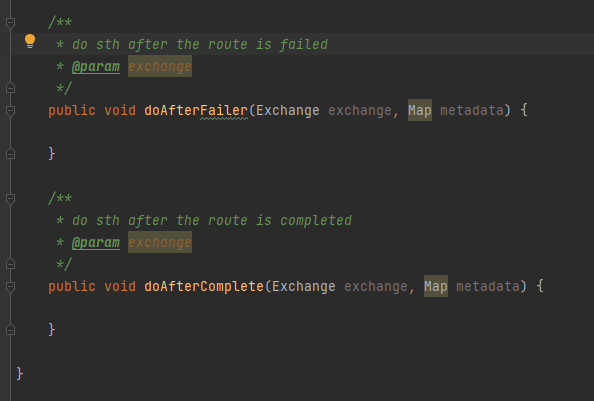
Step 3: Test the Code
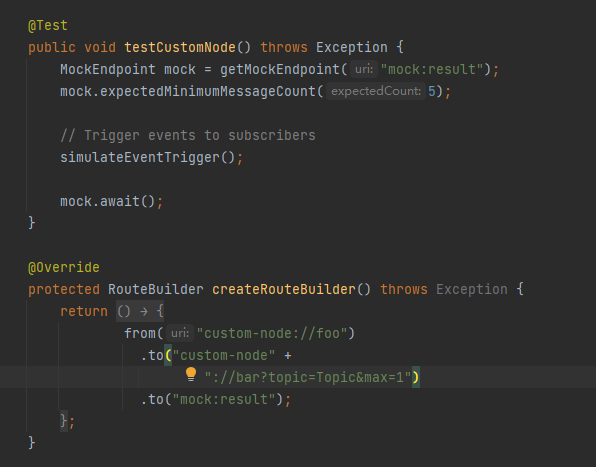
You can test the node by entering the parameter values defined in the /process/CustomNodeEndpoint class in the /test/java/CustomNodeComponentTest class.
<br />
In the above figure, “custom-node” is the scheme customized above. “Bar” is a placeholder, which is optional. After the “?” are the parameters defined in the CustomNodeEndpoint class and their test values. Parameter-value pairs are separated by “&”.
Step 4: Build the fat JAR Package
You need to package the custom node into fat JAR to avoid dependency conflicts between different nodes. Use Maven package to build the packages. If successful, two JAR packages named custom-node-1.0-SNAPSHOT.jar and original-custom-node-1.0-SNAPSHOT.jar will be built in /target/. The former is the fat JAR.
Step 5: Upload the ZIP file
Compress the JAR Package named
custom-node-1.0-SNAPSHOT.jarand thecustom-node.yamlfile into a ZIP file.In the EnOS Management Console, go to Device Data Integration > Flow Designer (cloud/remote flows) or Device Data Integration > Integration Agent (online/offline on-premise remote flows).
Either create a new flow or click on an existing flow to enter the design canvas. For details on how to create a flow, see Creating Flows.
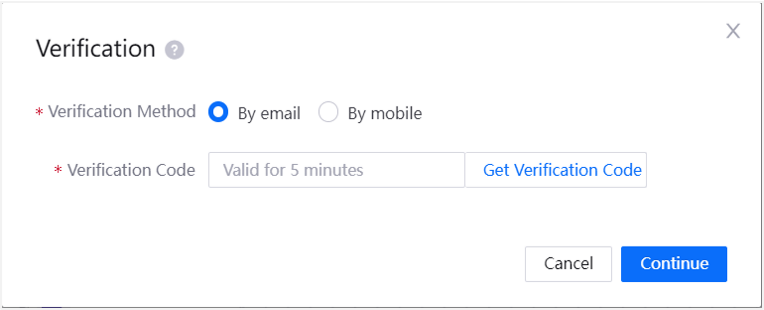
Click Import Node at the top of the canvas. Choose a verification method and click Get Verification Code.
Enter the verification code sent to OU Admin and click Continue. The verification code is valid for 5 minutes.
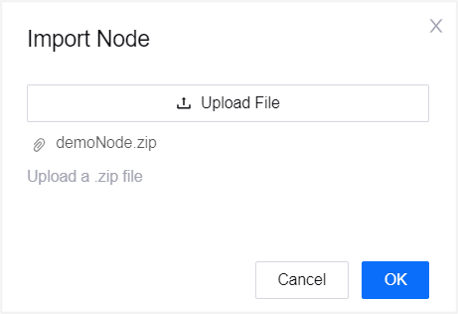
upload the ZIP file, and click OK to create the customized node.
Results
Once successfully uploaded, the node will appear in the list of nodes on the left where you can drag and drop it as per the other standard nodes.