Managing Cloud Flows
After creating and publishing a cloud flow, you can view its basic information, edit it as well as edit its flow design, monitor its runtime status, copy, or delete it.
Prerequisites
Ensure that you have read the limitations for creating flows. See Limitations.
Viewing Flow Information
Log in to the EnOS Management Console and click Device Data Integration > Flow Designer from the left navigation menu.
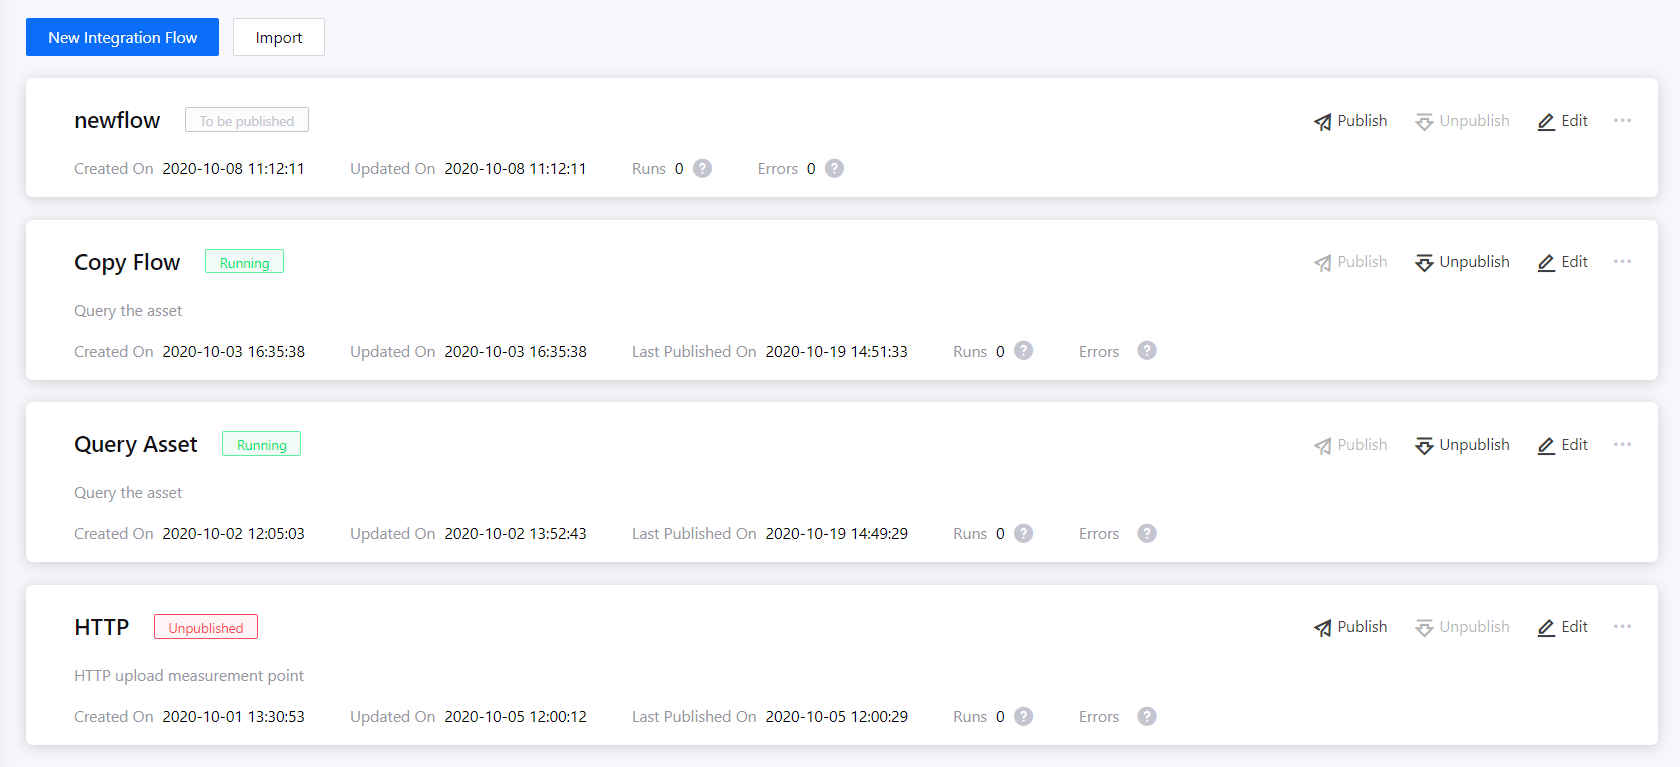
The Flow Designer page lists all the created flows under the OU in rows. Each row represents one flow. You can view the following details for a flow.
Flow name and its current status such as To be published, Running, and Unpublished.
Flow description.
The time the flow is created, updated, and last published.
Number of times the flow is triggered within the last 24 hours.
Number of errors the flow generated within the last 24 hours.
Runtime resource and alert configurations (only after configured or flow is published).
Runtime status (only after flow is published and running).
Monitoring Runtime Status
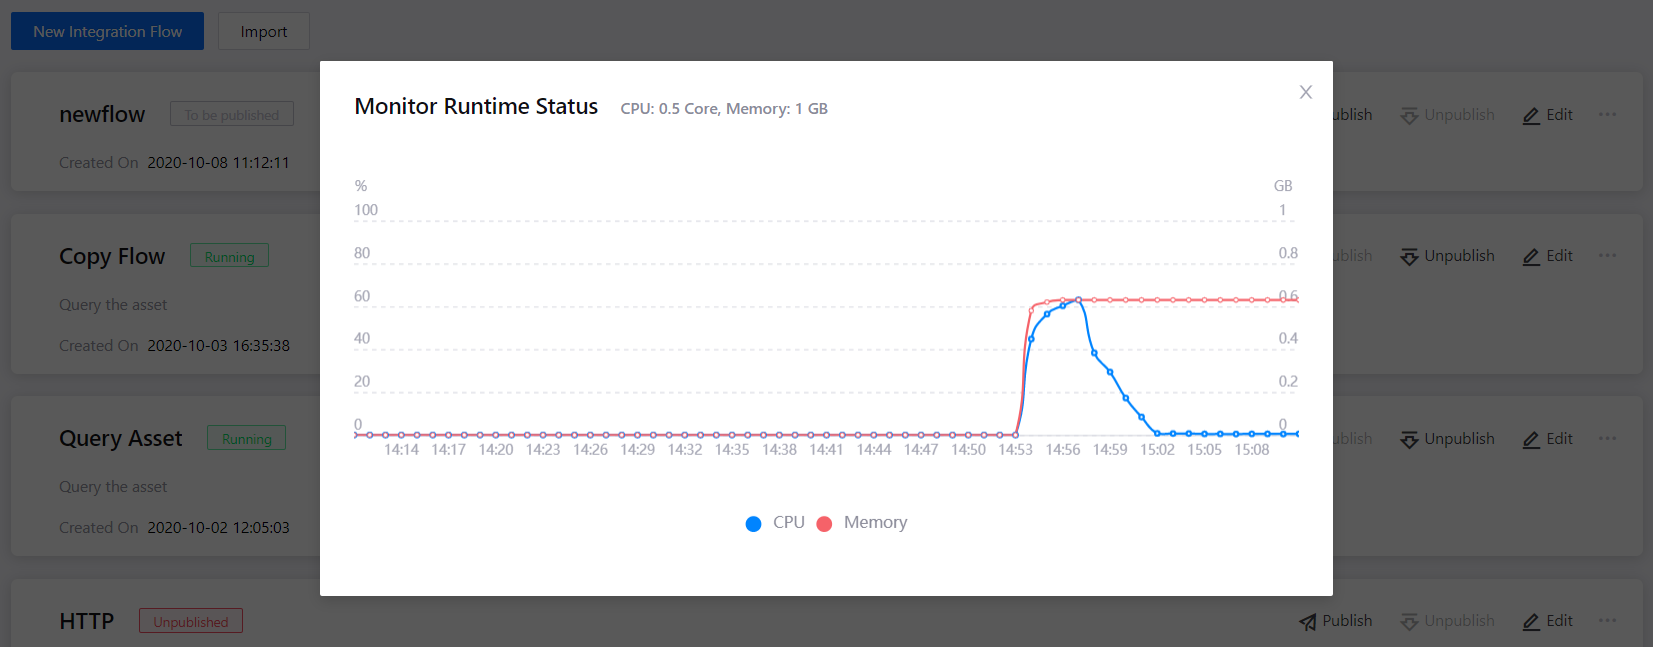
In the list of flows in the Flow Designer page, find the one you wish to view its runtime status and click … > Monitor Status.
A pop-up window will show a graph of the flow’s CPU and memory usage for the past hour.
Editing a Flow
In the list of flows in the Flow Designer page, find the one you wish to edit and click Edit.
You can edit a flow in two ways.
Edit its basic information: Click Settings on the top right of the page to edit its name and description.
Edit its design: You can add or delete nodes, rearrange the flow, and configure the nodes’ settings as per required. It is similar to how you would design a flow during flow creation. For more details, see Design the Flow.
Note
After saving an edited flow that is currently running, you need to publish it again for the change to take effect. If the flow is saved but not published, there will be an icon beside the flow name to indicate that the published version is not the same as the current saved version.

Copying a Flow
Copying a flow lets you easily create a new flow from an existing flow. This is useful if you need to create a new flow that is similar to an existing flow as you can just copy the existing flow and modify the flow instead of creating from scratch.
In the list of flows in the Flow Designer page, find the one you wish to copy and click Edit.
Click Copy at the top of the page and enter a name for it in the pop-up window.
Click OK to copy it and it will appear in the list of flows at the Flow Designer page.
Note
The successfully copied flow is considered as a new flow and needs to be published for it to start running.
Deleting a Flow
You can only delete a flow that is not running (unpublished or to be published).
In the list of flows in the Flow Designer page, find the one you wish to delete and check its status.
Running status: Click Unpublish, wait for it to change status, and proceed to next step.
All other status: Proceed to next step.
Click … > Delete. Data related to the flow will also be deleted if you delete the flow. If you are sure that you wish to delete it, click Delete.