Configuring Templates
After creating a template, you need to configure it so that it can convert device data points to measurement points.
About This Task
This section shows how to configure a template.
Before You Start
Ensure that you have the OU Administrator access. If you do not have the access, contact your OU administrator. For more information, see Policies, Roles, and Permissions.
Ensure that you have created a template.
Editing and Uploading the point.csv Point Table File
Select the template you created and click the Edit icon
 in the Operations column.
At Point File in the Basic Information section, click the Download Template icon
 , select a template, and then click the Download icon
  to download the point.csv file.
Open point.csv and enter the measurement point information in the file.
Field
Description
Measurement Point Name
The name of the collection points from the device.
Point Number
The information indicating the location of the data. EnOS uses this number to map collection points to measurement points.
Value Type
The measurement point data type. See below for details.
Point Type
The point type supported by EnOS.
Coefficient
If you want to convert the data type or unit, you need to perform an operation similar to a(x+b) in the communication protocol, where a is the coefficient. Set this value in this column.
Base Value
If you want to convert the data type or unit, you need to perform an operation similar to a(x+b) in the communication protocol, where b is the base value. Set this value in this column.
Alias
The alias is an attribute of the measurement point. Its default value is the point number.
Different protocols support different types of measurement points. It is usually necessary to configure the following types of measurement points.
byte
short
ushort
integer
uint
string, 1-1024 bytes
float
double
Fill in all the required fields, save the file, and click the Upload icon
 .
.You can click the Edit icon
to edit the point.csv online.
Configuring Point Mapping
Configuring on Console
After uploading the point.csv, you need to map the device collection points and control points to the model measurement points.
Click the Edit icon
of the template to enter the Edit Template page. The list in Points Mapping displays all the measurement points as defined in the model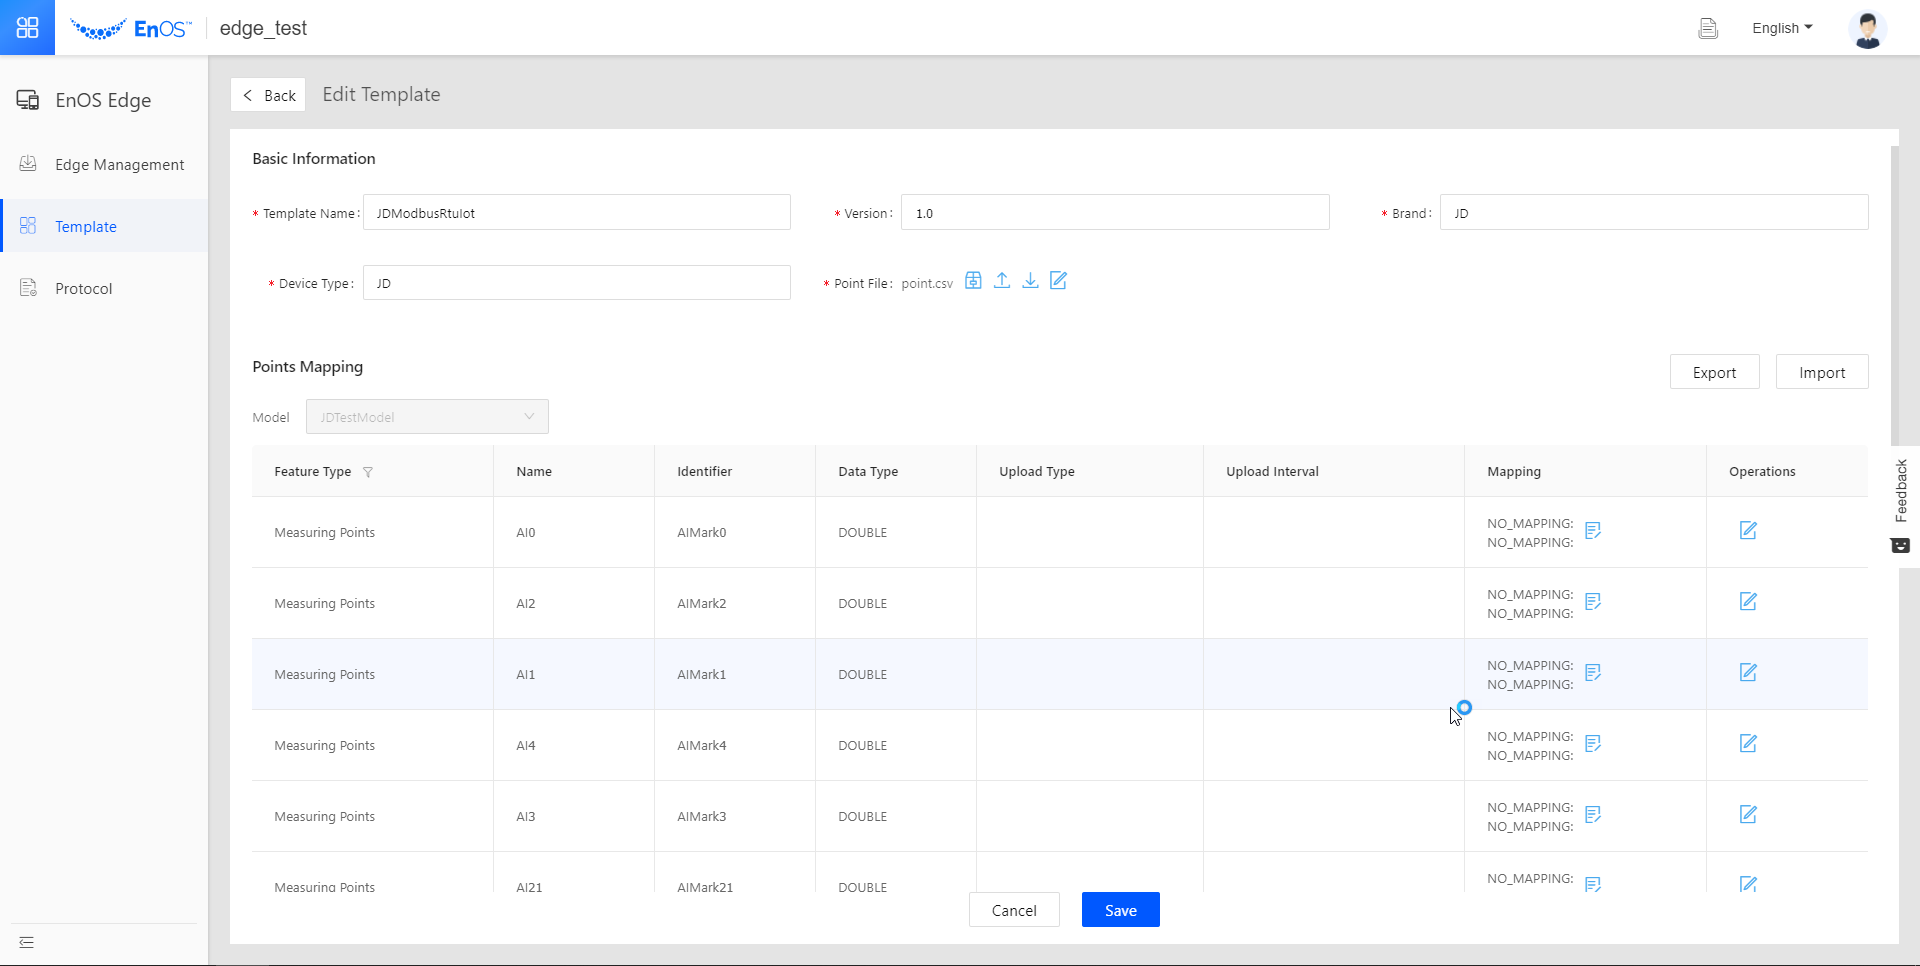
In the Mapping column, click the Mapping Points icon
 to enter the mapping configuration page.
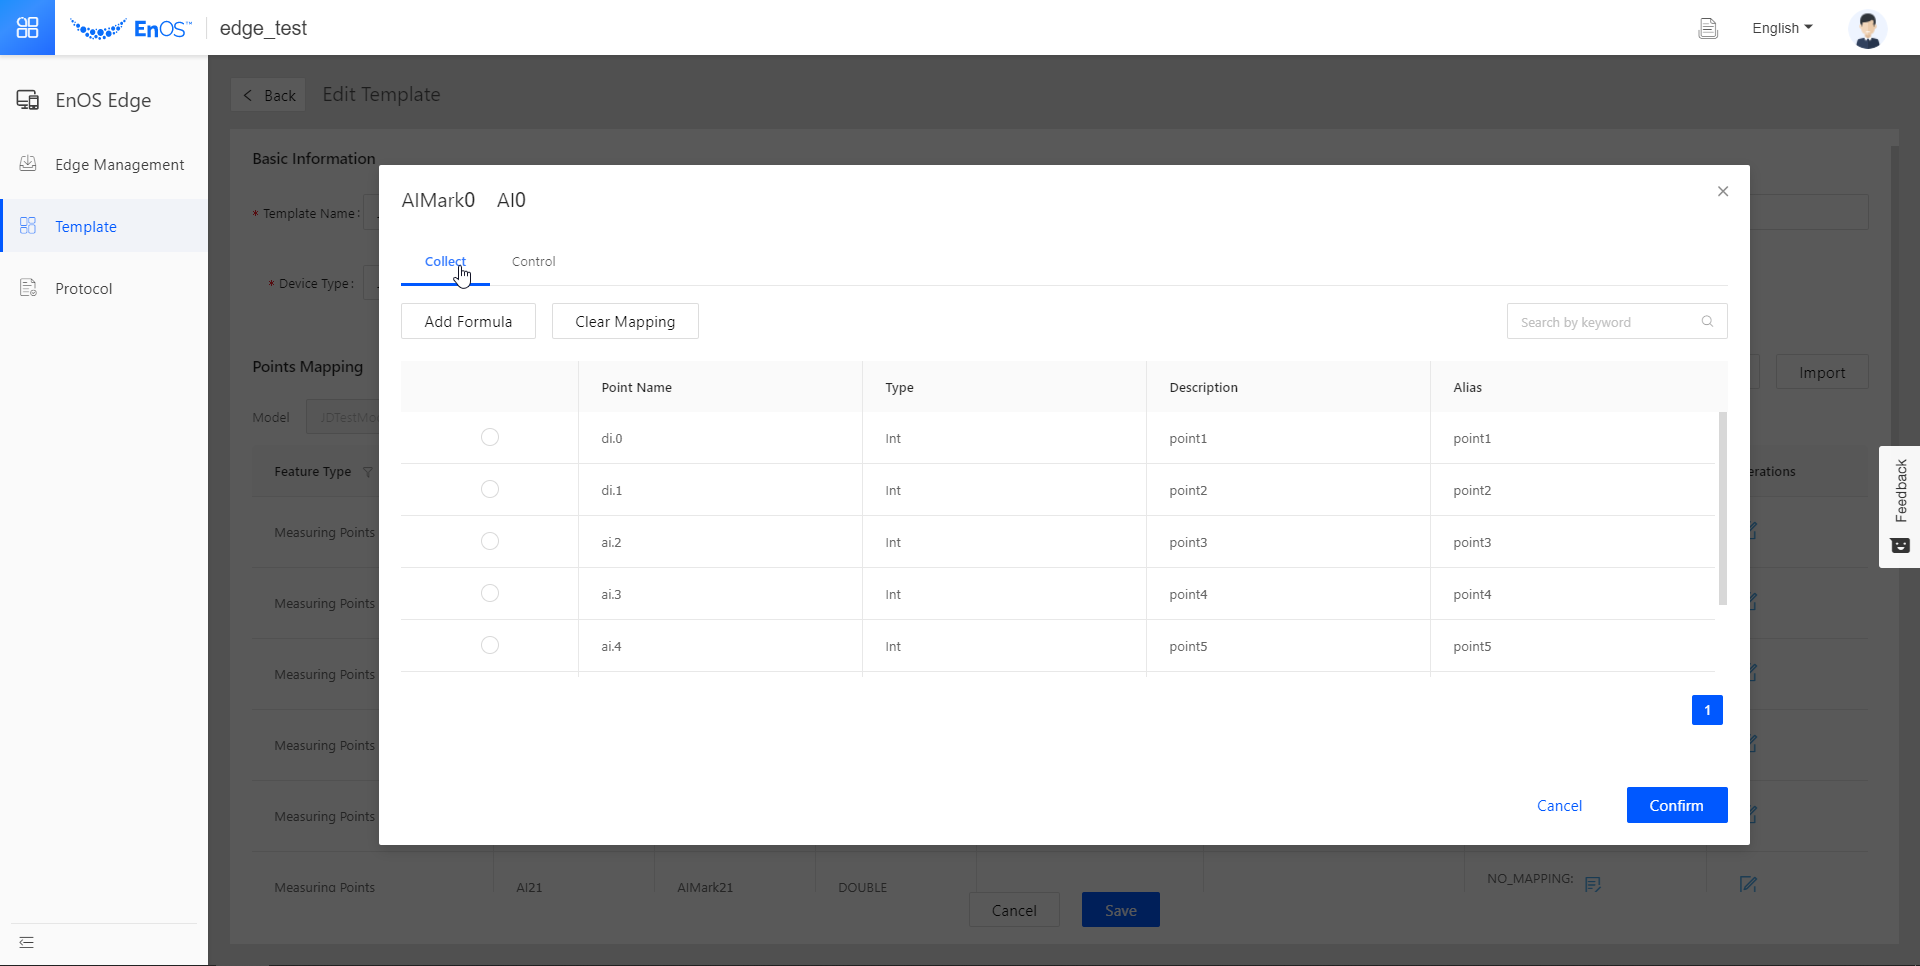
To map a collection point, select one-to-one mapping or formula mapping on the Collect tab. For more information, see Point Mapping Formulas.
For one-to-one mapping, select the collection point or control point you want this measurement point to map to.
For formula mapping, click Add Formula, and select the formula and parameters for the calculation.
If you want to map the control points to the measurement points, go to the Control tab, and select the control point you want this measurement point to map to. You can only use one-to-one mapping for control points.
In the Control tab, the value of AO control point cannot be set but is issued by the application directly whereas you can enter the value of DO control points. The DO default value is the value set by an application.

You can also configure point mapping in batch by exporting and then importing mapping.xlsx. If the mapping is EQUAL, fill in the file with the point number. For other formula mappings, fill in the file with standard formulas as stated in Point Mapping Formulas.
Click the Edit icon
for the targeted point to set its Upload Type. EnOS supports the following uploading types.REALTIME: Once the Edge collects a point, it will send it to the cloud immediately.
TIMER: The Edge sends the collection point value to EnOS at specific time intervals. Set the interval in Upload Interval.
CHANGE: The Edge sends the latest point value to EnOS when the value of the point changes.
Exporting and Importing Templates
Click the Export button at the right of the Point Mapping section to export the point mapping to your local machine.
Edit the exported file on your local machine and click Import and import your edited file into EnOS.
Under Points Mapping, if the Mapping of a point is EQUAL, the point can only be mapped to a data collection or control point. For other mapping formula, see Point Mapping Formulas.
Automatic Mapping
Only EQUAL mapping is supported. Follow the following steps to for automatic mapping.
In the alias column in point.xlsx, fill in the corresponding measurement point IDs.
Upload the point.xlsx and click Auto-mapping.
Setting Device Timestamp
If the protocol supports the resolving of the OEM timestamp, you can choose whether to use OEM timestamp or system timestamp in the Using OEM Timestamp column.
Script Processing
Click the Create button under Script and enter the script details in the pop-up.
You can also click the Export button to download the script template and edit it offline, and then click the Import button to upload the edited script.
For scripting specifications, see Edge Computing
Configuring a Template by Exporting/Importing
In EnOS Edge > Template, select a template in the template list, and click the Export button to download the existing template.
In the downloaded JSON file, modify the values and save it. Click the Import button to upload the modified JSON file.