Managing Organization Structures
Organization structure displays the hierarchical relationships within the OU based on factors such as function or region with nodes as the unit of organization structures.
This article introduces how OU administrators manage organization structures in the Admin Console of EnOS Application Portal.
Creating an Organization Structure
In the left navigation pane of the EnOS Application Portal Admin Console, select Organization Structure.
Select New Organization Structure, enter the name of the organization structure on the popup window and select Submit.
Managing Organization Structure Nodes
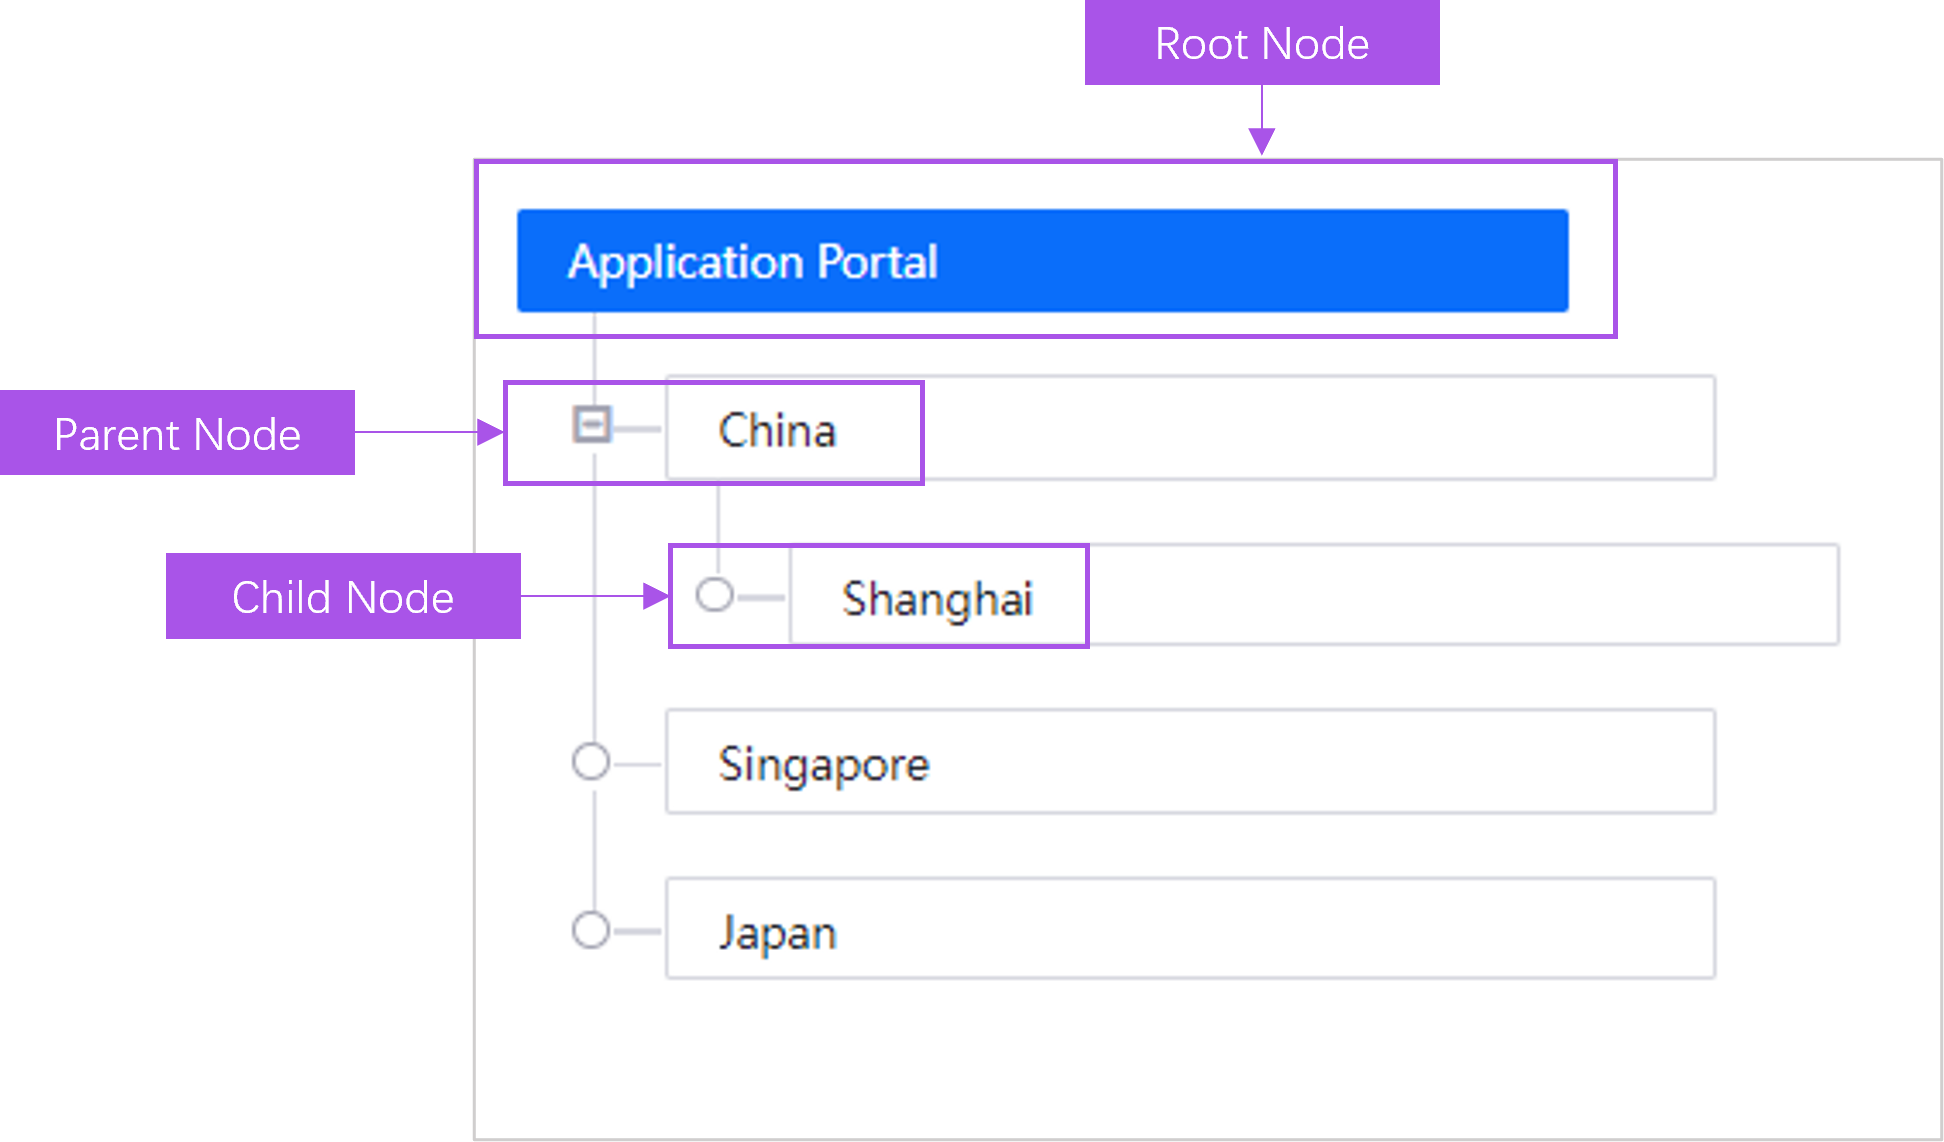
Nodes are the basic units of an organization structure, demonstrating the hierarchical relationships in the organization structure. An organization structure consists of a root node and other nodes that connected to the root node directly or indirectly.
Adding a Node
In the left navigation pane of the EnOS Application Portal Admin Console, select Organization Structure.
Select the Manage
 of the target organization structure from the organization structure list.
Hover over the ellipsis (…) of a node and select Add Child Node.
Enter the node name on the popup window and select Submit.
Note
The node name should be different to the name of the parent node and the nodes under the same parent node.
Sorting the Order of Nodes
The order of organization structure nodes affects the display order of resources or nodes in related applications. Sort the order of nodes under the same parent node by the following steps:
In the left navigation pane of the EnOS Application Portal Admin Console, select Organization Structure.
Select the Manage
of the target organization structure from the organization structure list.Select Sort Order.
Drag the tag of organization structure nodes to sort the order of the nodes under the same parent node on the popup window.
Select Submit.
Assigning Resources to Nodes
In the left navigation pane of the EnOS Application Portal Admin Console, select Organization Structure.
Select the Manage
of the target organization structure from the organization structure list.Hover over the ellipsis (…) of a node and select Manage Resource.
In the popup window, select Add Resource.
Select the target resources on the left and select Submit.
Note
A resource can only be assigned to one node in an organization structure.
After assigning resources to an organization structure node, you can assign the organization node to OU users, so that the users can get access to the information of the resources via applications. For more information on assigning organization structure nodes to OU users, see Assigning Organization Structure Nodes to a User.
Associating Resources
Associate resources by the following steps to give a node the specified business meaning:
In the left navigation pane of the EnOS Application Portal Admin Console, select Organization Structure.
Select the Manage
of the target organization structure from the organization structure list.Hover over the ellipsis (…) of a node and select Associate Resource.
Select the resource to associate and select Submit in the popup window.
Adding a Tag
When developing applications, developers can acquire the information of organization structure nodes by the tags on the nodes. Add tags to an organization structure nodes by the following steps:
In the left navigation pane of the EnOS Application Portal Admin Console, select Organization Structure.
Select the Manage
of the target organization structure from the organization structure list.Hover over the ellipsis (…) of a node and select Add Tag.
Enter the key and value of the new tag on the popup window and select OK.
You can view the tags of an organization structure node on the Tag tab of the right panel.
Renaming a Node
In the left navigation pane of the EnOS Application Portal Admin Console, select Organization Structure.
Select the Manage
of the target organization structure from the organization structure list.Hover over the ellipsis (…) of a node and select Rename.
Enter the new name of the node on the popup window and select OK.
Deleting a Node
In the left navigation pane of the EnOS Application Portal Admin Console, select Organization Structure.
Select the Manage
of the target organization structure from the organization structure list.Hover over the ellipsis (…) of a node and select Delete.
Select OK on the popup window.
Deleting an Organization Structure
In the left navigation pane of the EnOS Application Portal Admin Console, select Organization Structure.
Select the Delete
 of the target organization structure from the organization structure list.
Select OK on the popup window.