Publishing Cloud Flows
You need to publish a cloud flow before it can run. When you publish a flow, you need to allocate resources for it. This section shows how to allocate resources and publish a cloud flow.
Prerequisites
Ensure that you have read the limitations for publishing flows. See Limitations.
Allocating Runtime Resource
Log in to EnOS Application Portal > Developer Console and click Device Data Integration > Flow Designer from the left navigation menu.
There are two ways to publish a flow. In the list of cloud flows, find the one you wish to run and click Publish, or click Edit to enter its canvas page and click Publish located at the top.
If you don’t have enough resources, the Publish link will be grayed out. Contact the system administrator to request for more resources.
You need to allocate the runtime resource needed for each flow that you publish, after which the configuration will be the default publish runtime resource for that particular flow unless you change it. For more information on changing the runtime resource, refer to Editing Runtime Resource.
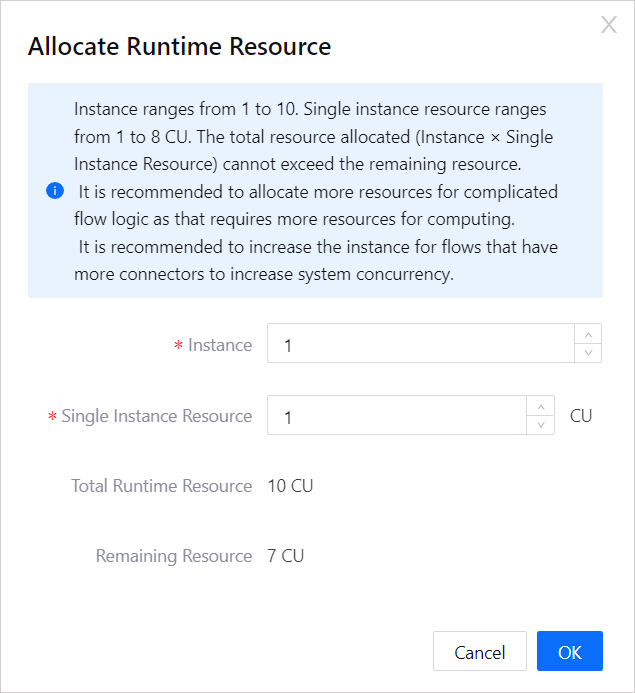
Instance: It is recommended to have a larger instance number for flows that have more connectors to increase system concurrency. The maximum number of instances for one flow is 10.
Single Instance Resource: Represents the computing resources consumed by each instance in CU. It is recommended to allocate more resources for flows with complicated logic as that requires more resources for computing. The maximum computing resource for a single instance is 8 CU.
Total Runtime Resource: The total amount of Data Integration resource applied for your OU.
Remaining Resource: The remaining resources you can use for your flow.
The total resources used for each flow is calculated by Instance x Single Instance Resource. For example, if you allocate 2 for Instance and 1 for Single Instance Resource, the total resources used for the flow would be 2 * 1 = 2 CU.
Click OK to publish and run the cloud flow. To unpublish the flow, click Unpublish.
When allocating resource for the flow that processes messages from MQTT servers, it is recommended to consider the resource allocation for MQTT server. For more information, see Allocating Resource for Server.
Editing Runtime Resource
After publishing, you can edit runtime resource as per required if the flow runtime status is not as expected. To monitor each message runtime, you can view the flow log and node log. For more information, see Flow Logs.
Find your flow from the list of cloud flows in the Flow Designer page and click its … > Allocate Resource.
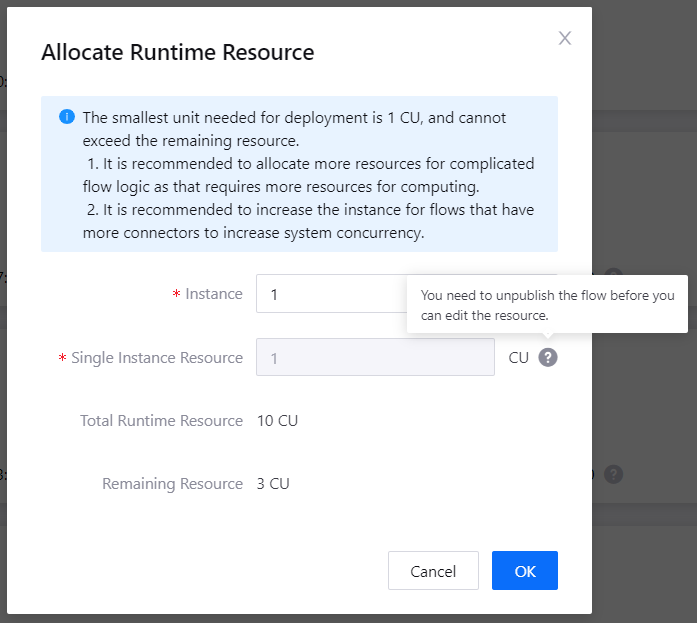
You can edit the configured runtime resource for your flow according to the two scenarios below.
Unpublished Flow: You can edit both the Instance and Single Instance Resource numbers. Once done, click OK.
Running Flow: You can only edit the Instance. If you wish to edit the Single Instance Resource as well, you need to unpublish the flow first. Once done, click OK.
Click Publish to publish and run the flow.
Results
It takes a few minutes for the flow to start running. When it does, the flow status on the Flow Designer page will show as Running. The number of runs triggered and errors generated for the past 24 hours, if any, will also be updated.

For flows that have the Debug switch toggled on, you can click Edit to view the running logs of the flow or the individual nodes.
Flow log: Click Log at the top of the canvas page to view the overall flow log.
Individual node log: Click the node you wish to view the log of and click its Log tab.
For more information on logs, see Viewing Cloud Flow Logs.
Cloud Flow Status
The types of statuses that a cloud flow can have are as per the below.
Status |
Description |
|---|---|
To be published |
The status when a flow is first created. |
Publishing |
The status shown when you click Publish. |
Running |
The status when a flow is successfully published and starts running. |
Publish Failed |
The status when a flow could not be published due to missing nodes or problems with the configurations of nodes in the flow. |
Unpublished |
The status when a flow is unpublished. |
Abnormal |
The status when a flow is running abnormally, such as encountering downtimes for more than 5 times in an hour. |
When the flow status shows Publish Failed, you can check the failure log displayed next to the name of the flow, except the failure reasons that are not within Device Data Integration Service. If the flow is failure with no log, please contact the OU administrator.