Managing Asset Trees
This section introduces asset tree management operations, including editing asset trees and asset information, moving or deleting sub-nodes, and deleting asset trees.
Prerequisites
Ensure that you have obtained the Developer role to have the access to Application Portal > Developer Console. If not, contact your OU administrator.
Editing Asset Information
Log in to EnOS Application Portal > Developer Console, and select an asset tree from the top of the Asset Tree page.
Click the root node, and in the Basic Information tab on the right, select the corresponding Edit
 icon to edit the name and tags of the asset tree.
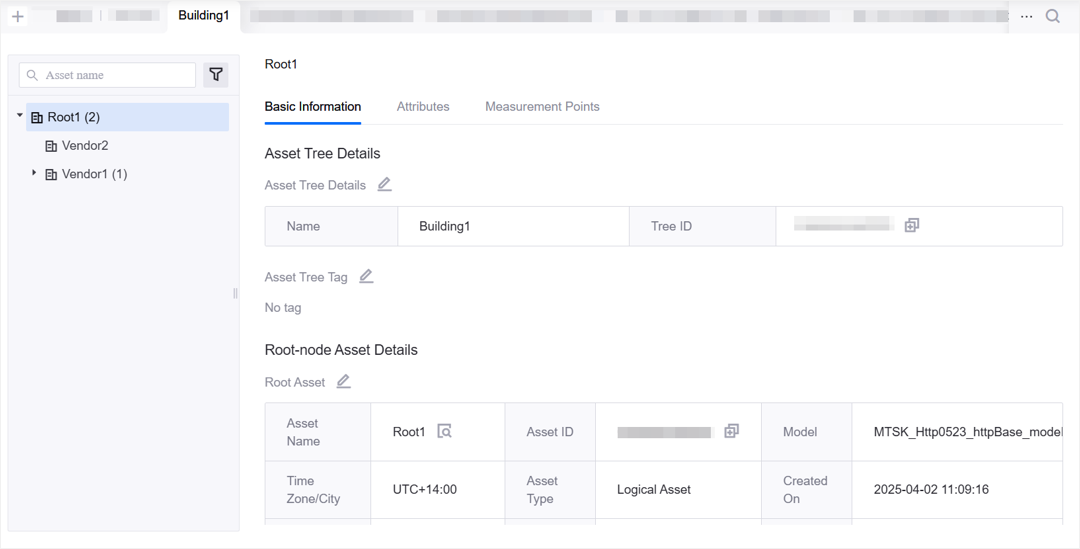
Editing an Asset
Log in to EnOS Application Portal > Developer Console, and select an asset tree from the top of the Asset Tree page.
Click the node you want to edit, and in the Summary Information tab on the right, select the corresponding Edit icon
to edit the asset’s basic information, including name, time zone/city, description, and tags.In the Attributes tab, you can edit the attribute values of the asset.
In the Measurement Points tab, you can view the measurement point values of the asset.
In the Commands tab, you can query the commands issued from the cloud to the asset or cancel commands.
Moving a Sub-Node
Log in to EnOS Application Portal > Developer Console, and select an asset tree from the top of the Asset Tree page.
Drag and drop the sub-node to move it. If the number of levels between the new target node and the root node (inclusive) exceeds 7 (with the root node as the first level), the node cannot be moved. When moving a node, its sub-nodes will also be moved to the new position.
Moving the root node is not supported.
Deleting a Sub-Node
Log in to EnOS Application Portal > Developer Console, and select an asset tree from the top of the Asset Tree page.
In the asset tree, click the - next to the asset to delete the sub-node. If the sub-node has child nodes, you need to check Delete all the sub-nodes under this node, then click Confirm to delete the sub-node.
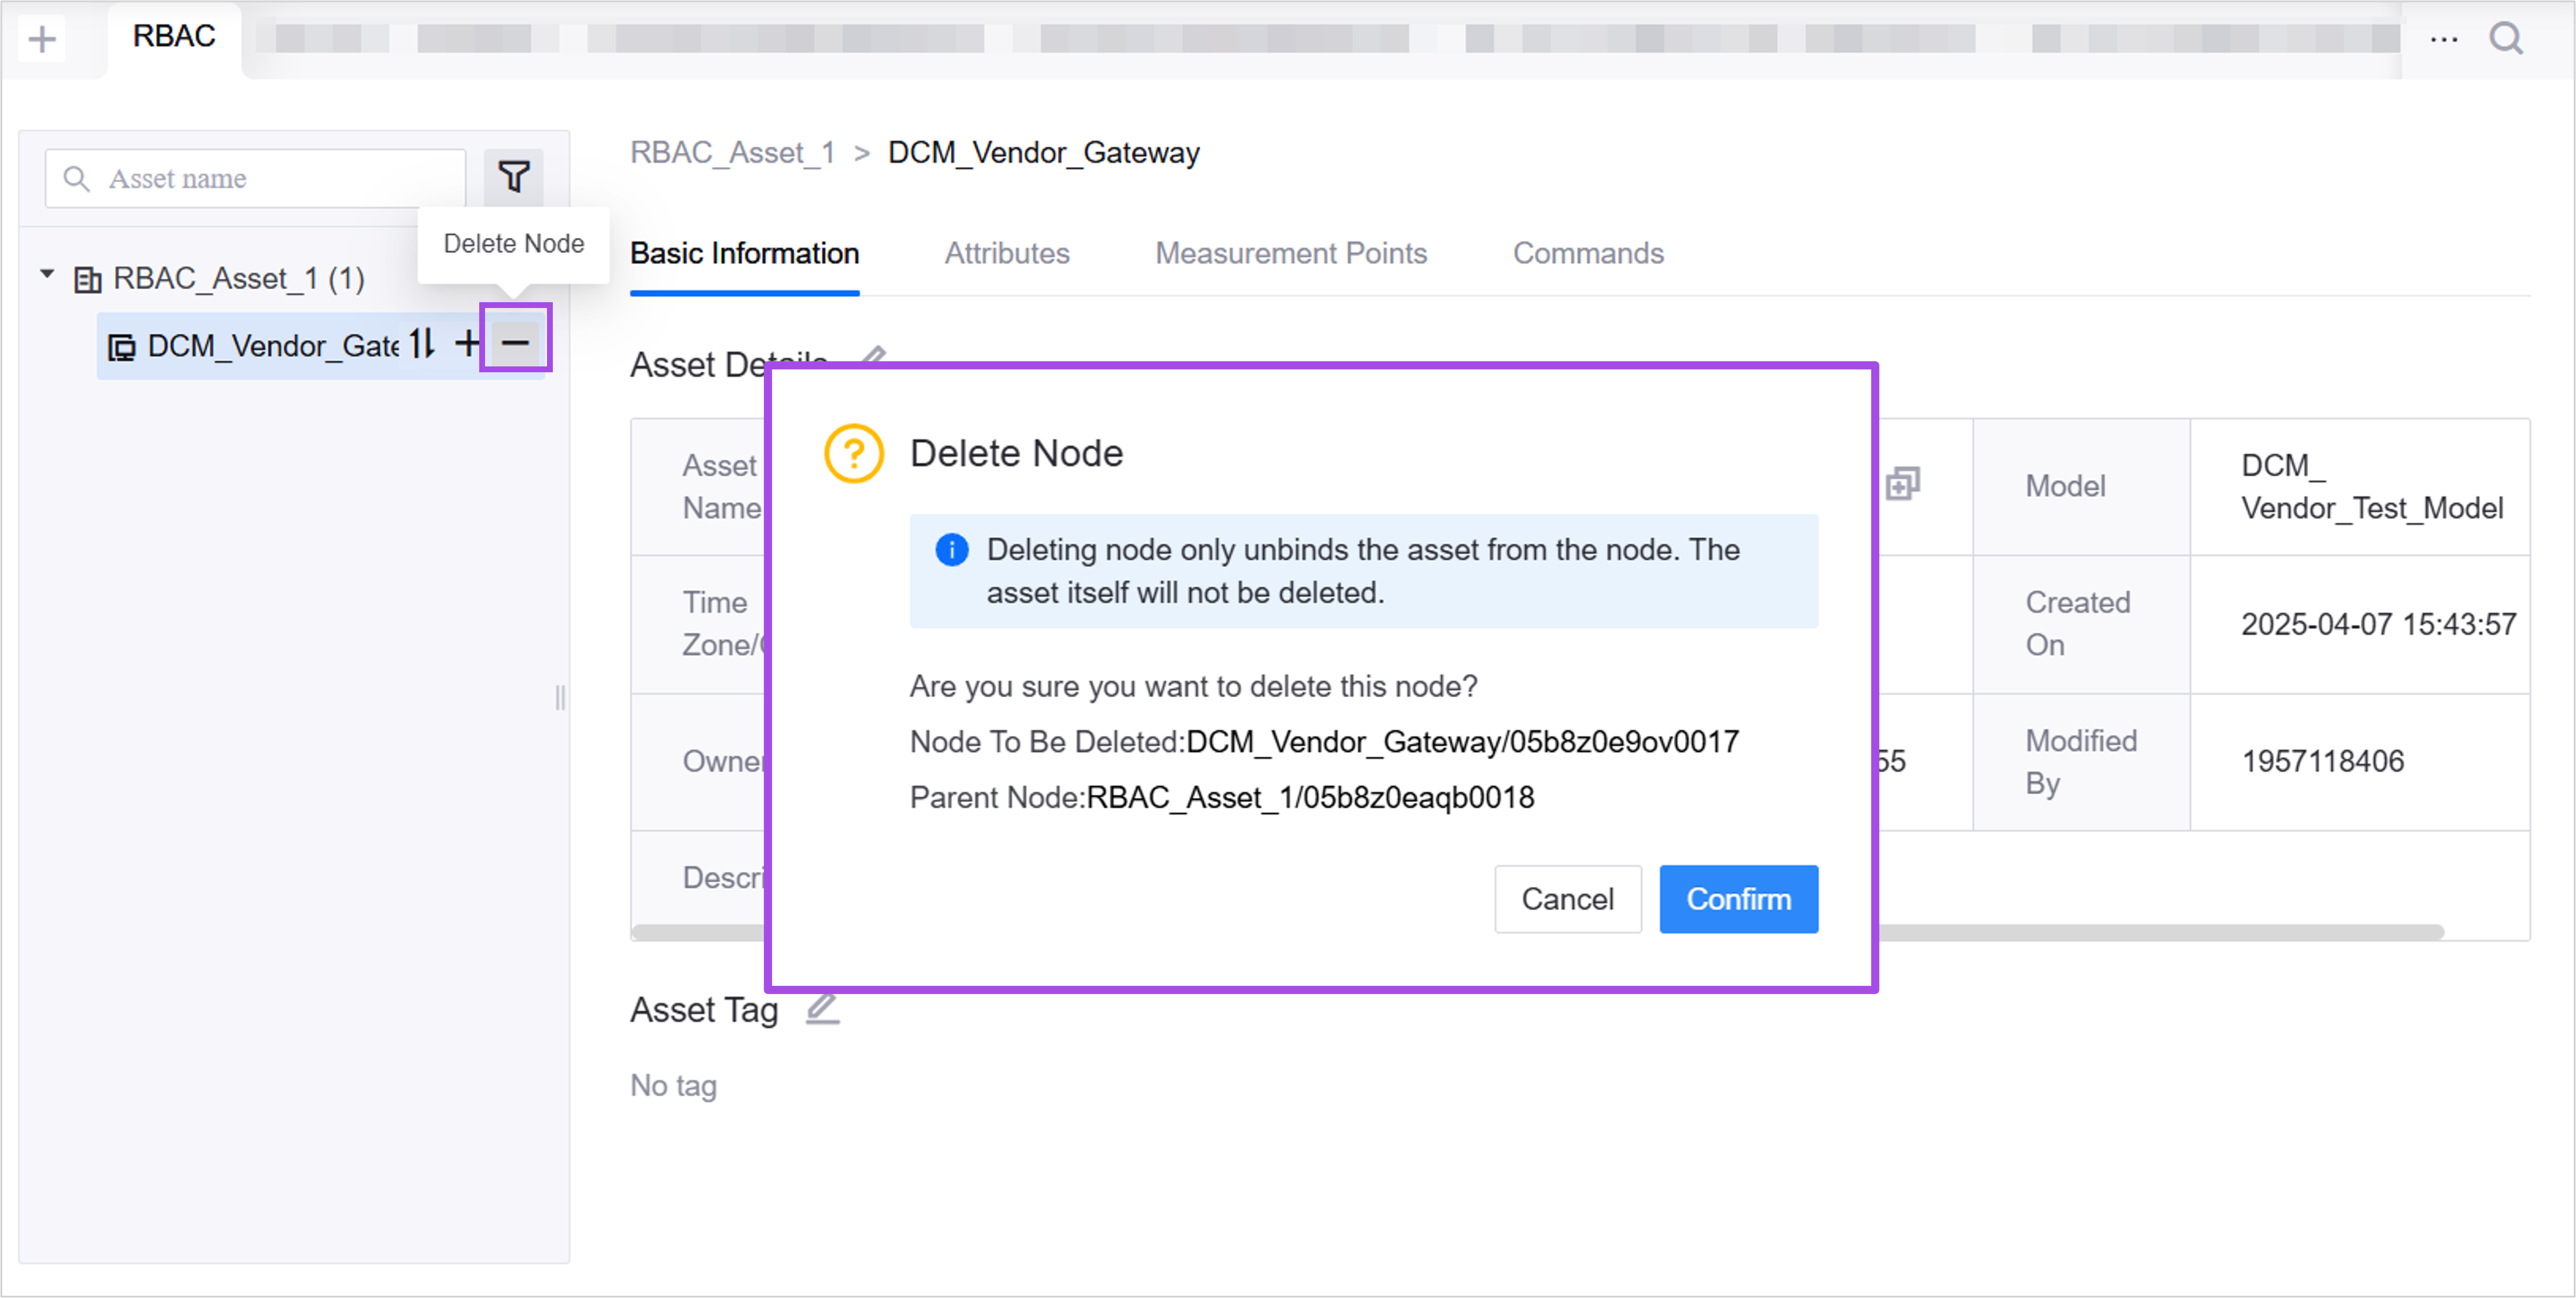
Note
Deleting a sub-node only removes the association between the asset tree and the asset. It does not delete the assets existing in Device Management > Device Assets or Device Management > Logical Assets. Deleting the root node is not supported.
Deleting an Asset Tree
Log in to EnOS Application Portal > Developer Console, and select an asset tree from the top of the Asset Tree page.
Before deleting an asset tree, ensure that there are no sub-nodes mounted under it.
Click the root node, scroll to the bottom of the basic information page on the right, and click the Delete Asset Tree button.