Unit 2: Allocating the Device
After registering the device, allocate the device to the environment/OU of your choice.
Step 1: Specify the Environment/OU
Select Device Provisioning Service > Registration Group Management from the left navigation pane.
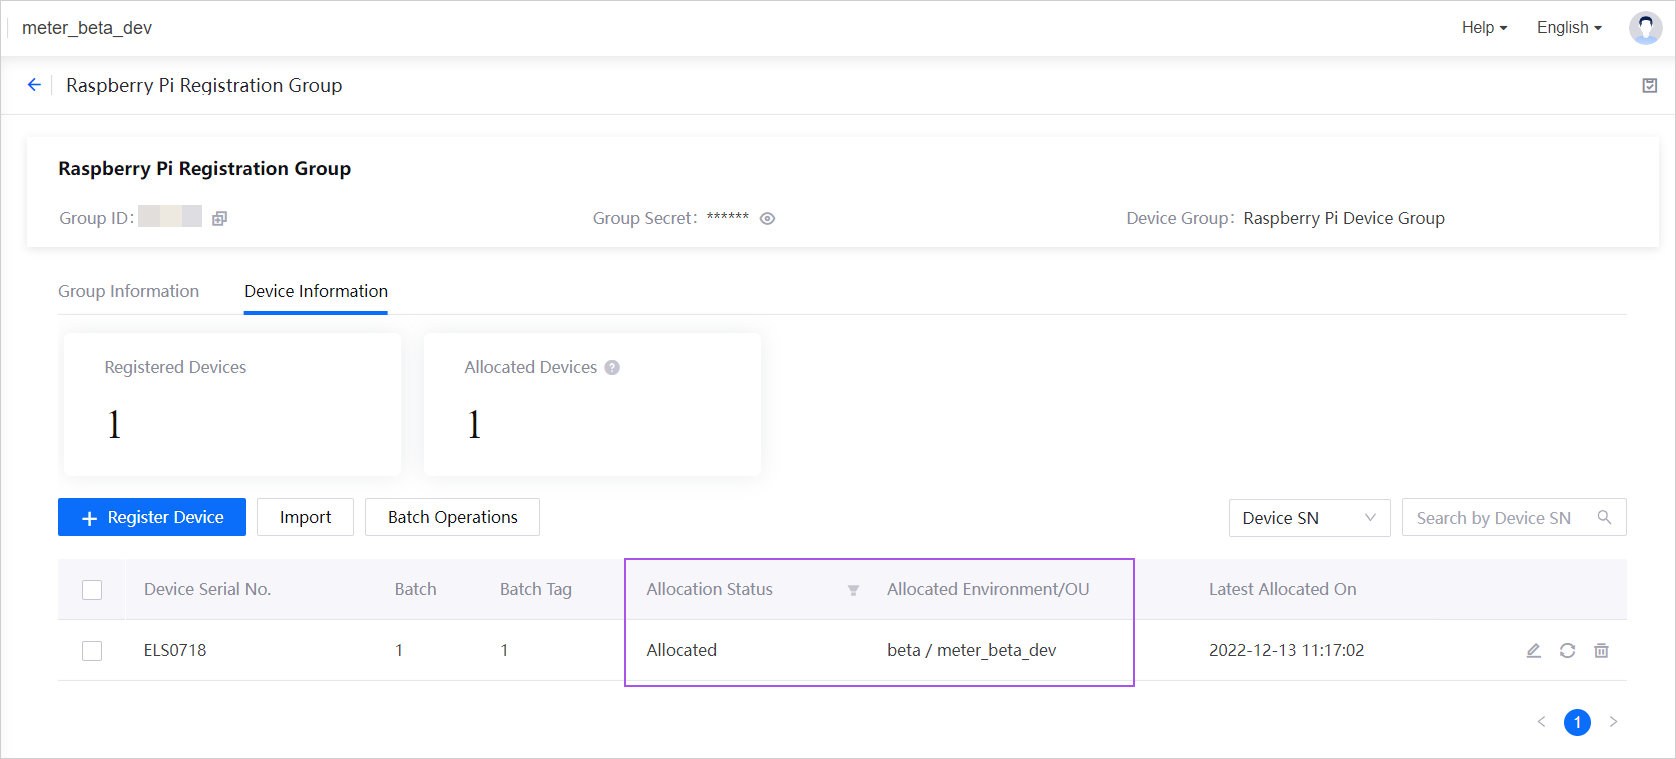
Locate the Raspberry Pi Registration Group registration group that you created in Unit 1, and click View Details
 .
.Click Device Information, and click the View Details
 for the device registered in Unit 1.
Under Gateway Onboarding Details, for Allocation Plan, select the environment/OU (which is beta/meter_beta_dev for this tutorial) for the first environment/OU that you wish to allocate the device and click Save.
Step 2: Allocate the Device
Click Batch Operations.
Select the device registered in Unit 1 and click Allocate.
The device’s Allocation Status will change from Not allocated to Allocated, and the Allocated Environment/OU will reflect the environment/OU that was chosen above.
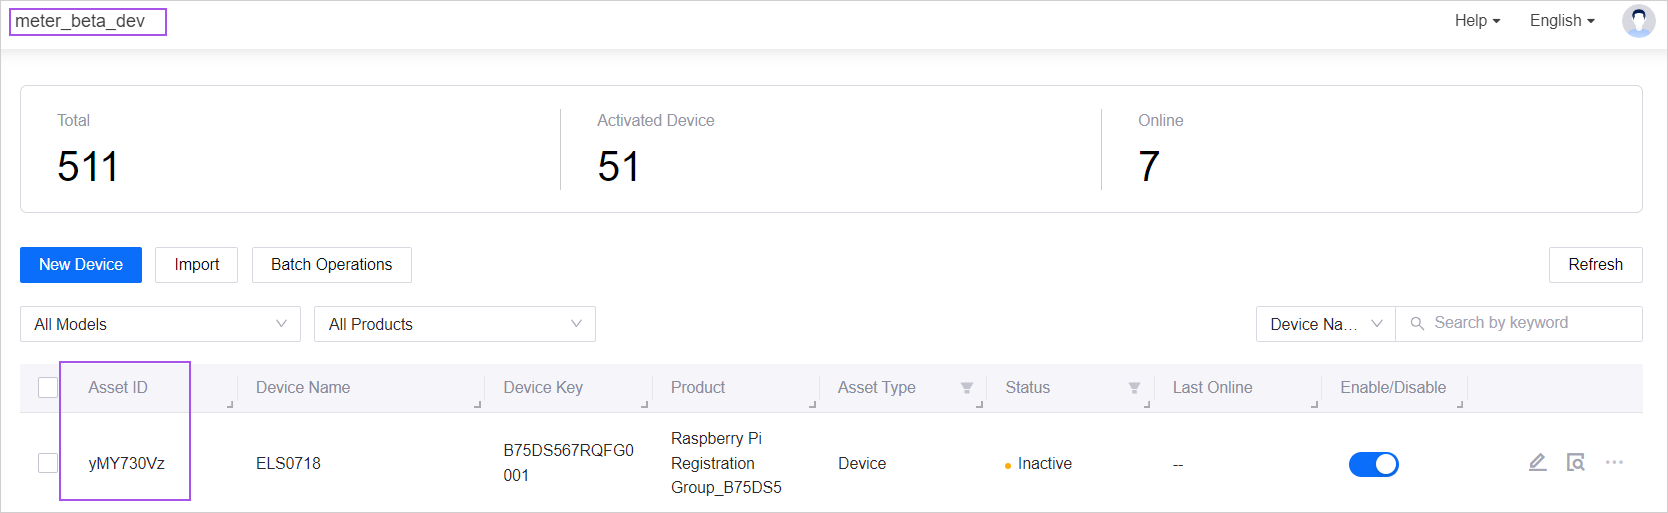
The device will also appear in the list of devices under the specified environment/OU in Device Management > Device Assets.