Creating Alert Rules
The alert rule is a rule that allows the trigger to trigger an alert within the scope according to the set alert conditions and alert details. You can define alert rules to trigger an alert when certain conditions are met. For example, for wind turbines, you can define a triggering rule to trigger an alert when the wind speed exceeds 30m/s, and the alert severity and alert content will be reported when the alert occurs.
The alert rules are for the specified model, and can be applied to the following scope depending on the settings:
All the assets instantiated based on the model.
The assets in the specified asset tree which are instantiated based on the model.
There are two ways you can create alert rules: by using either the old version or the new version. The new version is an enhancement of the old version that gives you more options for comparisons when configuring the condition for the triggering the alert. See the table below for more details.
Old Version |
New Version |
|---|---|
Does not have the option to give a rule name nor rule description for the rule. |
Can enter a rule name and description. |
Can select only one measurement point as trigger condition. |
Can select multiple measurement points as triggers for comparison. |
Events cannot be selected as triggers. |
Events can be selected as triggers. |
Custom alert sources cannot be selected as triggers. |
Custom alert sources can be selected as triggers. |
Can select the device status for all devices under the specified model as trigger condition. |
Can select the device status for all devices as the trigger for the trigger condition. |
Can select only measurement point from one device as trigger condition. |
Can select measurement points from different devices as triggers for comparison. |
Condition does not support factors. |
Condition supports factors (using expressions). |
Can only use the measurement point threshold as alert trigger conditions. |
Added timing conditions based on tumbling or sliding windows as alert trigger conditions. |
Need to create an alert content before creating an alert rule. |
Alert content and alert rule are merged: alert content can be directly entered when creating an alert rule. |
Does not support discrete alerts. |
Supports discrete alerts. |
Saves an alert as a historical record by default. |
Supports the option to not save the alert as a historical record after the alert is cleared. |
Unable to tag alerts. |
Can tag alerts through alert rule configuration. |
Changes to the alert rule requires 5 minutes to take effect after saving. |
Changes take effect immediately. |
This section shows how to create the triggering rules of an alert for the new version. For how to create an alert rule using the old version, see Creating Alert Rules (Old Version).
Prerequisites
Ensure that the alert severity and type to be used in the alert rule is created. For more information, see Creating and Managing Alert Severities and Creating and Managing Alert Types.
Ensure that you have read the limitations for alert rules. For more information, see Limitations.
If you want to use data from third-party systems, ensure that you have configured the third party alert source first. For more information, see Alert Sources.
Creating an Alert Rule
Click Alert Engine > Alert Rules on the EnOS Management Console navigation menu.
Click the New Rule button to define a new alert triggering rule.
Basic Information
Fill in the basic information for the alert rule such as its ID, description, etc., in the Basic Information section.
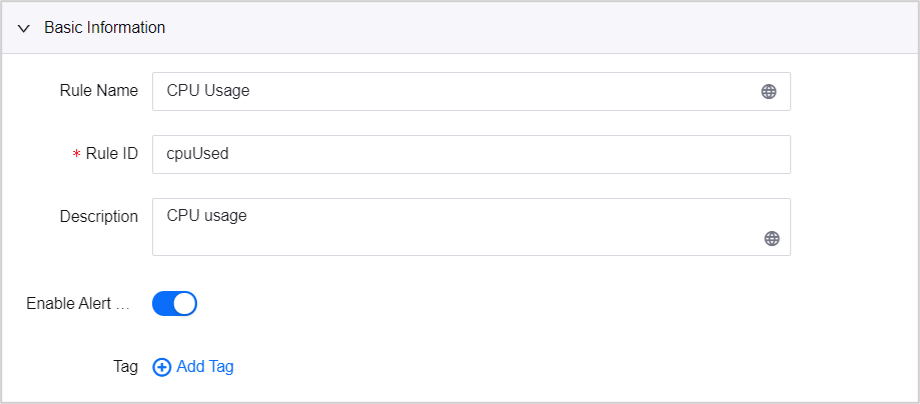
Rule Name: The name of the alert rule.
Rule ID: The identifier for the alert rule, which must be unique in the current OU and can not be edited.
Description: The description of the alert rule.
Enable Alert Rule: Select whether to enable this alert rule.
Tag: The tag of the alert rule. You can add one or more tags to the alert rule based on event characteristics for managing alert rules according to the situation. The maximum number of tags are 100. The tag consists of Key and Value, in the same alert rule, Key cannot be repeated and Value can be repeated. You can click Add Tag button to add more tags.
Trigger
The Trigger section enables you to select the triggers for the required alert condition and the asset scope of the alert rule. You can select different measurement points as the trigger source from the same or different sources. Click Add Trigger to add another trigger. The maximum number of triggers for each rule with Device Status as trigger source is 1, otherwise it is 3.
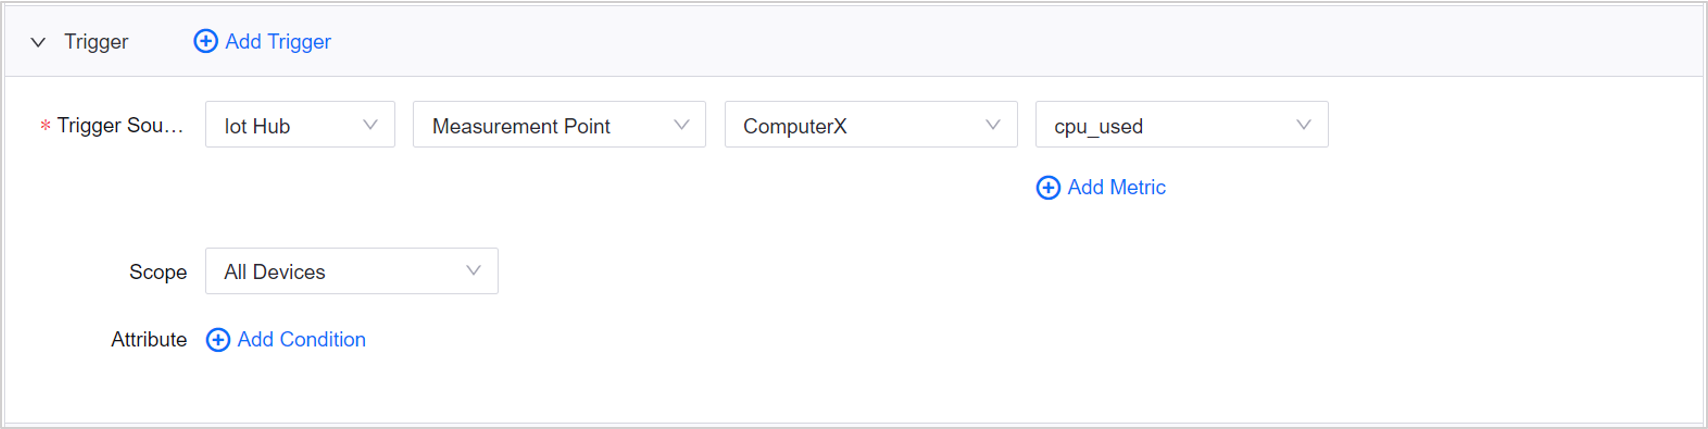
Trigger Source: There are two types of trigger sources available: Device Connectivity & Management and Others.
Device Connectivity & Management: Device Connectivity & Management model metrics such as measurement points, events, and device status, can be selected as the trigger sources.
Note
When selecting Device Connectivity & Management > Device Status as the Trigger Source, you can configure no more trigger sources. Otherwise, you can configure up to three trigger sources.
Measurement Point: Select the model and its corresponding measurement point. Click Add Metric to add another measurement point if required. The maximum number of measurement points for each trigger source is 5. For more information about models, see Device Modeling.
Event: Select the model and its corresponding event to compare the threshold value of the event’s parameters as the condition. If the condition is not met, the alert will be cleared. Click Add Metric to add another event if required. The maximum number of events for each trigger source is 5
Device Status: Select All or Model for a particular model to trigger the alert when the status of the devices under it change to offline.
Note
Only device assets have device status. This option is only available for the first trigger.
Others: Data from Others are those outside of EnOS and imported from Alert Sources page. The metrics in the alert sources can be selected as the trigger sources. Select an alert source, enter a metric, and select its data type. For more information, see Alert Source. Click Add Metric to add another metric if required. The maximum number of metrics for each trigger source is 5.
Scope:For Device Connectivity & Management trigger source, select the scope to which the alert rule applies to according to the selected model. Select the scope to which the alert rule applies to according to the selected model.
All Devices: The rule applies to all device instances based on the selected model in trigger source.
Asset Tree: Click Select asset tree to select one or multiple asset trees. By default, all asset instances of the asset tree(s) will be selected. The rule can be applied to all selected instances concurrently.
To select only specific nodes in the asset tree, you can click the Edit icon
 . If sub nodes exists, expand the parent node by clicking its arrowhead to access the list of sub nodes. Newly added child asset nodes will automatically inherit the rule defined on their parent nodes.
The maximum number of nodes that can be selected is 1,000. Note that if you select a parent node that has more than 1,000 child nodes, it counts as 1, but if you do not select the parent node, but instead select 2,000 of its child nodes, the total nodes would count as 2,000 and would exceed the maximum limit allowed.
Specific Assets: Click Select Asset to choose an asset under the selected model. In the subsequent pop-up window, you can search for assets based on the asset type (device/logical), product, device key, asset ID, and device name. Select the assets you wish to apply the alert rule to from the search results below and click OK.
The maximum number of assets that can be selected is 100.
Attribute: For Device Connectivity & Management trigger source, select attributes to filter the assets selected in Scope to reduce the application scope of the alert rule.
Click Add Condition, select attribute, operator, and enter the value.
Attribute: select the attribute based on the selected model in trigger source.
Click Add Condition Group to add child condition(s) or condition group(s) to the parent condition.
Select And or Or.
And: Assets selected only if all the attributes are met.
Or: Assets selected as long as one of the attributes are met.
You can add other attribute condition(s) if required. For limitations of the maximum number of conditions and condition groups that can be added, see alert_limitations。
Scope:For Others trigger source, select the scope to which the alert applies to according to the selected alert source above. You can select All Devices, or enter one or more asset IDs separated by commas.
Note
Only the first trigger supports All Devices or Specific Assets in Scope. For subsequent triggers, you can only enter an asset ID.
Trigger Validity
If there is more than one metric in the Trigger section, you need to indicate a validity period during witch the trigger condition will be used for the alert. You can either enter a validity integer value (between 60 seconds and 24 hours) or use the default Always Effective.
Calculation Interval: If there is more than one measurement point in the Trigger section, you need to indicate a calculation interval. In each calculation interval, only the last triggered alert generates an alert record.
Condition
The Condition section enables you to configure the alert conditions based on the trigger(s) selected.
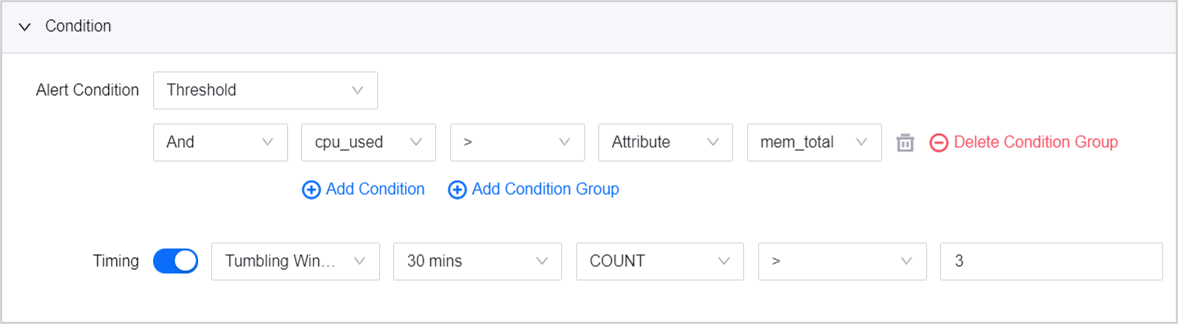
Alert Condition:For Iot Hub > Measurement Point, Iot Hub > Event and Others trigger source,select and configure conditions to trigger the alert.
Threshold: Select this to set a threshold comparison for the trigger selected above.
Click Add Condition Group and set the relationship between the conditions.
Select And or Or.
And: Trigger alert only if all the conditions are met.
Or: Trigger alert as long as one of the conditions are met.
Next, click Add Condition and select the trigger, parameter (only applicable to events), operator, and type for the comparison. The options for types are as per the below.
Value: Enter a threshold for the condition.
Attributes: The attributes in the model selected above that have the same data type as the selected measurement point will be listed in the corresponding drop-down. Select the one you require for the triggering condition. This is only available for Device Connectivity & Management triggers.
Trigger: Only if two or more metrics or triggers are selected in the Trigger section will this be available. If two triggers have the same data type, the trigger not selected for the alert condition will be listed in the corresponding drop-down. For example, if two triggers A and B of data type int are selected in Trigger Settings, and trigger A is the alert condition, then trigger B will be shown in the drop-down.
Note
The multi-measurement point alarm creation is temporarily unavailable in 2.4.1 to avoid data backlog caused by too many multi-measurement point alarms.
No update of data: Select this to trigger an alert when the data reported by the device remains the same with its value unchanged in the set duration. Only available if a single metric is the trigger.
Use expression: Construct an expression as the alert condition using a combination of triggers, attributes, functions, and operators. For more information on the functions, see Time Window Functions.
Construct the expression by using Trigger and Attribute. Triggers and attributes used in the expression have the same data type.
Expression like cpu_used > (cpu_core*0.8) can be constructed (in which,cpu_used is the trigger and cpu_core is the attribute of the model)
Triggers and Attributes used in the expression have the same data type.
When there are two triggers and trigger A is the first trigger:
Support constructing the expression by comparing the measurement point of trigger A with the attribute of trigger A.
Support constructing the expression by comparing the measurement point of trigger A with the attribute of trigger B.
Support constructing the expression by comparing the measurement point of trigger B with the attribute of trigger B.
Not support constructing the expression by comparing the measurement point of trigger B with the attribute of trigger A. Cause trigger A is the first trigger, the device attributes can not be fetched when no data of trigger A are upload.
Note
Only 1 measurement point can be used in expressions if the expression includes time window functions.
Alert Condition: For Device Status trigger, currently only supports Offline alert condition.
Timing: Enable this if you wish to trigger alerts according to certain timings. Currently the time windows supported are Tumbling Window (default) and Sliding Window. Select a duration for each window. If Threshold is selected for Condition, select a time window function, operator, and enter a value. For more information, see Timed Alerts.
Note
This is not applicable for Device Status triggers and is only available for a single metric trigger. If more than one metric is selected as Trigger, this function will be disabled.
The timing alarm creation is temporarily unavailable in 2.4.1 to avoid data backlog caused by too many timing alarms.
Alert Triggering Delay: You can set a time in seconds to delay triggering the alert rule. A “0” value will trigger the alert rule immediately when the condition is met.
Alert Recovery Condition
Enable Discrete Alert: When enabled, the alert will be recovered the moment it triggered and the alert end time will be the alert trigger time. The alert record will also be generated. Alert Triggering Delay and Alert Masking will not be applicable if discrete alert is enabled.
Alert Recovery: When enabled, you will have more options for customized alert recovery conditions.
Alert Details
The Alert Details section is where you set more information, such as the alert content, severity, type, etc.

Alert Content: The content of the alert, which may include the possible causes and solutions for the alert. Maximum length is 500 characters. The input supports internationalization, and can be text or a metric variable, using its identifier via the use of expressions, to return its value. See below for some expression example formats.
${pointId}for int, string, float, etc. data types.If there are multiple triggers, use trigger{n}i to specify which trigger the metric belongs to, for example,
${trigger2:pointId}to specify the metric in trigger 2.${pointId/parameterId}for struct data types with parameters.
Alert Severity: Select an alert severity from the list of defined alert severities according to your business needs.
Alert Type: Select an alert type/subtype from the list of alert types.
Alert Masking: Only available when the Scope is an asset tree, or if Timing is not enabled. When Alert Masking is enabled, all the alerts associated with the child nodes of the selected asset node will be blocked. It helps to reduce irrelevant alerts. See Masking Alert.
Save Alert Record: The option to save an alert as a historical record after it is cleared is enabled by default. Historical records can be searched for and viewed at Alert Engine > Alert Records if required. Toggle the switch off if you do not wish to save a historical record of the alert. If not saved, you will not be able to find any record of the triggered alert once it is cleared.
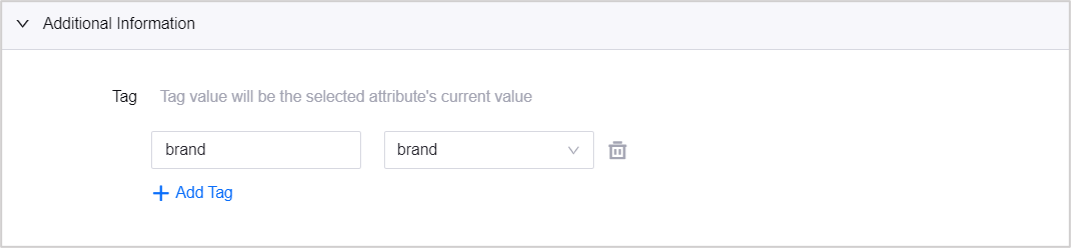
Additional Information
The Additional Information section enables you to create key-value tags based on the attribute values of the model selected in the Trigger Settings section. Create a tag by entering its Key and choosing an attribute from the drop-down, where the Value of the tag will be the attribute’s current value.
Click Confirm to create the alert rule.
Alternatively, you can create the alert rule for the current OU by calling the Open APIs, and the successfully created alert rules will also appear in the alert rule list. For more information, see About EnOS API.
Editing an Alert Rule
The alert rules created in Alert Engine > Alert Rules can be edited by clicking the corresponding Edit button . Contents other than Rule ID can be edited.
You can only view the alert rules created by Open APIs in the Alert Engine > Alert Rules page.
Deleting Alert Rules
The alert rules created in Alert Engine > Alert Rules can be deleted by clicking the corresponding Delete button  . You can also click Batch Operations > Delete to delete the alert rules in batches if needed.
The alert severities created by Open APIs cannot be deleted in the Alert Engine > Alert Rules page.
Results
After creating or editing an alert rule, the rule will take about 5 mins to take effect. You can view the alert records (if any) at Alert Engine > Alert Records.