Tutorial: Setting the Alert Triggering Delay Timer
In some scenarios, alerts need to be delayed until a specified time instead of triggering immediately when there is an anomaly.
Let us take the example of using EnOS to monitor the load factor of an electricity producing installation: when the load factor is over 120% for, say, 120 minutes, EnOS will then trigger the “Overload” alert. The alert triggering delay timer can be used in this scenario.
Concepts
Anomaly : When the measurement point data sent from a device satisfies the condition set in the alert rule, an anomaly is generated.
Alert triggering delay : The time from when an anomaly occurs to when the alarm is triggered.
Usage Notes
Start and End of Alert Triggering Delay
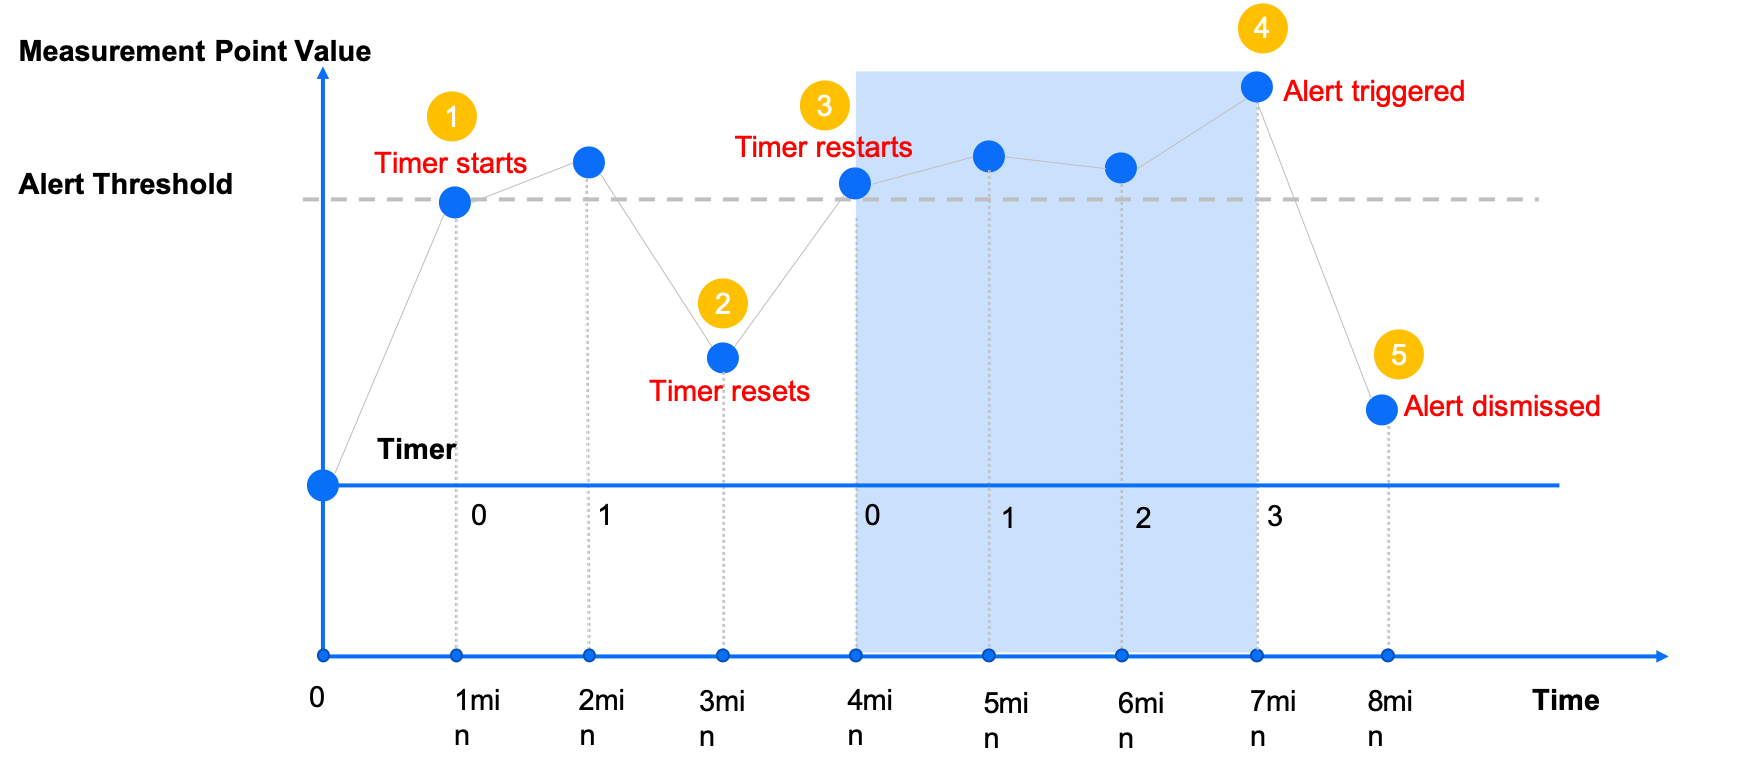
Timer starts: The delay timer starts the moment an anomly is generated. As the following illustrates, the timer kicks off at 1min, as the measurement point value meets the condition of the alert rule. At 2min, the anomaly persists, and the timer count increases by 1 minute.
Timer resets: If the anomaly is recovered before the timer times out, the timer is reset. As the following illustrates, the timer is reset to 0 minute at 3min when the anomaly disappears.
Timer restarts: At 4min, the anomaly reappears, and the timer restarts from 0 minute.
Alert triggered: At 7min, the timer reaches 3 minutes and times out. An alert is triggered.
Alert dismissed: At 8min, the anomaly disappears and the alert is dismissed.

About This Task
This task shows how to use the alert triggering delay function in a smart-building scenario. For details of this scenario, see Tutorial: Setting Different Alert Thresholds for Devices of the Same Model. For this task, we will use only the code snippet of the fridge ammeter.
Before You Start
Ensure that you have the access to the model, asset management, and alert services. If not, contact your OU administrator. For more information, see Policies, Roles and Permissions.
Go through the Tutorial: Setting Different Alert Thresholds for Devices of the Same Model.
Procedure
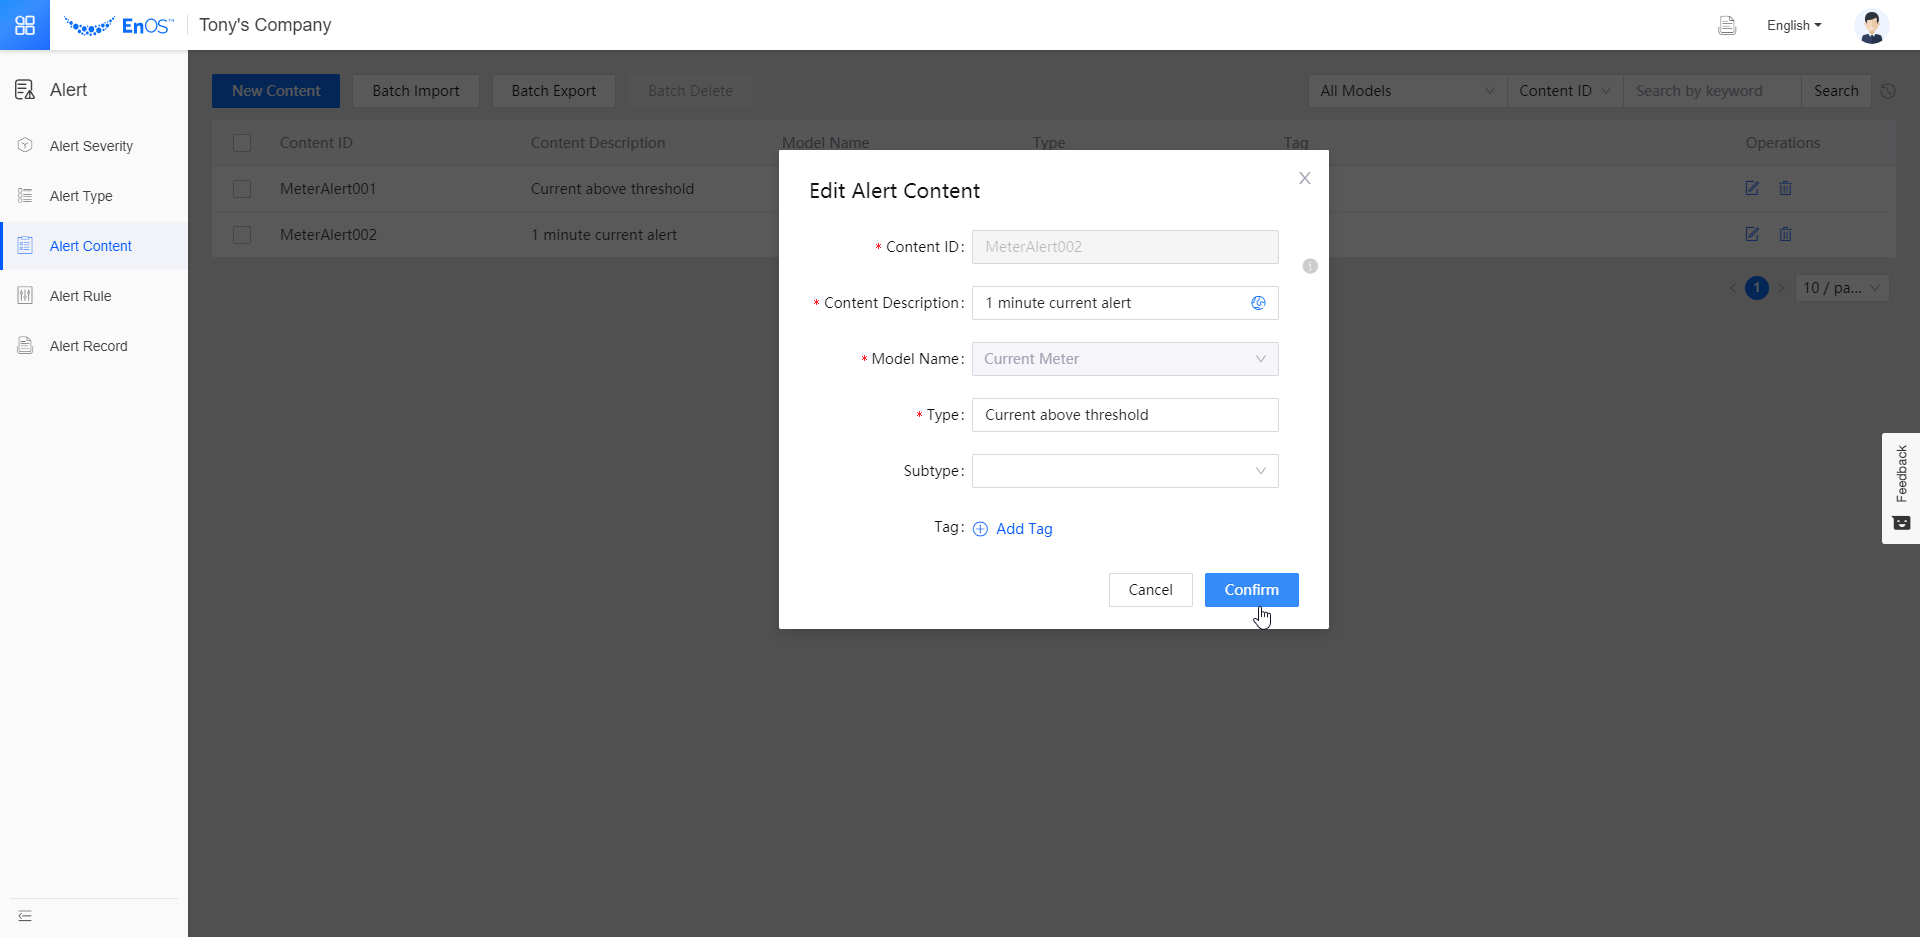
Select Alert > Alert Content. Create a content named “1 minute current alert”. For how to create an alert content, see Creating Alert Content.

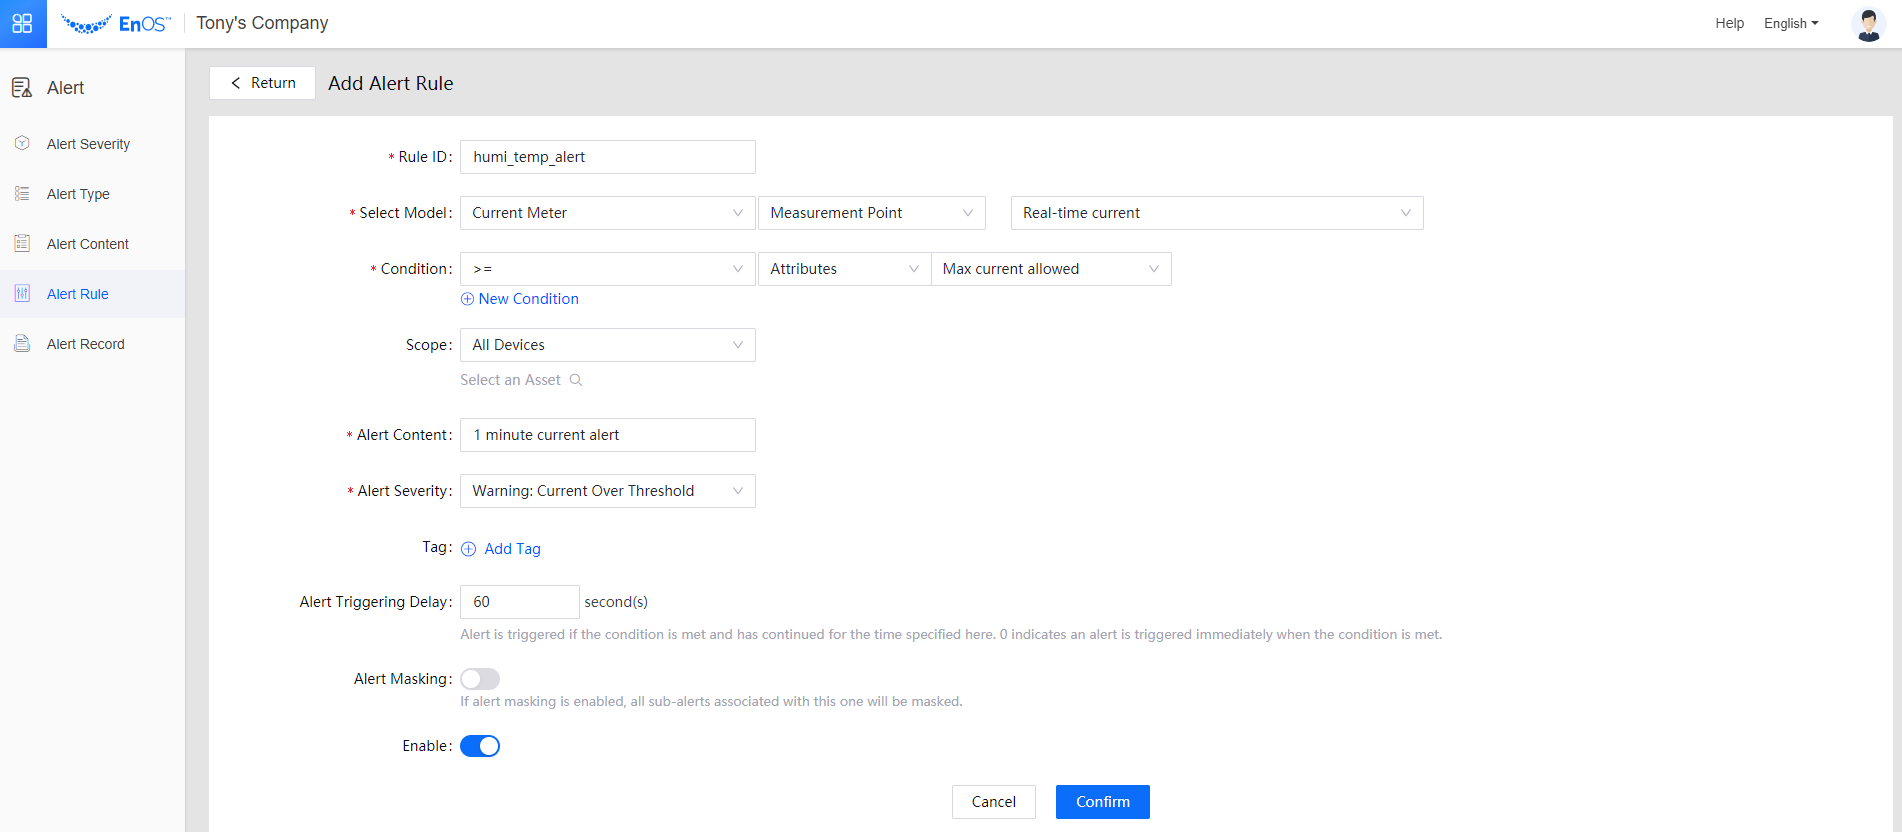
Select Alert > Alert Rule. Create a new rule as per the following. For how to create an alert rule, see Creating Alert Rules.

Set Alert Triggering Delay to 60 seconds and click Confirm.
Copy the sample code fridgeMQTT from Tutorial: Setting Different Alert Thresholds for Devices of the Same Model to your IDE and make the following changes:
Change
MeasurepointPostRequest request = MeasurepointPostRequest.builder().addMeasurePoint("rt_current", random.nextDouble() * 1500).build()toMeasurepointPostRequest request = MeasurepointPostRequest.builder().addMeasurePoint("rt_current", random.nextDouble() + 1500 ).build()so that the telemetric data Real-time current sent from the simulated ammeter exceeds the Max Current Allowed, thus generating the anomaly.Change
Thread.sleep(10000L)toThread.sleep(30000L)so that the simulated ammeter sends telemetry every 30 seconds. In this way, if the ammeter sends 3 consecutive Real-time current, which is above the Max Current Allowed, to EnOS, the 1 minute current alert will be triggered.
Run fridgeMQTT .
Results
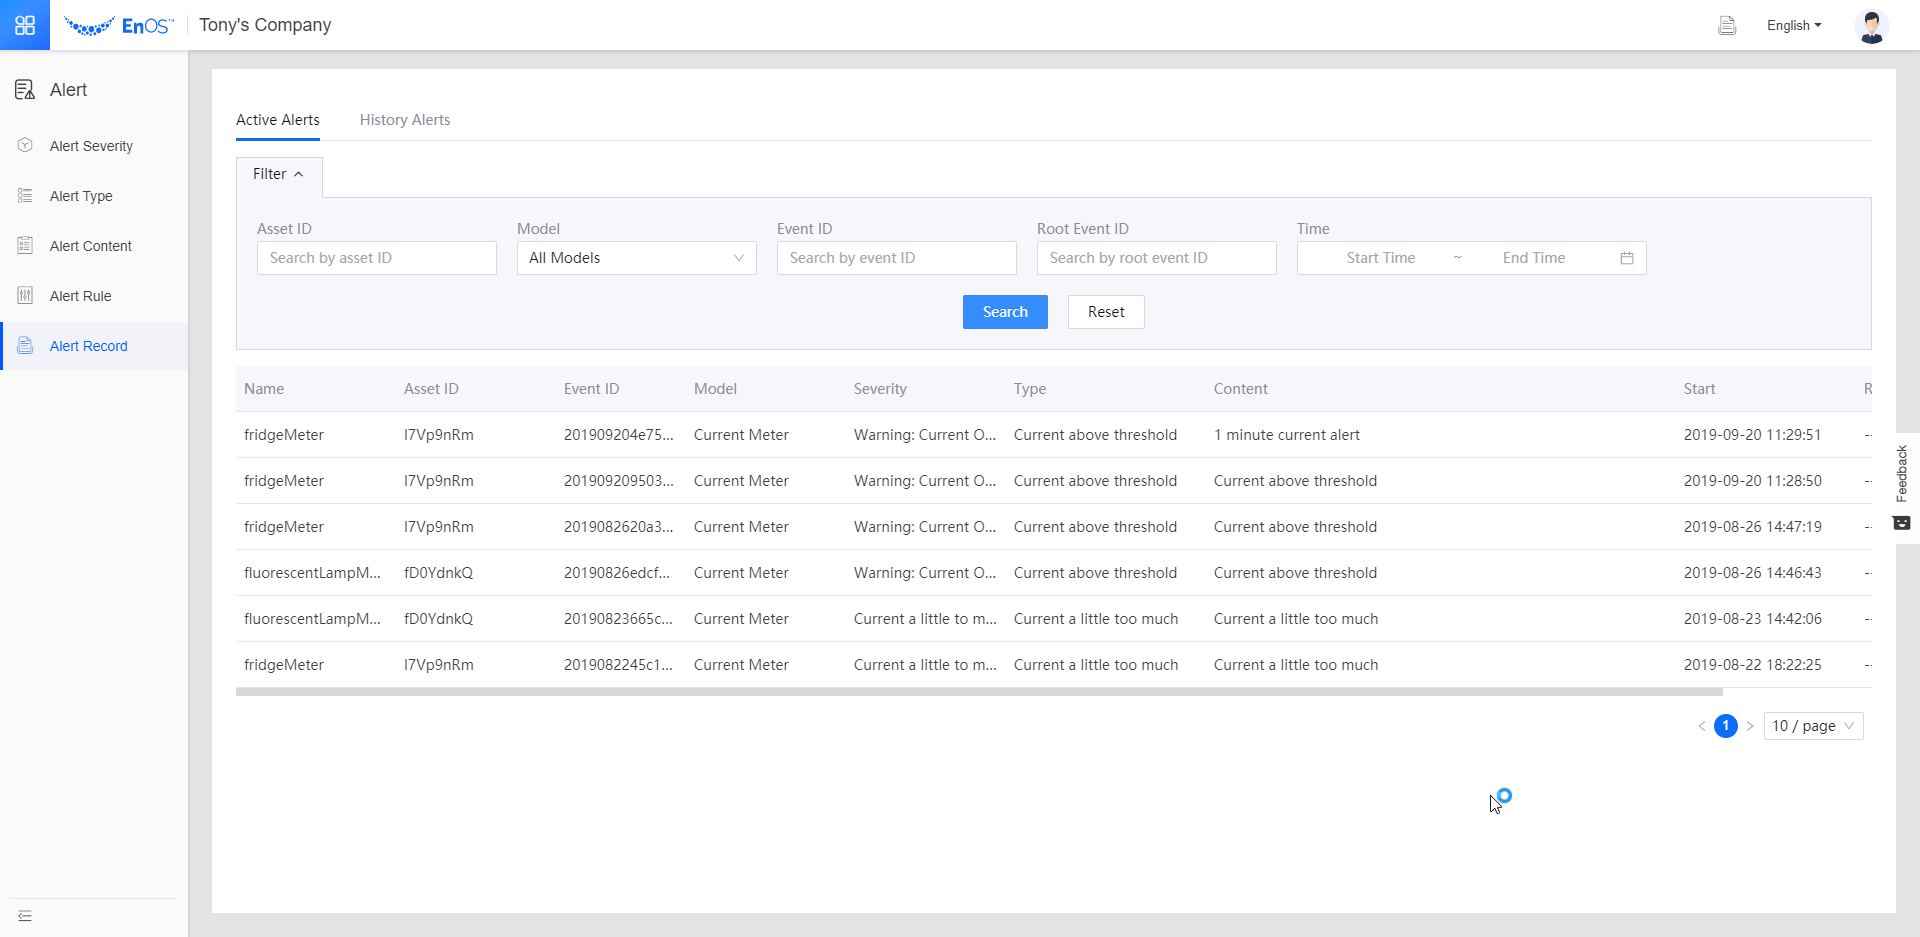
Select Alert > Alert Record. Set Model to Current Meter and click Search.
Once the ammeter sends 3 consecutive data to EnOS, which are all above the threshold, across 60 seconds, you will be able to see the triggered alert as follows:

You can also call an API to query the triggered alerts, where the measurement point data value included in the response is the telemetric value when the timer starts timing.