Managing Resources
Using Stream Data Processing resource as an example, this topic shows how to request for resources, extend resource allocation, change resource quota, view the status of resource allocation, and set alarms for resource usage rate.
Prerequisites
Full access permission to the Resource Management module.
Procedure
The procedure for managing the Stream Data Processing resource is as follows:
Request for the Stream Data Processing resource.
View resource allocation status.
Extend Stream Data Processing resource allocation.
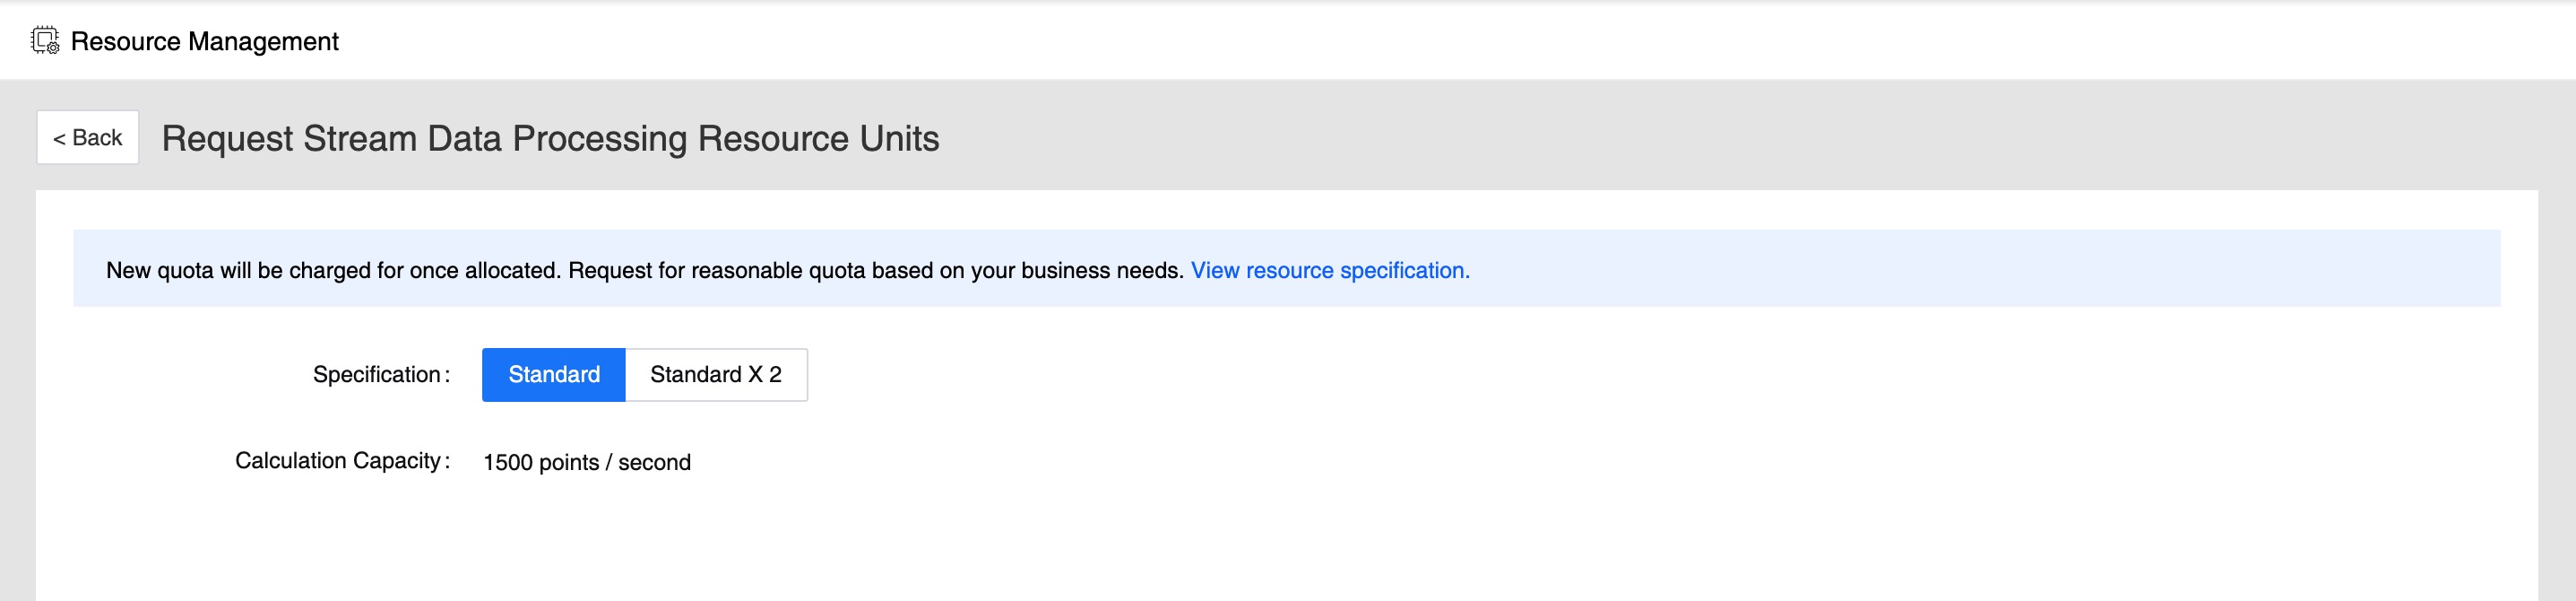
Requesting Stream Data Processing Resource
Log in to EnOS and click Resource Management from the left navigation panel.
Under the Data Asset Management tab, click the Request Resource button for Stream Data Processing.

View the description of computing resource specification, estimate the needed resources, and select a resource specification.
Click the Request Now button to submit the request. The system will allocate resources according to the request review result.
Viewing resource allocation status
After submitting the resource request, return to the Resource Management page to view the status of the resource allocation.
The status Allocating indicates that the resource allocation is still in progress.
The status Allocated indicates that the resource allocation is completed. You can start the published stream processing jobs. For details about stream processing job operation, see Monitoring the Stream Processing Job.
Extending resource allocation
If the allocated resource cannot meet the growing business needs, you can extend the resource allocation.
On the Resource Management page, find the resource request with Allocated status.
Click the Change Quota icon from the Operations column of the resource request.
Select a higher stream analytics specification and click the Request Now button.
View the status of new resource allocation. When the new resource specification is displayed in the Specification column, and the status is changed to Allocated, the resource expansion is completed successfully.
Changing resource quota
If the allocated resource exceeds the business needs, you can change the resource quota.
On the Resource Management page, find the resource request in Allocated status.
Click the Change Quota icon from the Operations column of the resource request.
Select a lower stream analytics specification and click the Request Now button.
View the status of new resource allocation. When the new resource specification is displayed in the Specification column, and the status is changed to Allocated, the resource quota is scaled down successfully.
Note
If the resources currently in usage are more than the scaled down resource specification, you need to release resources (such as stopping stream processing jobs) first, and then request to change the resource quota.
Setting alarms for resource usage rate
To avoid the impact of insufficient resources on normal business operations, you can set alarms for the resource usage rate.
On the Resource Management page, click the Alarm Setting icon from the Operations column of the resource request.
Enable the Resource Usage Alert switch and set the resource usage alert threshold (0.1 ~ 1.0).
Select receivers for the alerts. At most 3 receivers can be selected.
Select the alert sending mode, through email or SMS.
Click Confirm to save.
Deleting resource
Before using product functions such as streaming computing, big data, TSDB, etc., you must first open the dependent resources. After using for a period of time, if the service is no longer needed, in order to avoid affecting normal business operations due to insufficient resources, you can delete the corresponding resources through resource deletion.
Note
The resource deletion function is temporarily unavailable for some resources.
Once the resource is deleted, data cannot be recovered. Please proceed with caution.
On the Resource Management page, find the resource request in Allocated status.
Click the Delete icon from the Operations column of the resource request.
If the resource has no associated objects, after confirming the deletion, the system will completely delete the resources; if the resource has associated objects, according to the prompt information, you need to delete the associated objects in its product module first, and then return to the Resource Management page to delete resource.
Deleting TSDB resource
Stream data processing does not support the resource deletion function temporarily. Using TSDB resource deletion as an example, the following steps are used to delete:
On the Resource Management page, find the resource request in Allocated status.
Click the Delete icon under the Operations column of the resource request.
If there is no associated storage policy group in the TSDB instance, after confirming the deletion, the system will completely delete the resource. If storage policy groups are created in the TSDB instance, delete the storage policy groups before deleting the TSDB instance. For more information, see Deleting a TSDB Storage Policy Group.