Configuring Forwarding Templates
For the device asset of the same type, you can use one forwarding templates to forward data. This topic describes how to configure the forwarding template.
Before You Start
Contact your OU administrator for permission on Edge management. For more information, see Policies, Roles, and Permissions.
Procedures
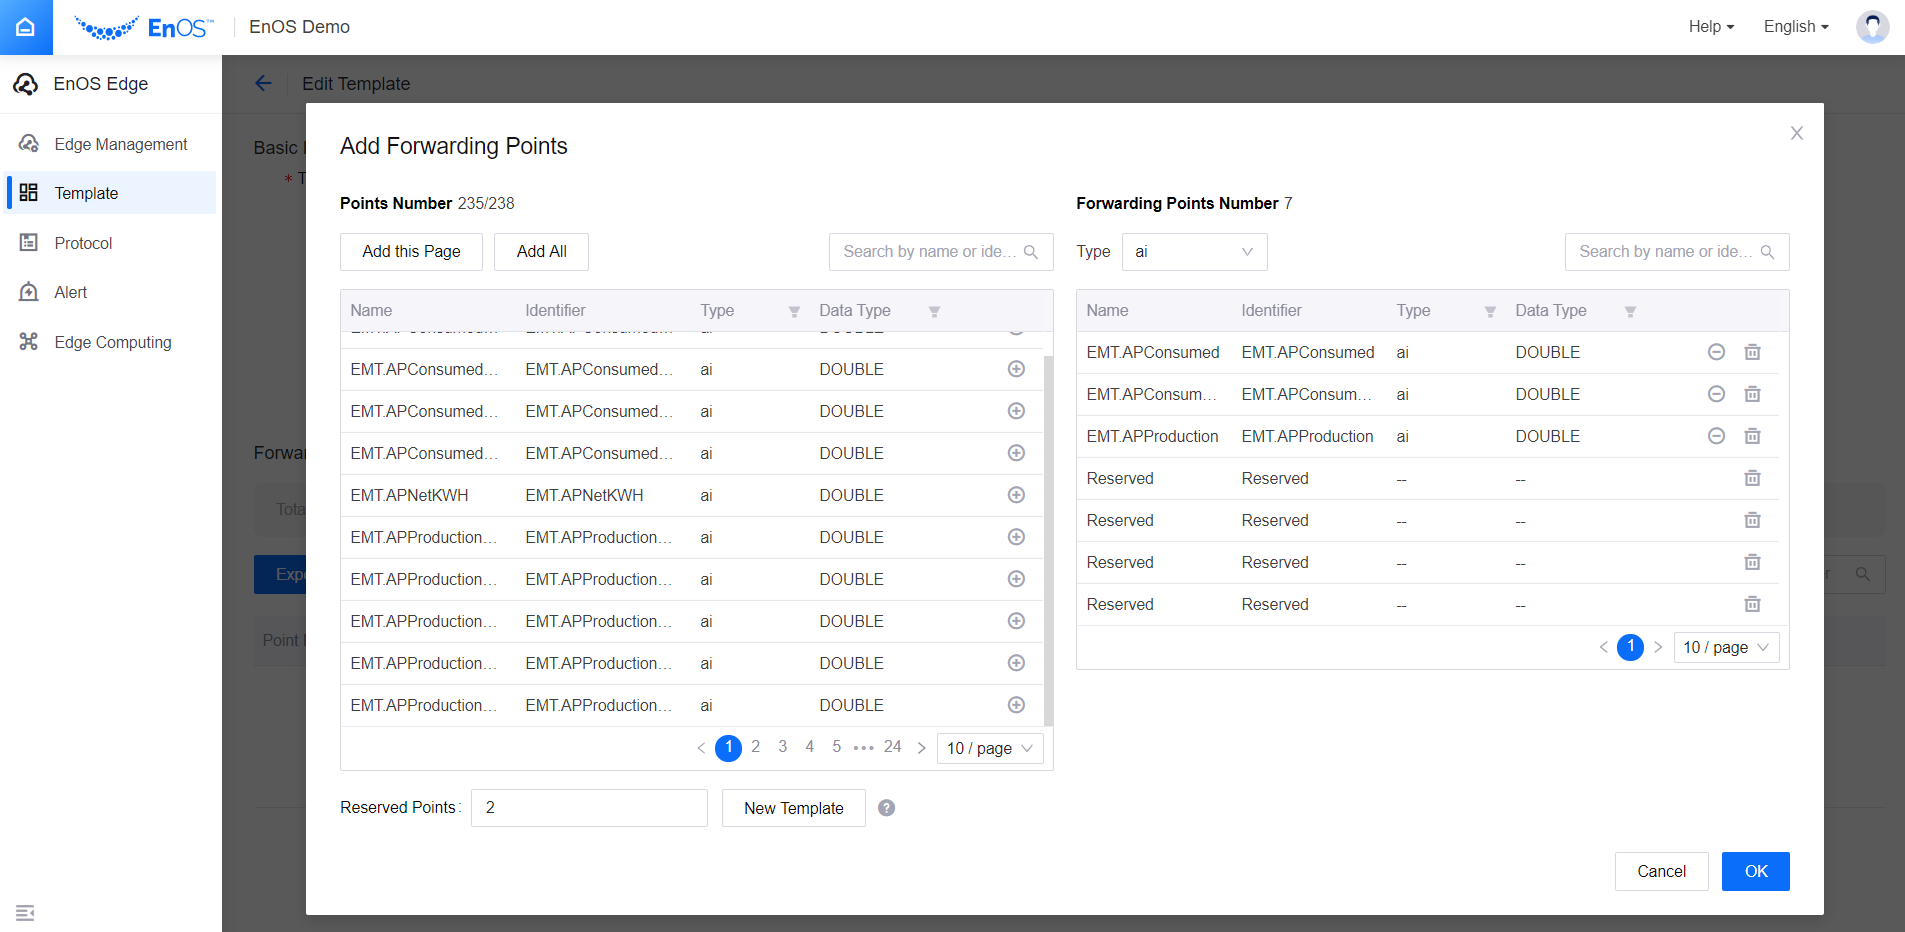
Log in to the EnOS Management Console and select EnOS Edge > Templates > Forwarding Templates from the left navigation menu. Click New Template and fill in the required information in the pop-up window.
In the Operation column of the created forwarding template, click
 to go to the “Edit Template” page.
In “Forwarding Configuration”, click + to add a measurement point for data forwarding. Measurement points are on the left and the points to be forwarded are on the right.
Select the measurement point first and then click Add to add it to the list on the right.
(Optional) Click
 for a forwarding point to turn it into a reserved point, or enter a number for the Reserved Points and click New Template. You can create a maximum of 1,000 reserved points.
Reserved points only takes up a position and does not represent any actual data.
You can add or delete forwarding points using reserved points to avoid subsequent changes in the number and order of forwarding points.
Editing forwarding points might impact the final point number, which requires you change your device configuration.

Click OK and back to the “Edit Template” page.
At the Edit Template page, click the Edit icon
 for a forwarding point and configure the points as prompted by the GUI.
Parameter |
Description |
|---|---|
Forwarding Data Type |
The data type of the measurement point that will be forwarded. Different forwarding points have different forwarding data types. |
Coefficient |
You can assign a coefficient to a forwarding point. The final forwarding data can be calculated using a formula y=ax+b. |
Offset |
In the formula y=ax+b, |
You can also configure forwarding points by exporting, editing, and then importing a template file. The table below lists the fields in the template file.
Field |
Description |
Value and Verification |
|---|---|---|
Point Number |
Point numbers are automatically generated based on the forwarding type and the order it is added. This value indicates a relative position in the template. The final point number is also based on the offset or the starting address of the register. |
You cannot use existing point numbers. |
Name |
The names of the measurement points to be forwarded. |
This field will not be verified when imported. |
Identifier |
The identifers of the measurement points to be forwarded. |
The identifiers must belong to the points to be forwarded. |
Point Type |
The data type of the forwarding points. Types can vary based on the protocol used. |
|
Coefficient |
In the formula y=ax+b. x indicates the raw measurement point value. a indicates the coefficient. b indicates the offset. y indicates the final value to be forwarded. |
The default value is 1. |
Offset |
In the formula y=ax+b. x indicates the raw measurement point value. a indicates the coefficient. b indicates the offset. y indicates the final value to be forwarded. |
The default value is 0. |
Add Forwarding Points of Array Type
Edge IIoT Gateway 2.0 and 3.0 series support forwarding model points with the array type via the IEC104 protocol. The operation is almost the same as that of forwarding non-array-type points above. Only when selecting the array type model point, you need to fill in the number of elements in the model point of this array type.
Only support forwarding the array points as AI point type
The point number is created according to what you have filled in when adding the measurement points of array type
When forwarding an array type measurement point, each element in the array only supports exporting with the same data type