Unit 3: Building the Routing Rule
A routing rule is made up of a series of rule nodes that process the incoming messages from devices.
Step 1: Creating A Rule
Log in to EnOS Application Portal > Developer Console and click Routing Rule from the left navigation menu.
Click New Routing Rule.
Enter the rule name Water Meter Rule and description, and click OK.
Step 2: Designing the Rule
You will enter a design canvas page with the Rule Entry node.
Design and connect the rule with the following nodes in the order shown below.

Rule Entry Node
Every routing rule must start with the Rule Entry node.
Click the Rule Entry node.
Select Third-party Gateway from the Gateway Type drop-down.
Select Water Meter Protocol Gateway from the list so that all incoming data from this protocol gateway will come to this rule to be processed.
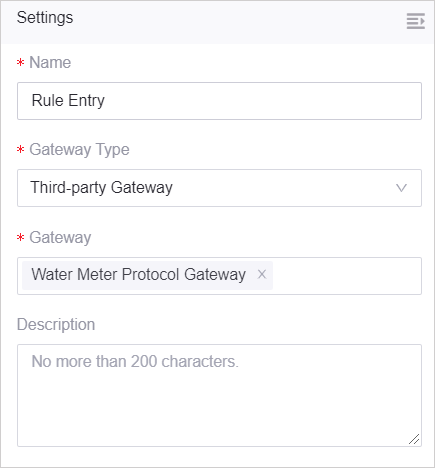
For more information, see the Rule Entry node.
Message Type Switch Node
The Message Type Switch node routes the incoming message when the devices from the Water Meter Protocol Gateway post measurement points.
Click the Message Type Switch node.
Select Post Measurement Point from the Message Type drop-down.

For more information, see the Message Type Switch node.
Kafka Pub Node
The Kafka Pub node establishes a Kafka client that publish messages to a third-party Kafka server. Since the alert source only supports Kafka messages within the cluster, the Kafka component host needs to use the Kafka host in the cluster.
Enter the host and topic.
Select Anonymous from the Authentication Method drop-down.
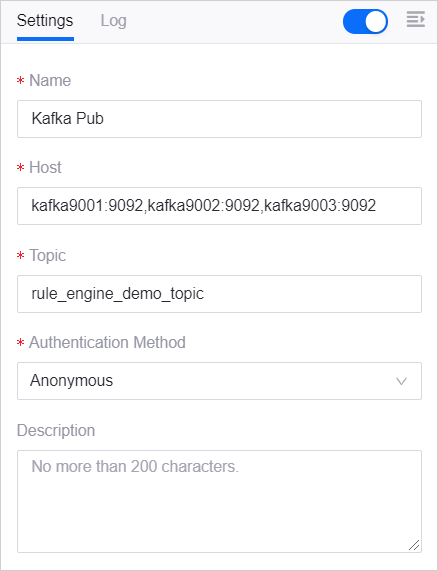
For more information, see the Kafka Pub node.