Viewing OTA Job Details
You can view the OTA job status as well as edit the job from the job details. This section shows how to view the status and edit the job for both OTA verification and upgrade jobs.
Before You Start
Ensure you have completed Verifying Firmware or Batch Upgrading Firmware in order to view each status respectively.
Viewing OTA Job Details
Select Device Management > OTA Upgrades > OTA Jobs.
Select View Details for the OTA job you wish to view.
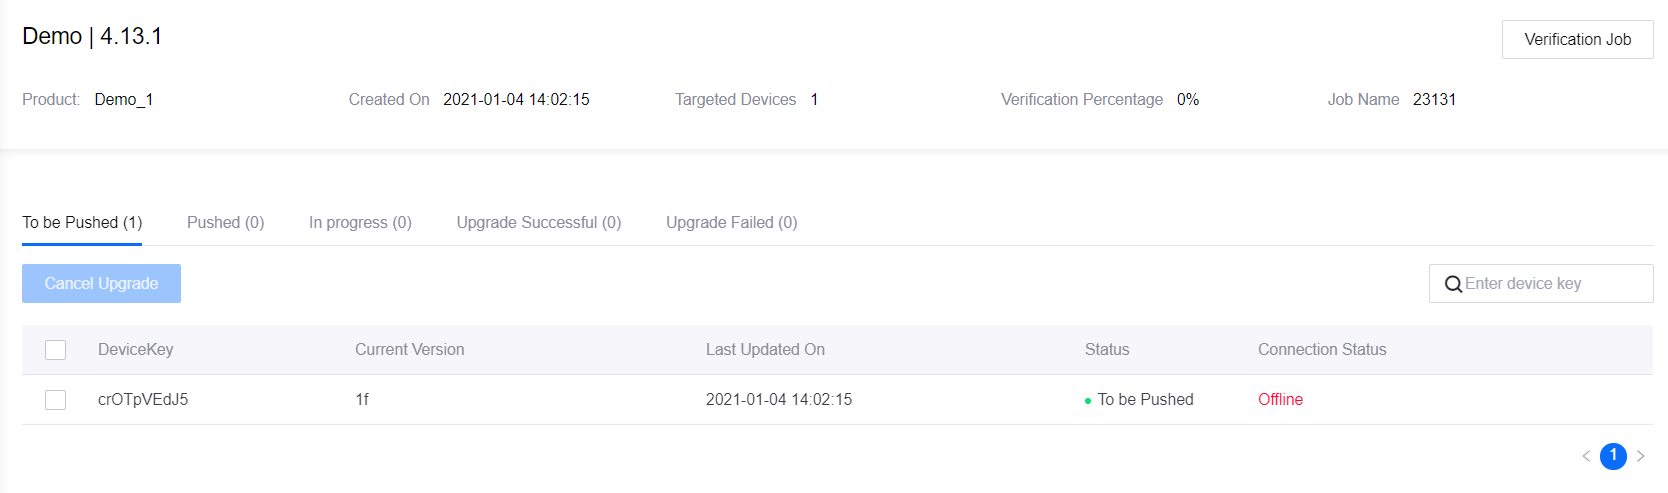
In the details page, you can view the information such as the product, job creation date, devices to be verified/upgraded, percentage of the verification/upgrading progress, and job name.
Click Verification Job or Upgrade Job at the top right if you wish to edit the job details.
Verification Job: The details that you can change are the version number to be upgrade, the device key, and the timeout period.
Upgrade Job: All details other than the job type, name, product, and firmware name can be changed.
Note
If a verification job is currently executing, none of the items can be edited. You need to wait until the job is finished.
The job status is categorized into five tabs as per the below. You can search for devices using the device key for all tabs.
To be Pushed: Devices with this status usually means that the cloud has not yet pushed the firmware for reasons such as the device is offline, or the total concurrency count is at the maximum number so the firmware cannot be pushed.
Pushed: Devices with this status means that the cloud has pushed the firmware, but the device has not returned the upgrade progress.
In Progress: Devices with this status means that firmware upgrade is currently in progress.
Upgrade Successful: Devices with this status means that the upgrade is successfully completed.
Upgrade Failed: Devices with this status means that the upgrade job has failed. A reason for the failure is provided for device developers to troubleshoot the errors accordingly. For this tab, you can not only search for devices using the device key, but also search using the current firmware version, reason of failure, and time range. The possible reasons of failure are as per the below.
Cancelled by user
Device ignored this upgrade
Device version not included in the target scope
Failed to write firmware to device
Firmware download failed
Firmware verification failed
Last upgrade in progress
Target device not found
Undefined failure
Upgrade timeout
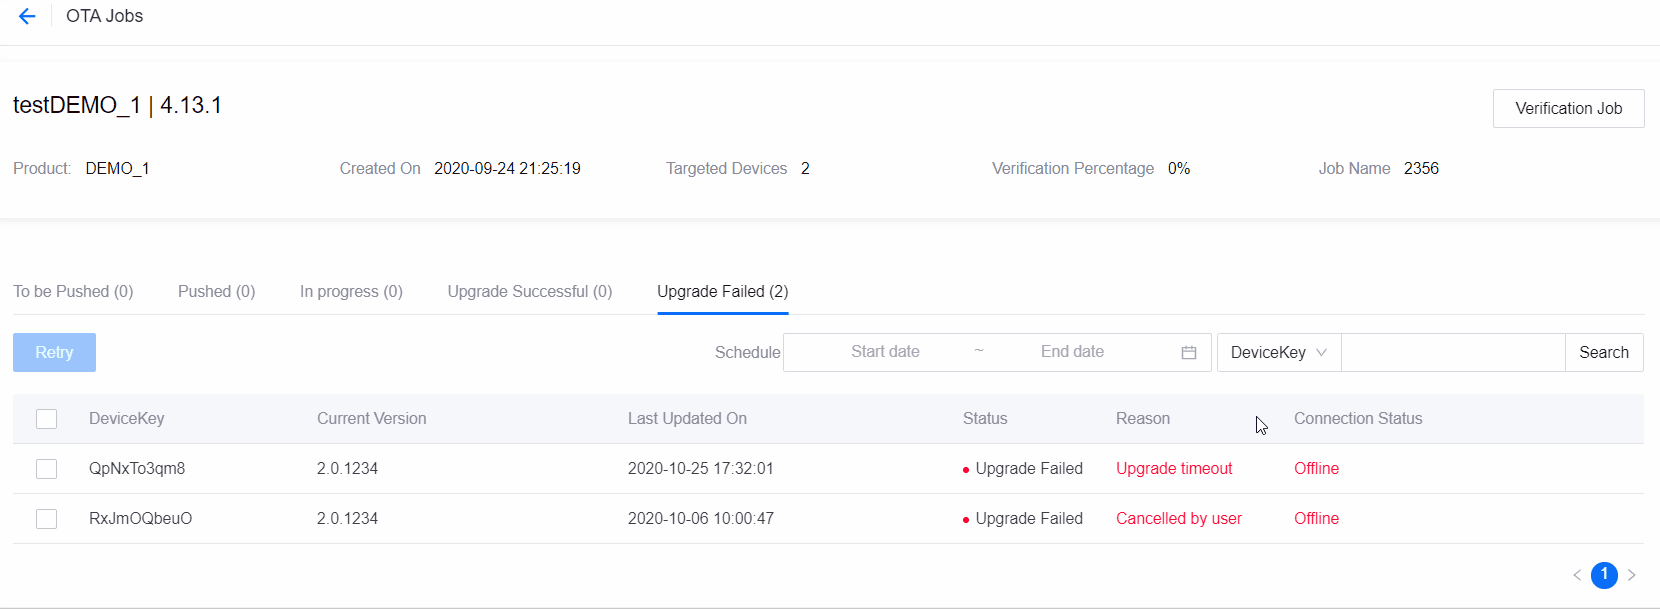
A Cancel Upgrade button is provided in the To be Pushed and Pushed tabs for you to cancel the job in situations such as when you do not wish to wait for the system to timeout (two hours by default). Select the device key of the device to cancel the job for and click Cancel Upgrade. The status of the device will change to Upgrade Failed with the reason as Cancelled by user.
Next Steps
You can Verify the Firmware again and perform Batch Upgrading Firmware. For firmware that is no longer needed, you can Delete Firmware.