Publishing an Application with Helm Chart
The EnOS™ ECP supports the managing and publishing of complex applications with Helm Charts, improving the efficiency of application publishing.
For more information about Helm Charts, see Helm Documentation.
Prerequisites
Organization and namespace name are selected.
All the Chart files that are required for publishing the application are in your Git repository, organizsed by the following structure.
examples/
  Chart.yaml          # A YAML file containing information about the chart
  LICENSE             # OPTIONAL: A plain text file containing the license for the chart
  README.md           # OPTIONAL: A human-readable README file
  requirements.yaml   # OPTIONAL: A YAML file listing the dependencies for the chart
  values.yaml         # The default configuration values for this chart
  charts/             # A directory containing the charts upon which this chart depends.
  templates/          # A directory of templates that, when combined with values,
                      # will generate valid Kubernetes manifest files.
  templates/NOTES.txt # OPTIONAL: A plain text file containing short usage notes
Creating a Publish Form
Create a new Chart publish form by following these steps:
In the left navigation bar, select Publish > Helm Chart.
In the Chart list, find the uploaded Chart and click the Chart name to open the Chart details page.
The steps for publishing applications with Helm Chart in Cluster Manager are similar to the steps in Developer Studio. For details, see Publishing Applications with Helm Chart.
Checking the Publish Result
When the publishing starts, the status of the publish form is changed to Running. You can check the running status and result of the publish form in the Publish Logs section.
Viewing the Publish History
In the list of Charts, find the target Chart, and click the Chart name to open the Details page of the Chart.
Click the Publish History tab, and select the environment and cluster where the application is deployed to query the publish history of the application.
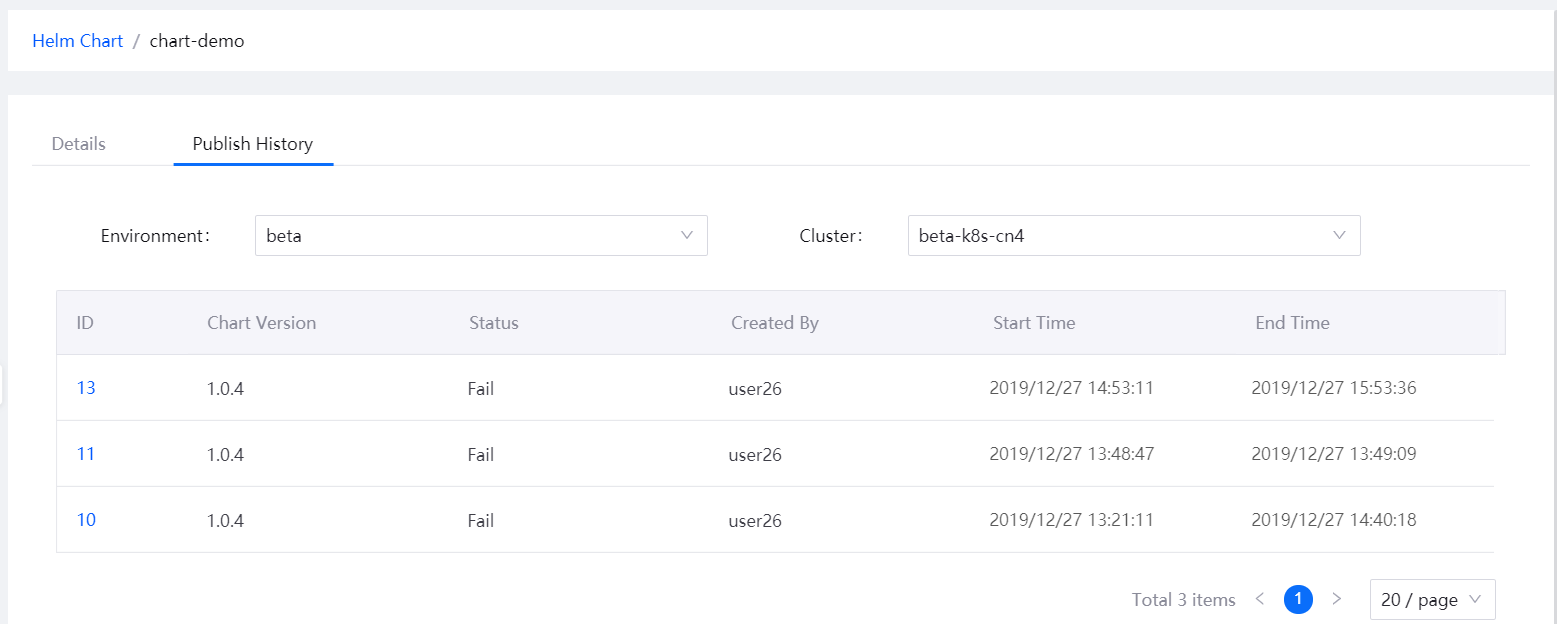
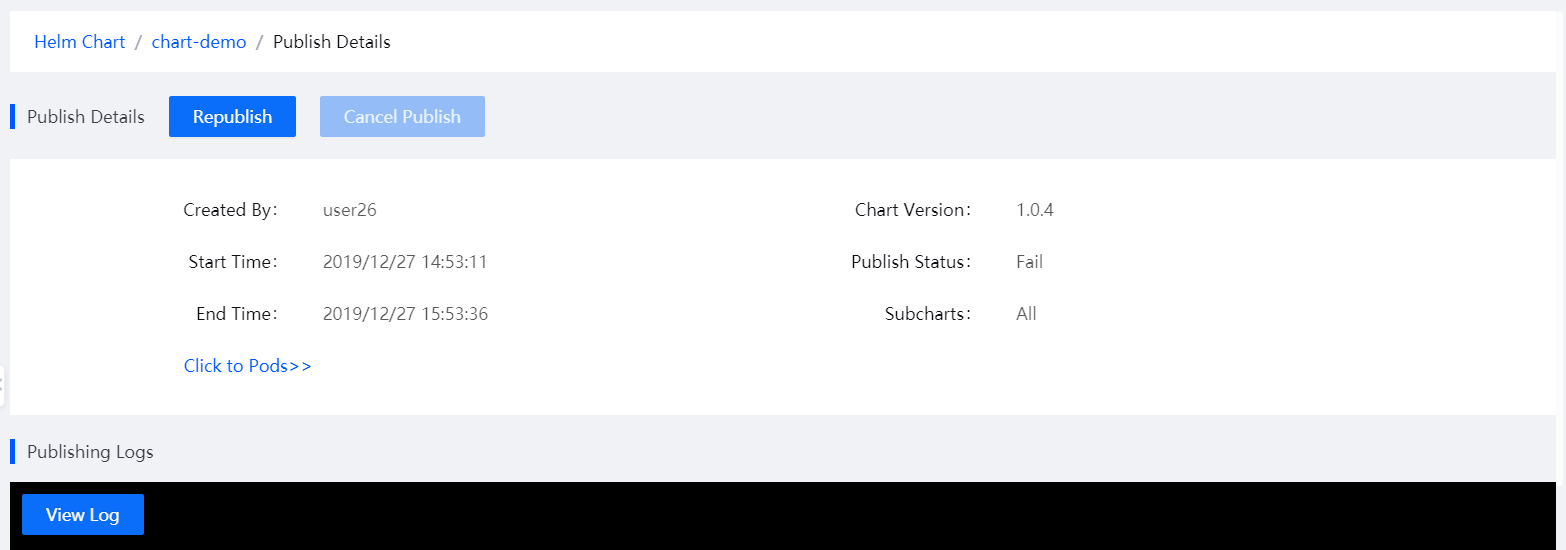
From the list of publish forms, click an ID to open the Publish Details page, and view the details of the publish form and publish log.
(Optional) To republish the application, click Republish, edit the configuration of the publish form, and publish the application.
Next Step
When the publishing is completed, you can verify the published application online.