Managing Rules
After creating a routing rule, you can view, edit, enable/disable, publish, or delete it. You can also view the node logs of a rule that is published and running, or had run before.
Prerequisites
Ensure that you have read the limitations for routing rules. See Limitations.
Viewing and Editing Rules
You can view a routing rule and edit its information as well as its rule design after creating it.
In EnOS Management Console, click Routing Rules from the left navigation menu.
The page lists all the created rules under the OU in rows. Each row represents one rule. You can view the following details for a rule.
The rule name.
The date and time the rule is created.
The current rule status, where you can enable/disable it. A rule will go into effect when it is enabled.
To edit a rule, click on its Edit icon
 . You can edit a rule in two ways.
Edit its basic information: Click Settings on the top right of the page to edit its name and description.
Edit its design: You can add or delete nodes, rearrange the rule, and configure the nodes’ settings as per required. It is similar to how you would design a rule during rule creation. For more details, see Design the Rule.
Note
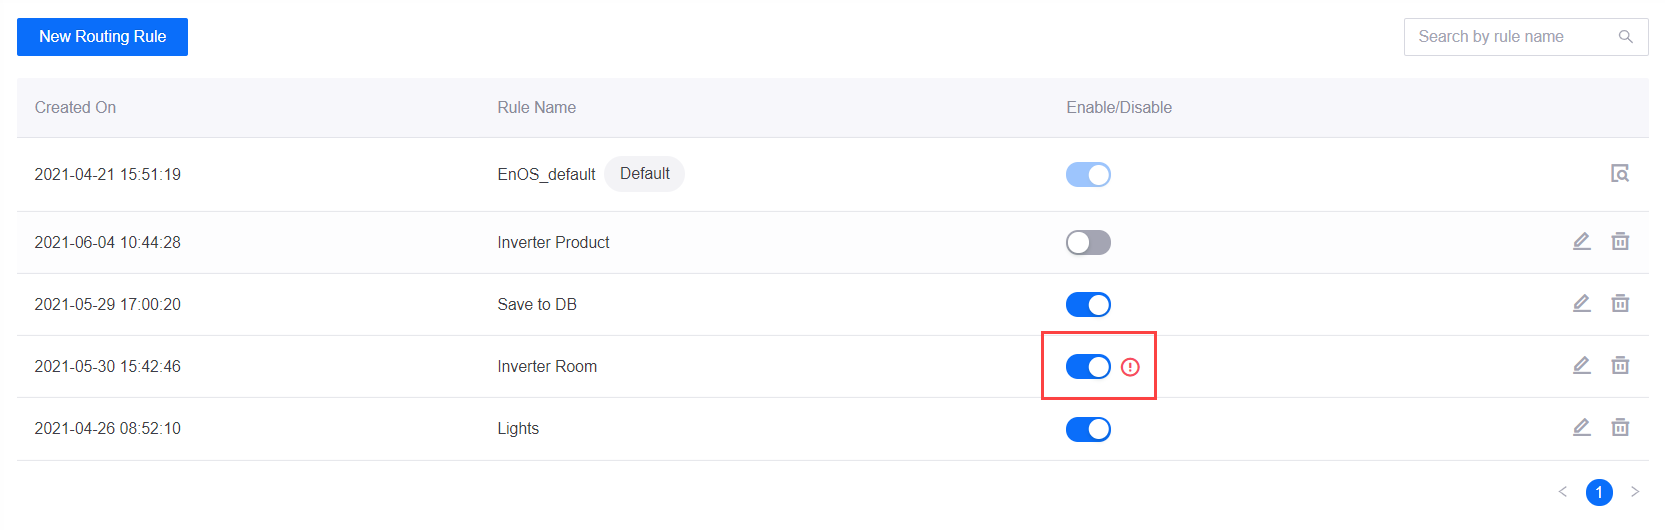
After saving an edited rule that is currently running, you need to publish it again for the change to take effect. If the rule is saved but not published, there will be an icon beside its status to indicate that the published version is not the same as the current saved version.
Publishing Rules
In EnOS Management Console, click Routing Rules from the left navigation menu.
You can use either of the two ways below to publish a rule. Publishing a rule that is not enabled will change its status to enabled immediately.
Toggle on its Enabled/Disabled switch in the Routing Rules page.
Click Edit to enter its canvas page and click the Publish icon located at the top.
Note
To ensure that the rule you are publishing is the latest version, save it first.
Viewing Rule Version History
After editing rules, you can view and roll back to any published version.
In EnOS Management Console, click Routing Rules from the left navigation menu.
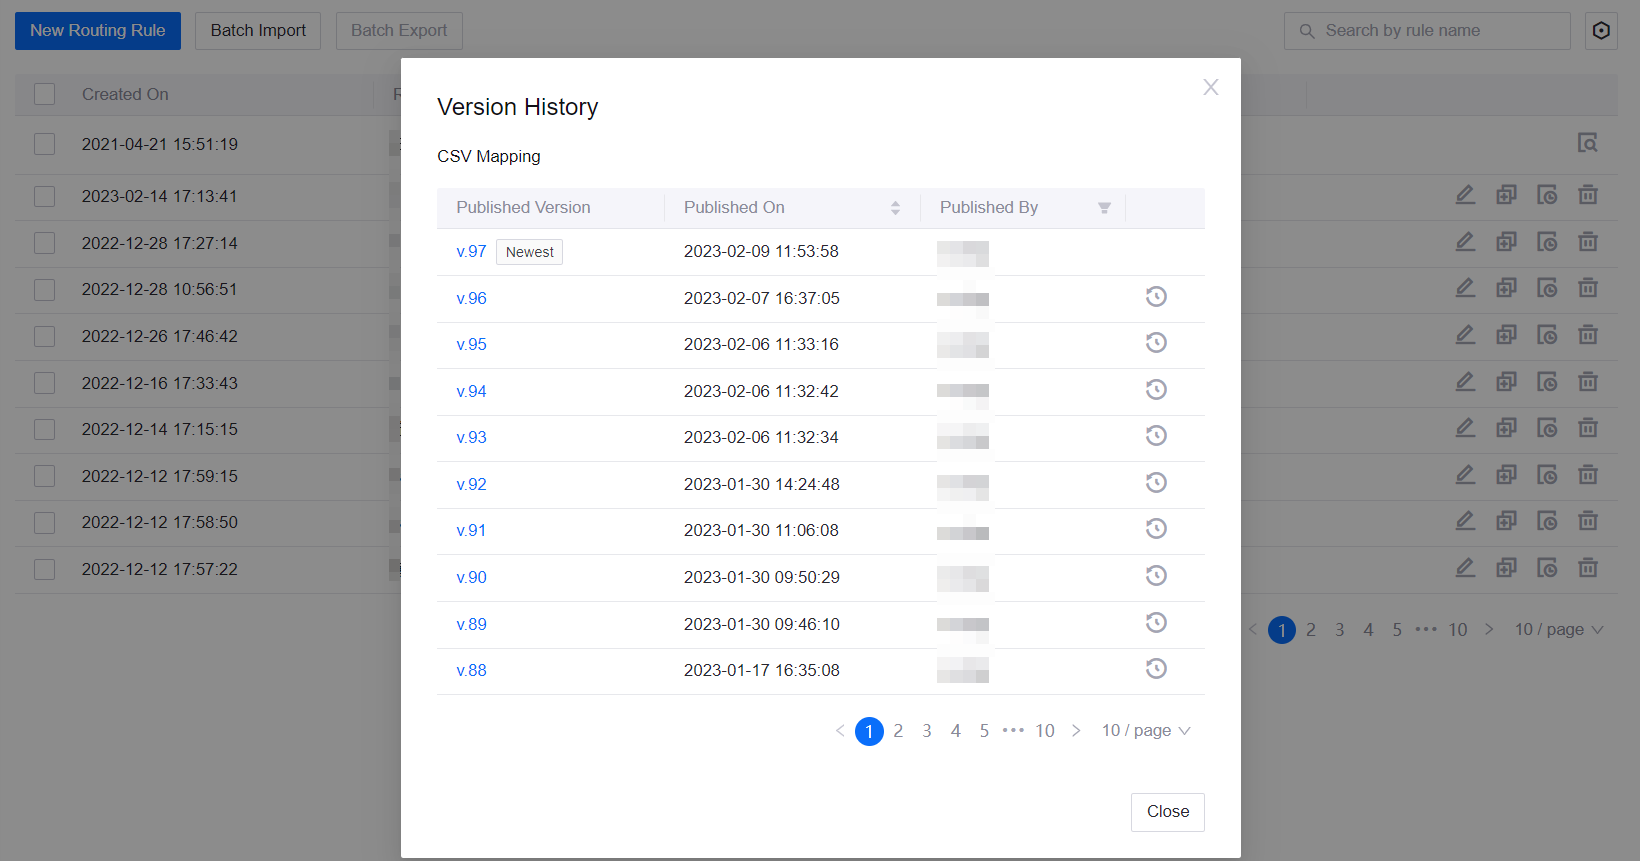
In the list of rules, select the rules you wish to export and click the View Version History button.
In the pop-up window, you can view the Published Version, Published On, and Published By of the rule. The newest version is with the tag Newest. You can roll back a rule to the version by clicking Roll Back in the pop-up window. The rule will be updated after you save and publish it.
If you roll back a rule that contains a subrule to a historical version, the subrule will also be rolled back.
If a subrule is used in more than 1 rule and one of the rule has been rolled back to a historical version, the other rules that contain the subrule need to be published again.
The files of the rule that has been rolled back will also be rolled back to the historical version.
The rules that are created by import or duplication will not contain the historical versions of the original rules.
In the pop-up window, click the version number to view the rule details.
Only viewing is supported in the historical version rule detail page.
Click Newest version to edit the newest rule.
Click Roll back to this version to edit this historical version, and the rule will be updated after you save and publish it.
Note
Before rolling back the history version, ensure that the latest version has been published, otherwise the unpublished version will be overwritten.
Configuring Runtime Resources
By default, rules run on computing resources shared by different OUs. As business grows, there is a risk of resources being taken up by each other. Requesting and enabling separate compute resources for routing rules can avoid resource congestion and facilitate rule operation and management. You can expand, shrink, or delete the requested resources for further.
Note
Before configuring runtime resources, ensure that Routing Rules Resource has been requested for your OU successfully. For more information, see Managing Resources.
In EnOS Management Console, click Routing Rules from the left navigation menu.
Click the configure
 icon in the upper right corner.
Enter the information as required in the pop-up window:
Instance: It is recommended to have a larger instance number for the OU that have more messages to increase system concurrency. The maximum number of instances for one flow is 10. The planning resource(Instance × Single Instance Resource) cannot exceed the remaining resource.
Single Instance Resource: Represents the computing resources consumed by each instance in CU. It is recommended to allocate more resources for OUs that contain rules with complicated logic as that requires more resources for computing. The maximum computing resource for a single instance is 8 CU. The planning resource(Instance × Single Instance Resource) cannot exceed the remaining resource.
Total Runtime Resource: The total amount of Routing Rules resource applied for you OU.
Remaining Resource: The remaining resources you can use for your OU.
Enable Resource: When the resources are enabled, rules will run on the configured separate resources. When the resources are disabled, rules will run on the resources shared by OUs.
When the configuration is completed, click OK.
Exporting Rules
This function enables you to batch export selected rules to individual JSON files which will be zipped together for easy downloading.
In EnOS Management Console, click Routing Rules from the left navigation menu.
In the list of rules, select the rules you wish to export and click the Batch Export button.
Save the file to your local directory.
Importing Rules
This function enables you to batch create new rules. The file to be uploaded should be a ZIP file containing one or more JSON files, with each JSON file corresponding to one rule.
In EnOS Management Console, click Routing Rules from the left navigation menu.
Click the Batch Import button.
Upload the ZIP file. It should not exceed 2MB.
Once successfully imported, the rules will appear in the list of rules with the Enable/Disable toggle switch disabled. Edit the rule to enable it.
Copying Rules
This function enables you to easily create a new rule from an existing rule. This is useful if you need to create a new rule that is similar to an existing rule as you can just copy the existing rule and modify the rule instead of creating from scratch.
In the list of rules in the Routing Rules page, find the rule you wish to copy.
Click the Copy icon and enter a name for it in the pop-up window.
Click OK to copy it and it will appear in the list of rules at the Routing Rules page with the Enable/Disable toggle switch disabled. Edit the rule to enable it.
Deleting Rules
In the list of rules in the Routing Rules page, find the rule you wish to delete.
Click the Delete icon. Data related to the flow will also be deleted if you delete the flow. If you are sure that you wish to delete it, click Delete.
Viewing Logs
Node logs show the input and output msgs and the status of the nodes.
In EnOS Management Console, click Routing Rules from the left navigation menu.
In the list of rules, find the one you wish to view its nodes logs for and click Edit.
Click the node you wish to view the log of and click its Log tab.
Select a date range, the status (Success, Error, Stopped, or All for all three statuses), and click Search.
The results, if any, will be displayed below.
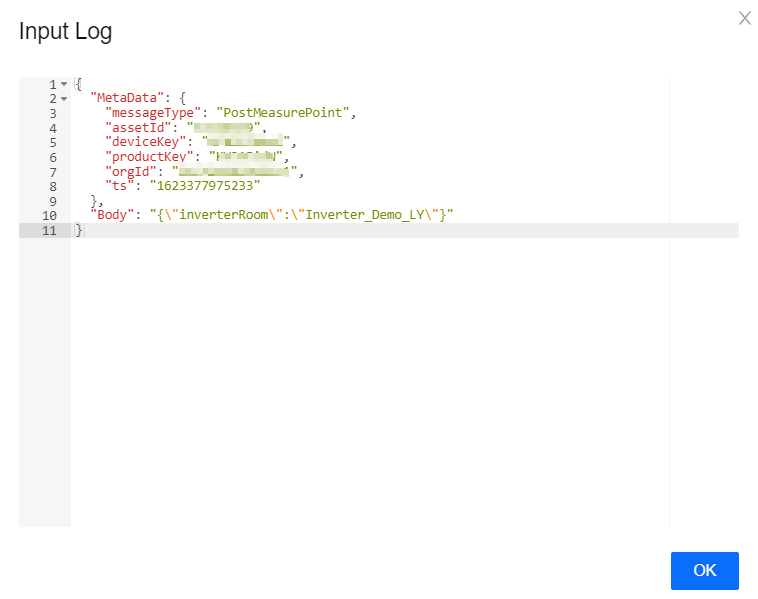
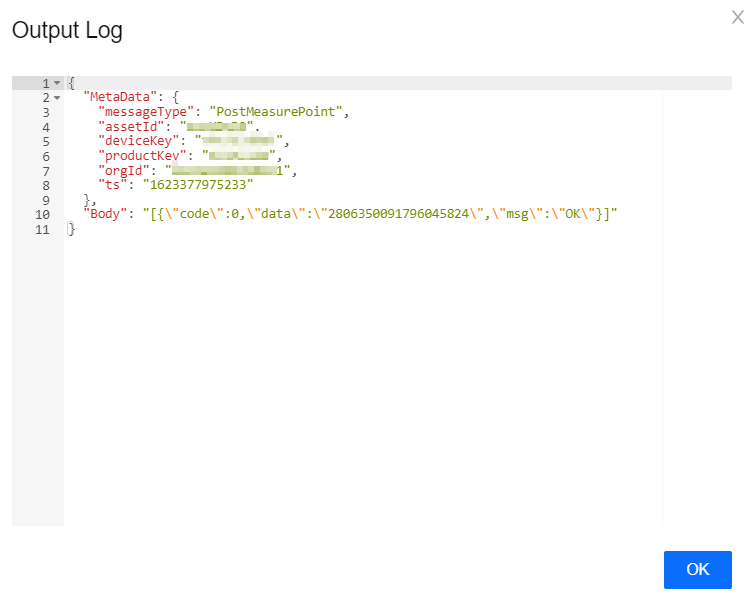
Click View under Input or Output to view the node’s input and output msg respectively, as well as its metadata.