Deploying Application Instances through Canary Deployment
When upgrading applications to a new version, grayscale release can reduce the risk of application release and ensure a smooth transition of application versions. The grayscale strategy is a canary release, leveraging Istio’s traffic control capabilities to drive some of the new release traffic to customers, gradually increasing the percentage of traffic sent to the new release until it is determined that the new release is stable and available, and routing all traffic to the new release.
Canary Deployment Chart Specification
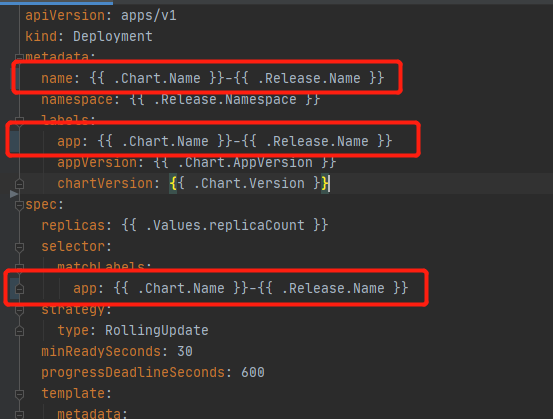
All resource filenames and App tags in the Chart of grayscale service are named as {{ .Chart.Name }}-{{ .Release.Name }} in order to separate the official and grayscale resources. Therefore, references between resources within the same SubChart need to be based on this name as well. For example, Deployment refers to Secret and Configmap, etc. Release.Name }} is a combination of the release name and the parent chartVersion, i.e. the chartVersion is different to isolate the grayscale version and the official version of the two sets of resources. The following are only three special resources, Deployment, Ingress and Service, for example, other resources only need to strictly follow the naming of the above resource names and App tags.
Deployment Resource File Preparation
Deployment resource names, App tags in labels, and App tags in Selector are named: {{ .Chart.Name }}-{{ .Release.Name }}.
Note
It is recommended that there be only one App tag in the Selector, and if there are other tags, these tags cannot be changed subsequently.
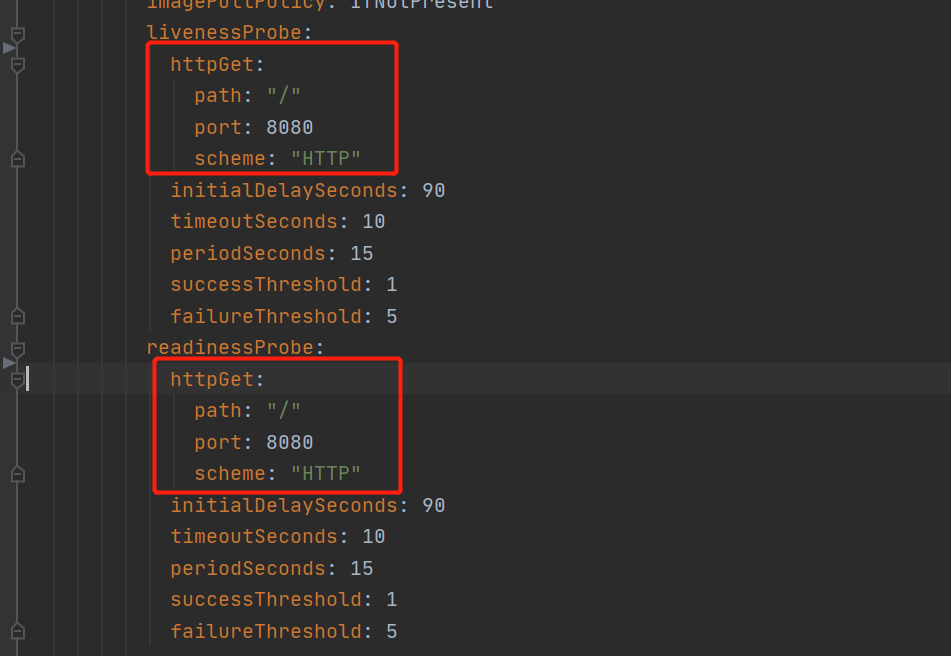
The service health check method needs to use all http methods because the underlying grayscale deployment relies on Istio, and the use of Istio disables the TCP method of health check. The http health check method is as follows.
Ingress Resource File Preparation
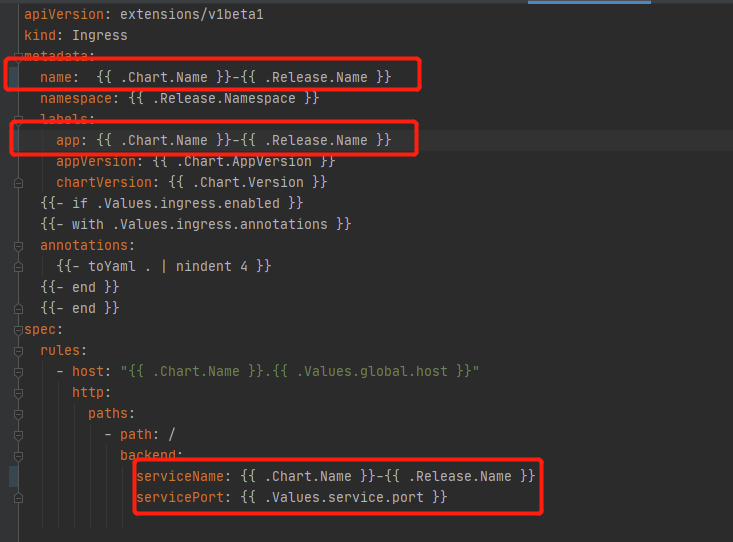
All filenames and App tags are named as: {{ .Chart.Name }}-{{ .Release.Name }} .
Note
The grayscale rule reads the port information from the Ingress resource in each SubChart and is used to implement fixed domain access.
If there are multiple ports, only the first port will be resolved and validated, resulting in some ports being unavailable. If you need to validate multiple ports, you can do so with the advanced features of grayscale deployment (write your own istio-related yaml file).
During grayscale, if the hosts in two Ingress resources are the same, it will cause Ingress not to take effect, so it cannot be accessed using Ingress’ host, but only through Istio’s domain name.
Each subservice of the grayscale deployment can only be accessed by means of a fixed domain name if the Ingress file exists and is written according to the above rules; otherwise, each subservice cannot be accessed by means of a fixed domain name.
Service Resource File Preparation
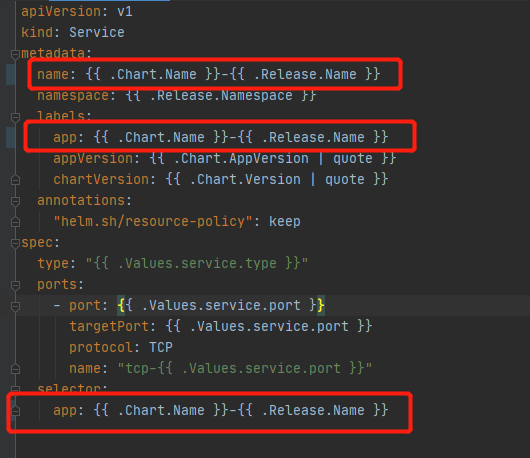
All filenames and App tags are named as: {{ .Chart.Name }}-{{ .Release.Name }} .
Note
For fixed svc access, the grayscale deployment rules read the port information from the service resource in each SubChart. If you need multiple ports and access to different ports based on different paths, you can use advanced grayscale rules (write your own yaml file with the corresponding istio rules).
For example, a grayscale deployment service in a beta environment with a subservice chart name: ecp-log-service under the op namespace, then the service’s svc access method is fixed to: ecp-log-service.op.svc.cluster.local .
Note
The prerequisite for using fixed svc access is the existence of the corresponding Service resource file for the subservice in the chart. After the chart is added to the gray deployment whitelist, if the chart has been deployed normally in the cluster, it needs to be upgraded and deployed normally once again before it can be accessed by the fixed svc method mentioned above.
Deploying Application Instances through Canary Deployment
Follow the steps below to deploy a template as an application instance.
Select your organization from the Organization menu.
Select the created project from the Project menu.
Select App Hub > Catalog from the left navigation.
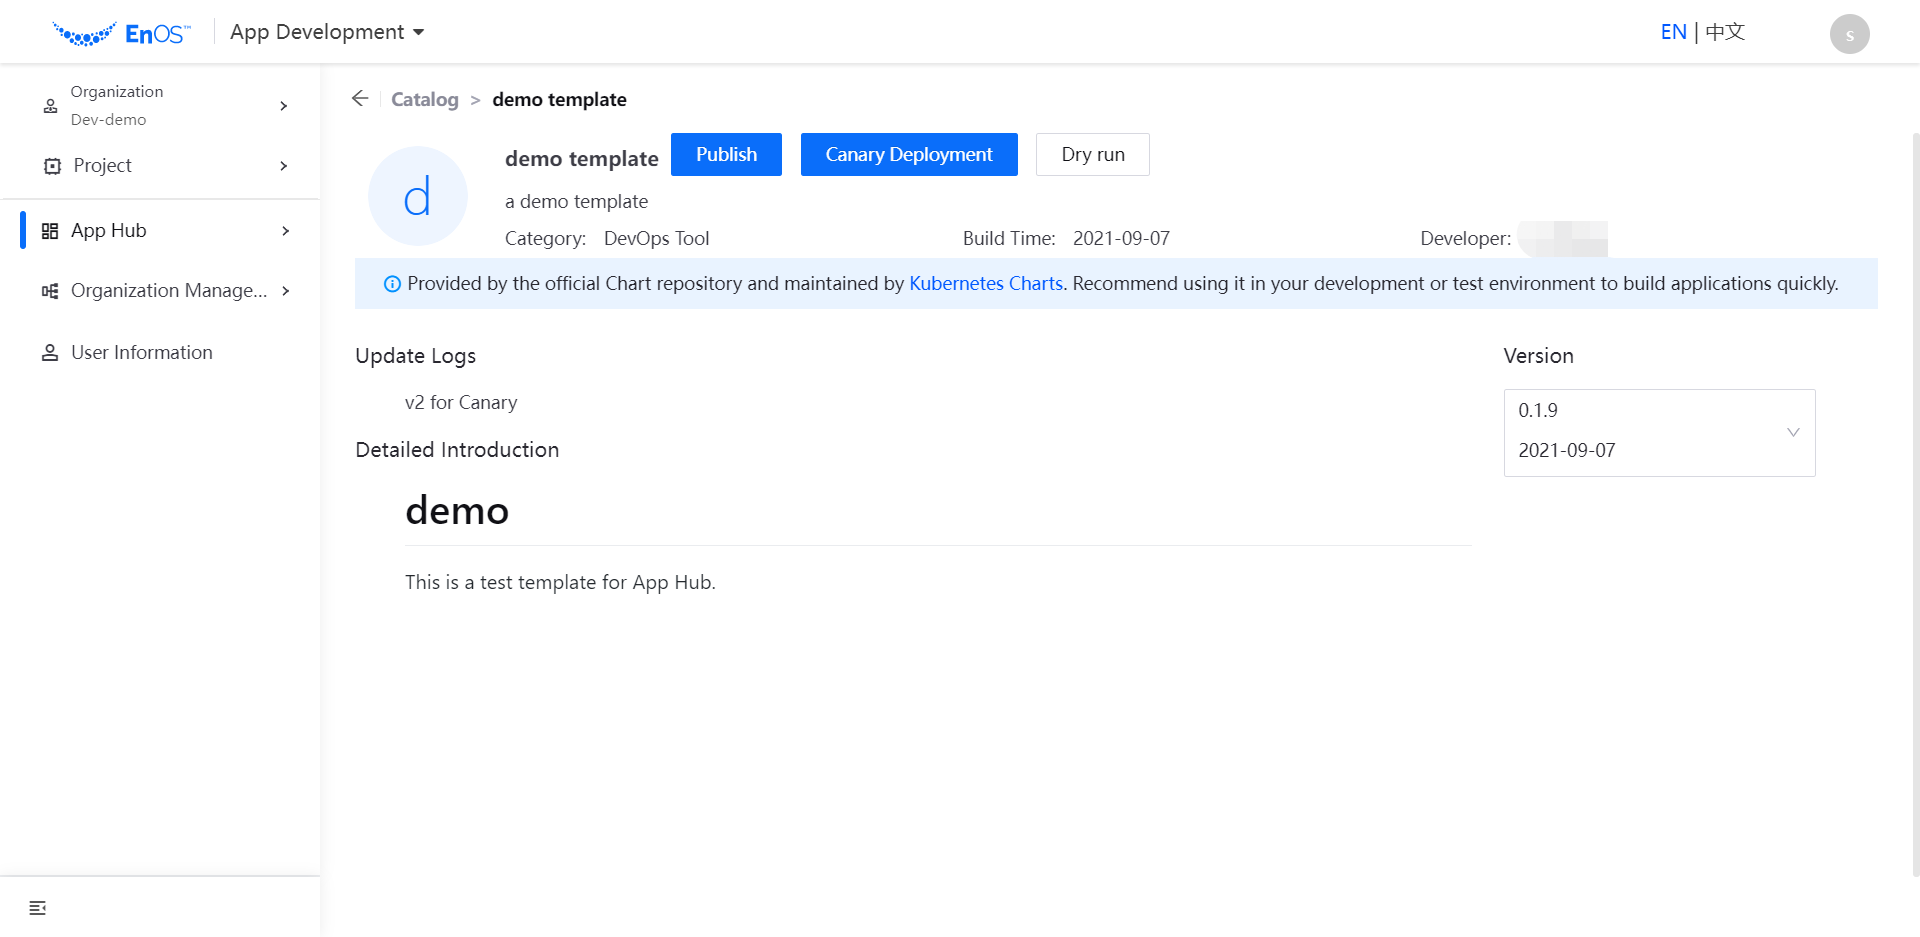
The online application templates are listed under each category. Click the one to be used for deployment to go to its details page.
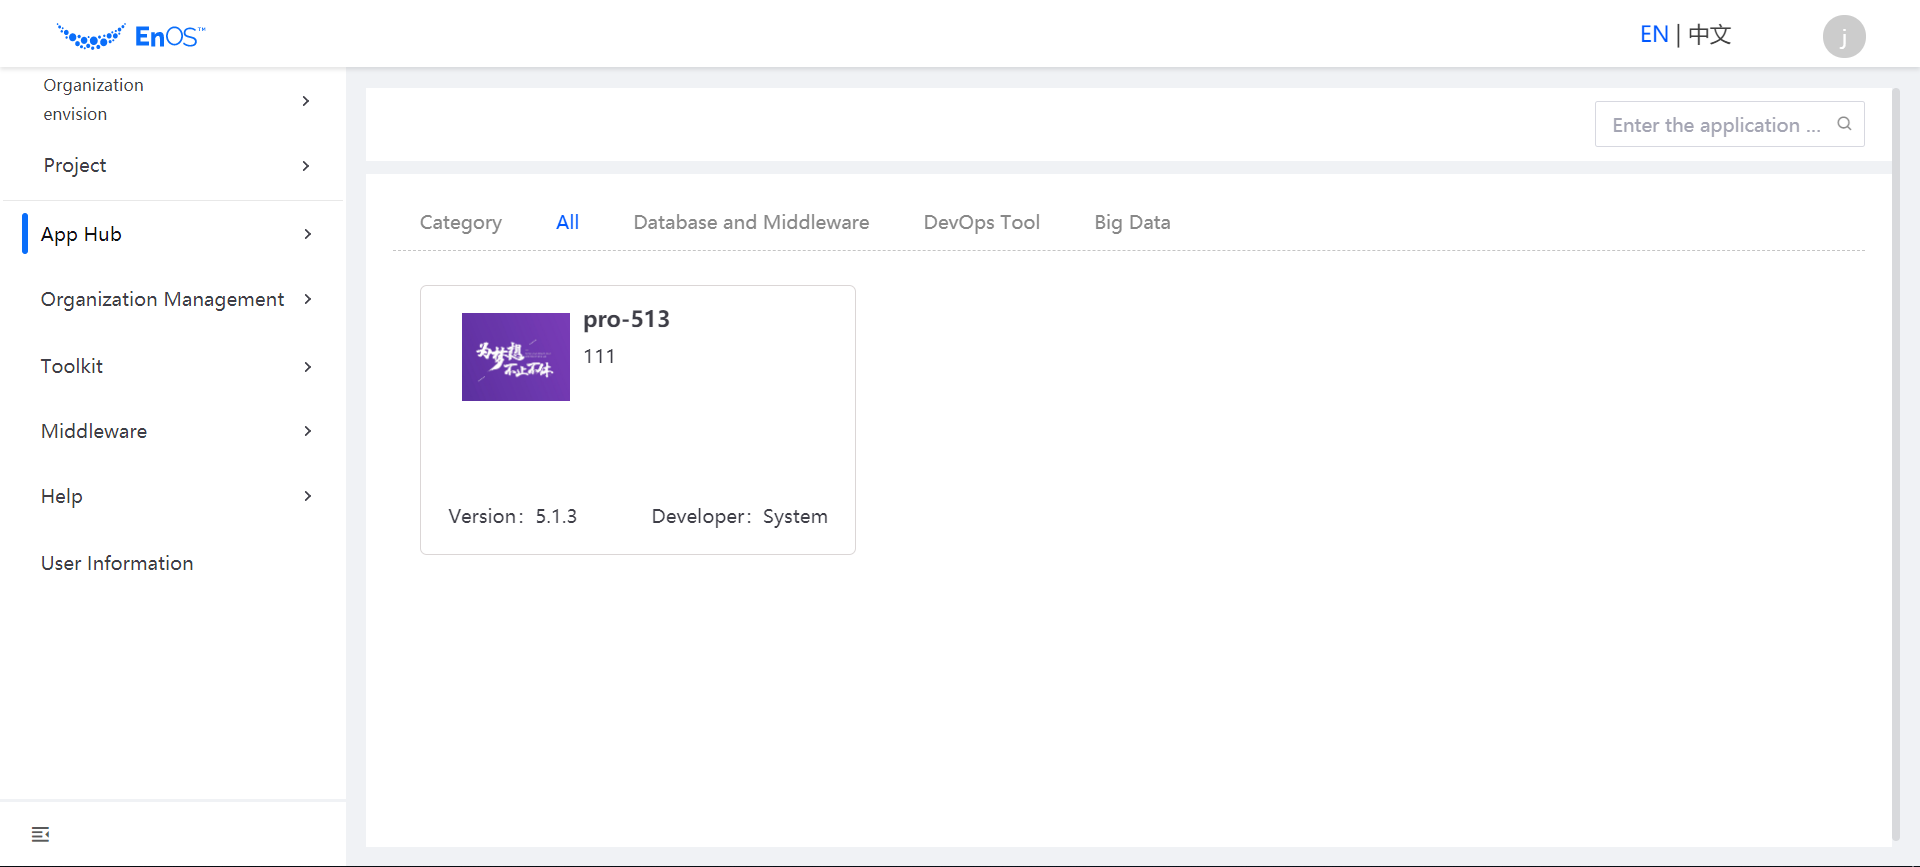
View the application template details, select the version of the template you need to deploy, and click Canary Deployment.
Note
Only application templates that are in the template whitelist are supported for grayscale publishing. To apply, please contact the system administrator.
On the Publish Information page, select the project, environment, cluster, and older version to be overwritten for the application instance to be deployed.

Click Next Step to go to the Canary Deployment Policy page, Select By Flow Ratio or By Request Header for publishing policy configuration.
By Flow Ratio:Select the traffic ratio of the old and new versions.
By Request Header:Exact match, prefix match and regex match are supported. For more information about regex match syntax, see Syntax.
Click Submit to complete the grayscale release.
Switching versions after grayscale release
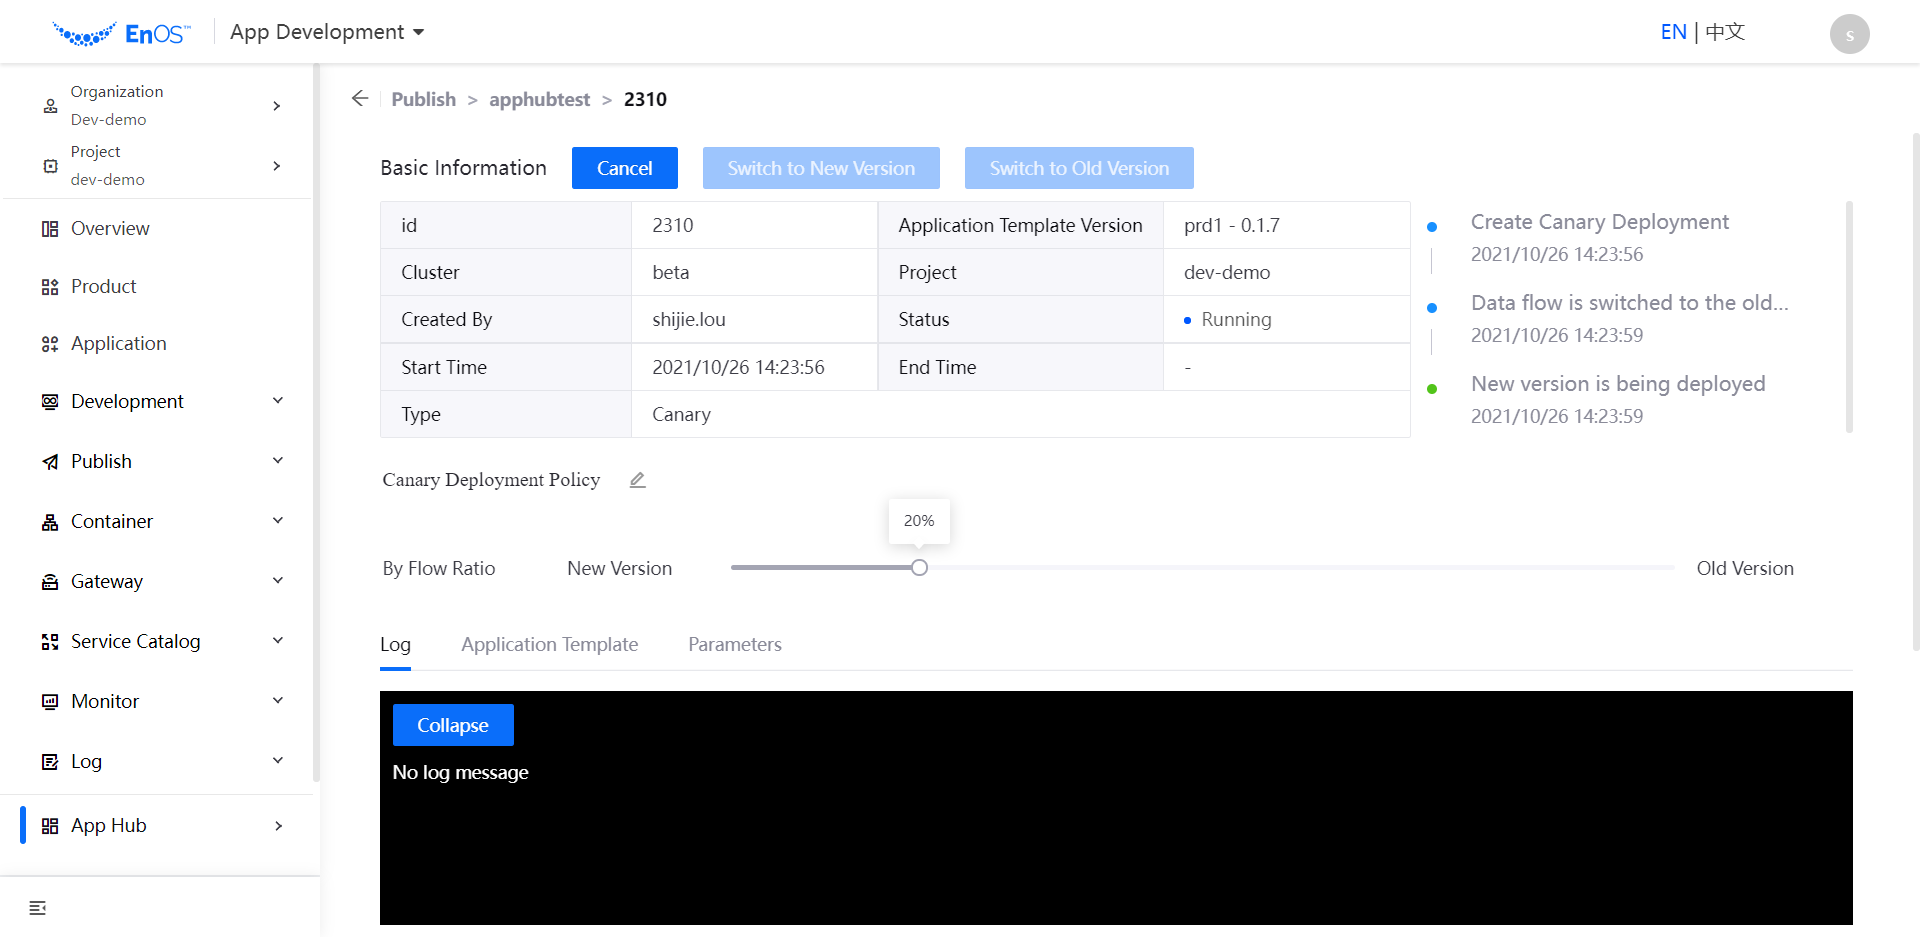
You can click Switch to New Version or Switch to Old Version on the deployment details page to direct traffic entirely to the new/old version.
Cancel Application Publish
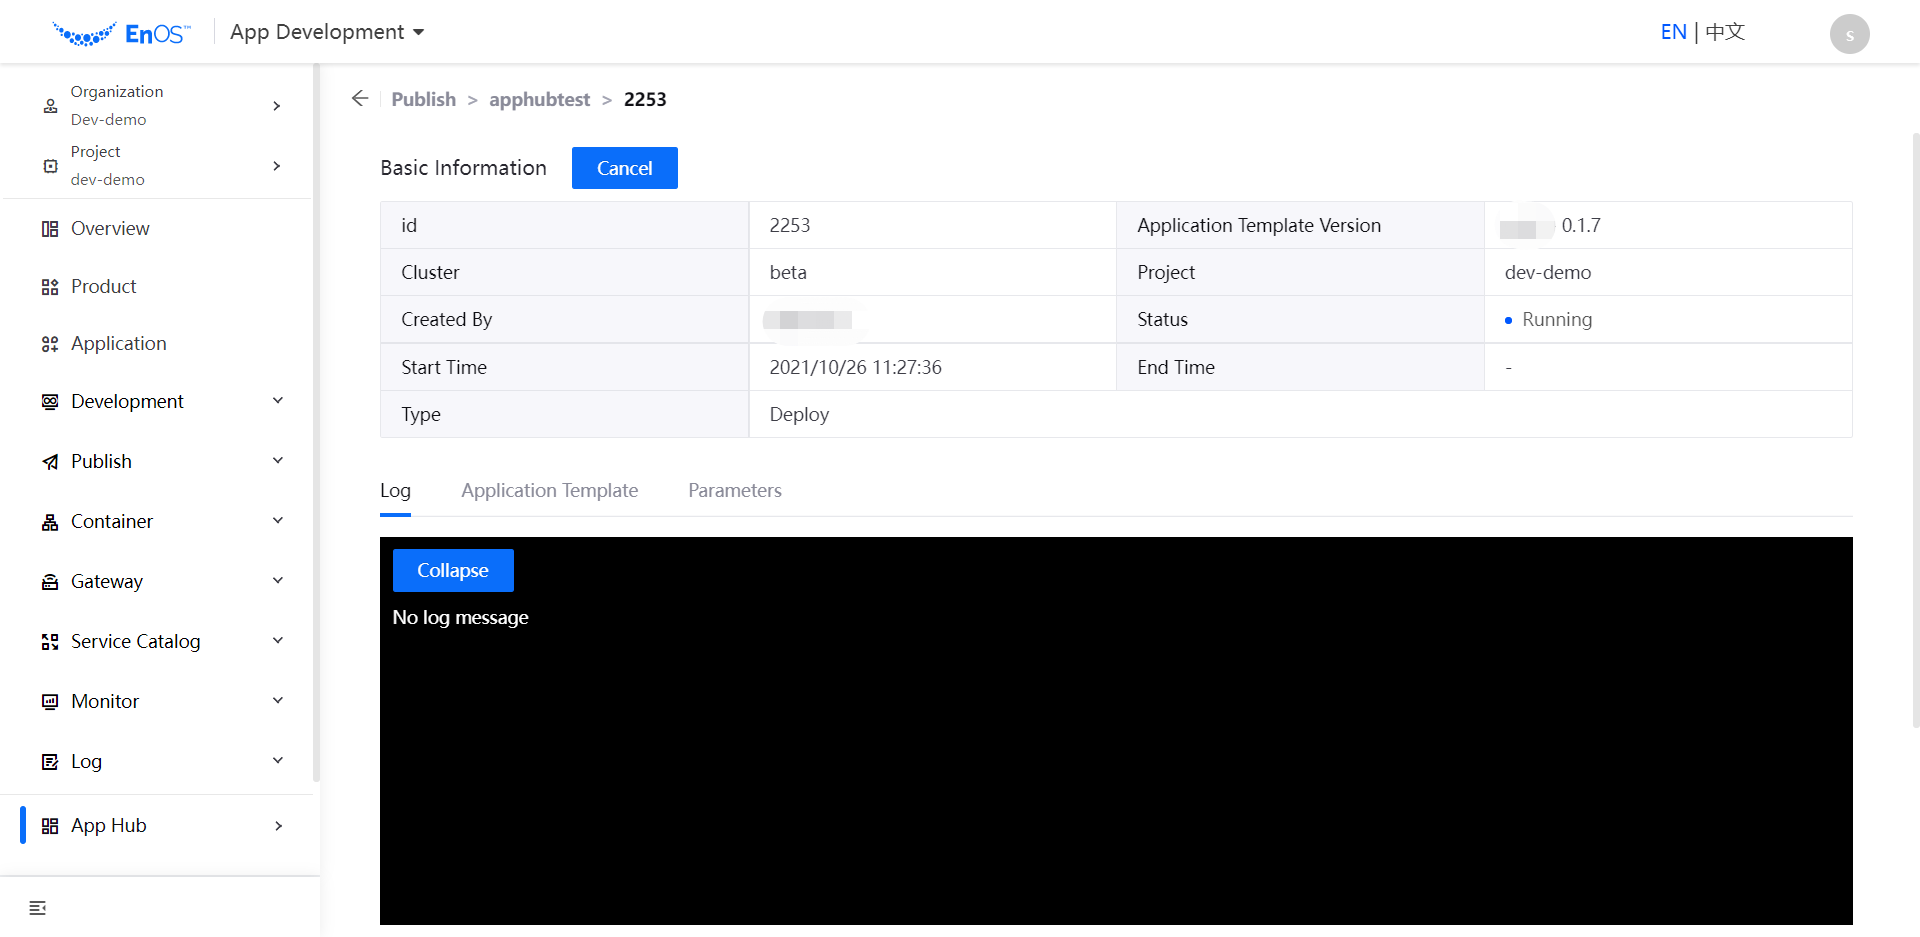
When the release status is still Running, you can cancel the release by clicking Cancel on the publish details page.
Viewing the Deployed Application Instance
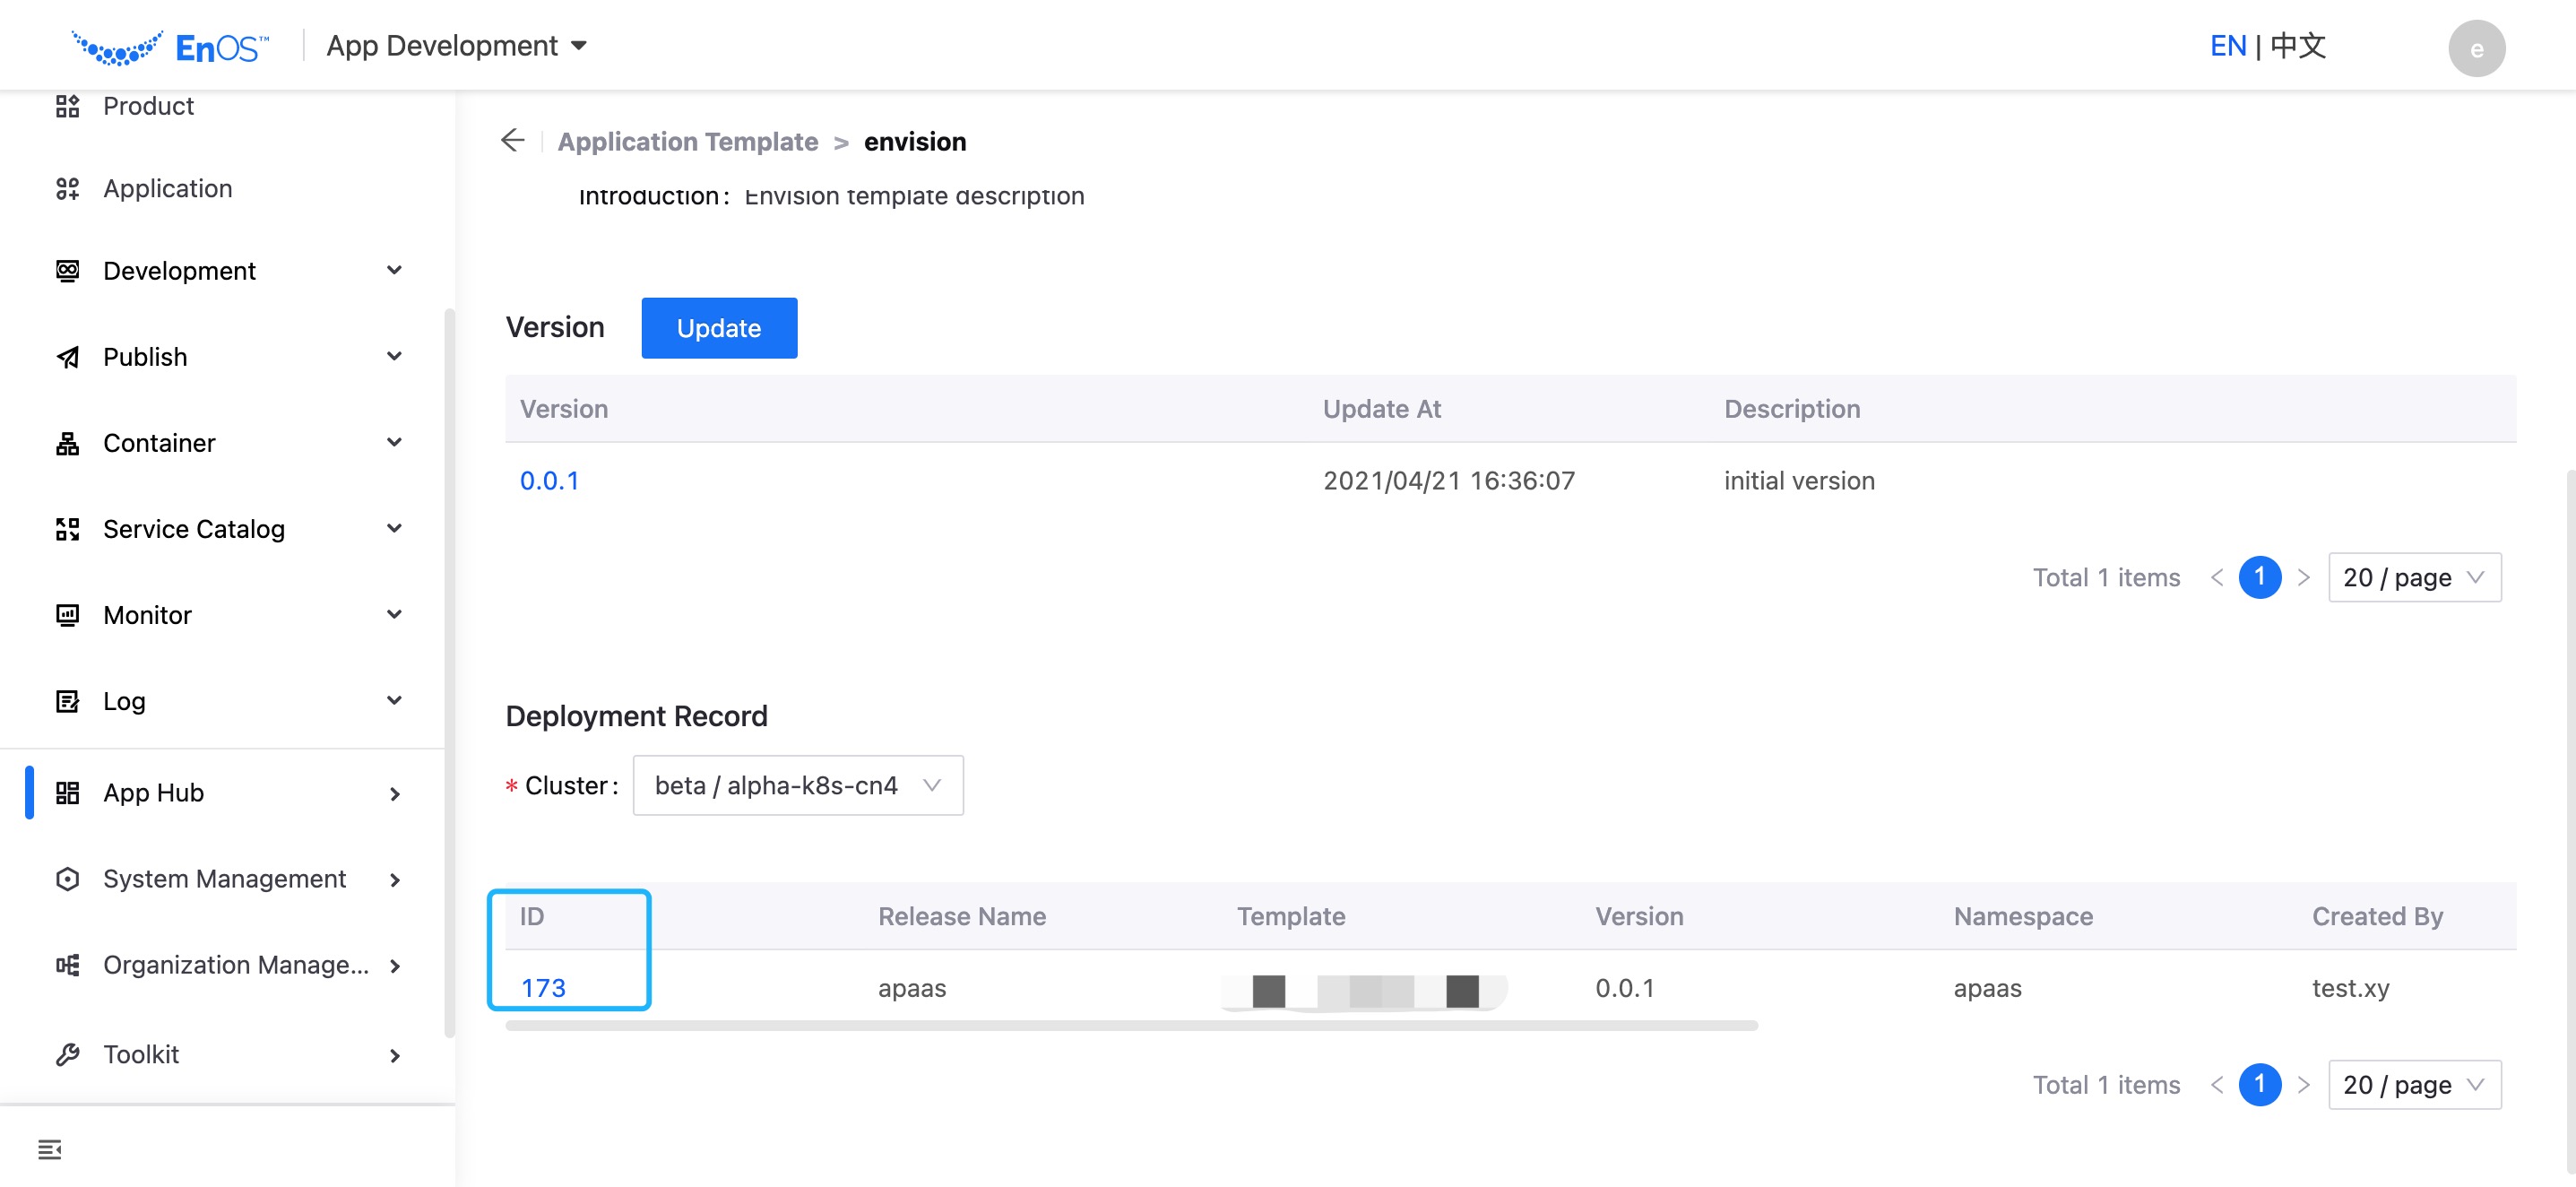
After an application instance is deployed, you can view the details of the instance through the Deployment Record section on the App Hub > Template details page.
In the application template list, click the name of the application template to open the application template detail page.
In the Deployment History section, view the details of the application instance and all records of the application deployed in different clusters.
