Getting Started
This section helps you quickly build and deploy an application, publish the application to a specified cluster, and test the application by using the EnOS ECP.
Scenario
An application named uic for querying personnel information in the organization has been developed. The source code of the application is stored in GitLab. You need to publish the application to the beta cluster with EnOS ECP, and then test using the application to query the personnel information.
About this Task
You will complete the container configuration for the uic application, create a pipeline for it, publish it online, and then use it to query personnel information. The steps include configuring the deployment, service, and route for the application, creating the pipeline with build, code scanning, and deployment tasks, and running the pipeline.
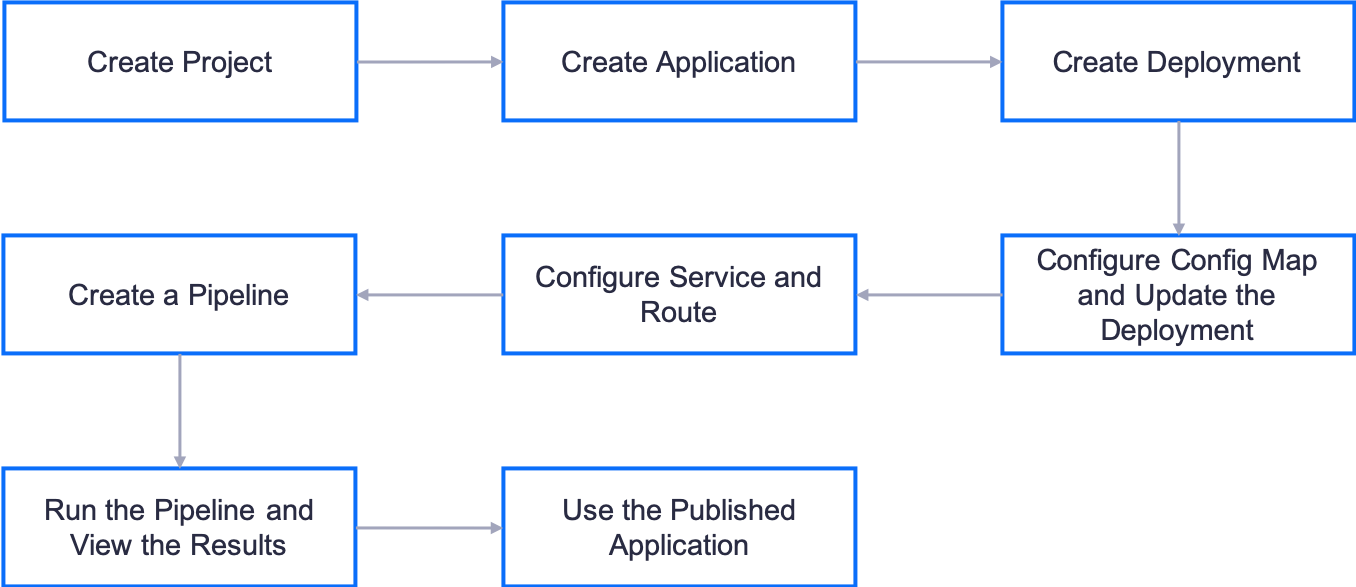
Based on the above, the process of publishing an application is shown in the following figure.
Prerequisites
An application development project has been created in EnOS ECP. - An application named uic has been created, and the application code is stored in the GitLab repository.
You are a member of the application development project and have development permission for the uic application. For more information about role and permission, see Managing Projects and Applications.
Step 1: Configure Deployment
In this step, create an application deployment for the uic application and complete the detailed resource configuration.
Log in to the EnOS Management Console and select Enterprise Container Platform in the left navigation menu.
Select your organization from the Organization menu.
Select the created project from the Project menu.
Select Container > Deployments from the left navigation.
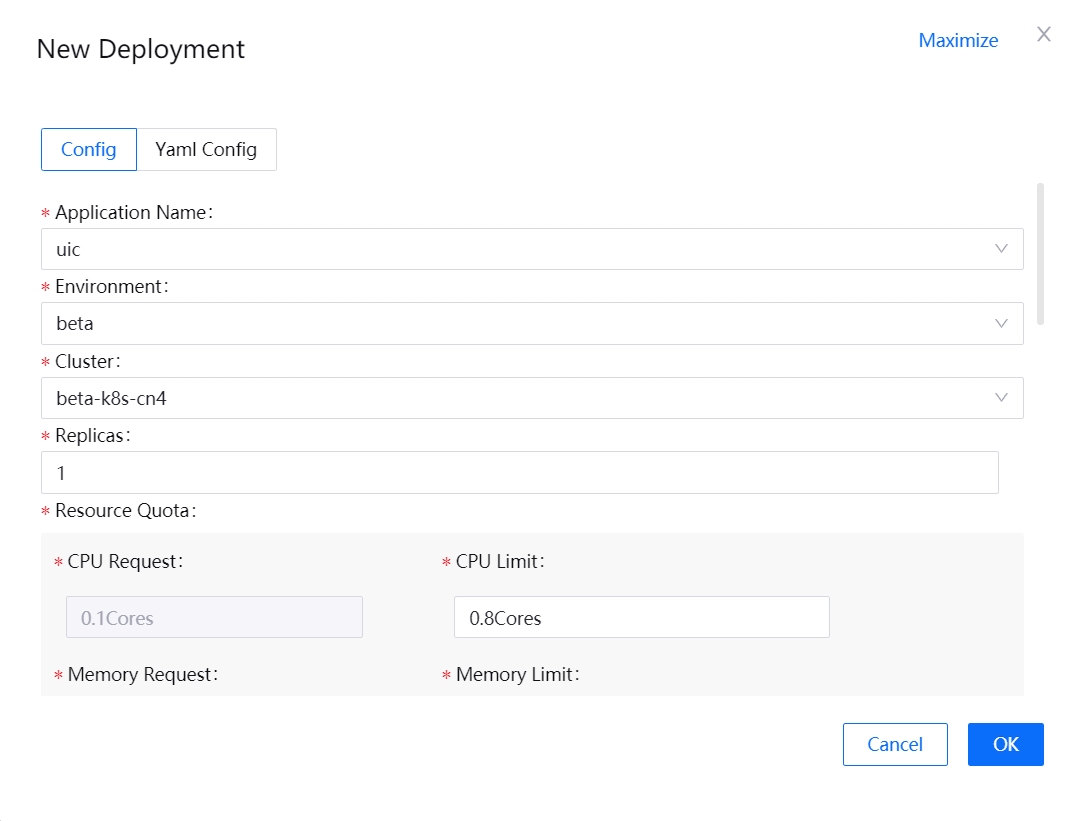
Click New Deployment, select Config mode, and provide the following deployment configuration information:
Application Name: uic
Environment: beta
Cluster: beta-k8s-cn4
Replicas: 1
CPU Limit: 0.8
Memory Limit: 0.5
Readiness Probe: + Add
Timeout: 120
Period: 2
Retry Times: 3
Initial Delay: 20
Handler: tcpSocket; TCP Port: 8080
Minimum Ready Seconds: 30s
Description: Deployment configuration for application uic in beta environment
Click the OK button to save the deployment configuration.
Step 2: Configure Config Map and Update the Deployment
In this step, create the Config Map configuration for the uic application and update the deployment configuration created in Step 1.
Select Container > Config Maps.
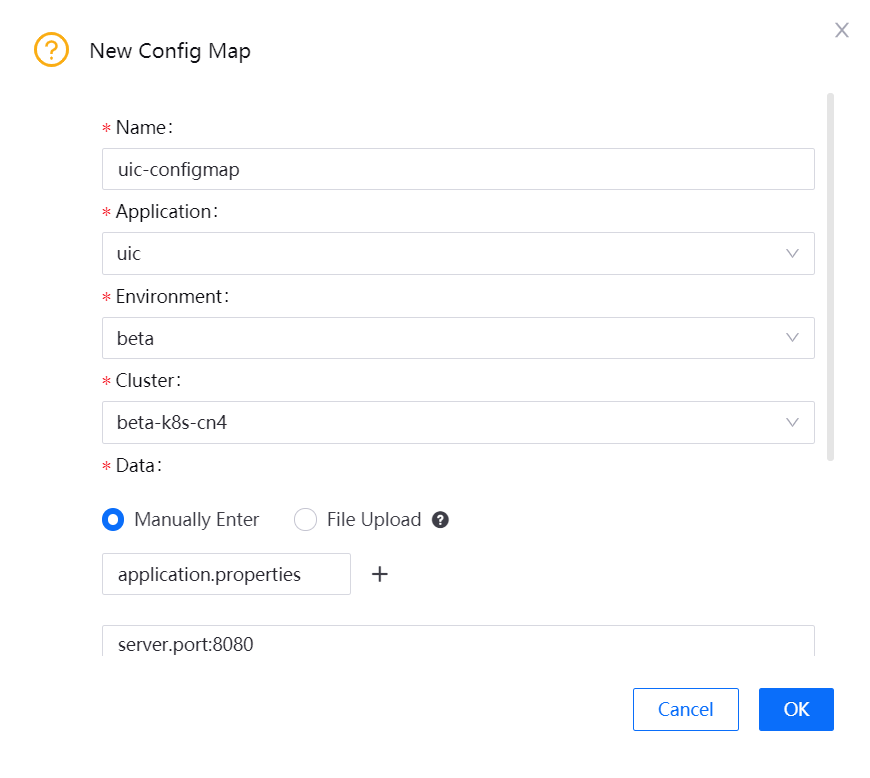
Click New Config Map and enter the following information.
Name: uic-configmap
Application: uic
Environment: beta
Cluster: beta-k8s-cn4
Data (Manually Enter): Key - application.properties; Value - the content of the application.properties file
Description: Config Map for application uic in beta environment
Click the OK button to save the config map configuration.
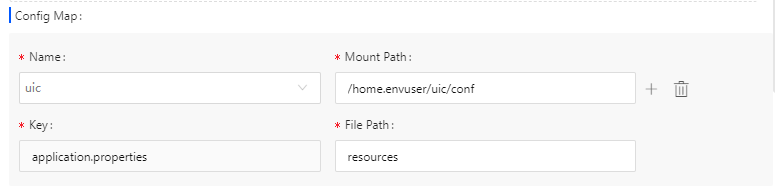
Click Deployments in the navigation bar, select the deployment configuration created in Step 1, and then click the Edit button.
Fill in the details of the Config Map in the deployment configuration as shown below.
Step 3: Configure Service and Route
In this step, create the service and route for the uic application so that it can open the Web services to those outside the cluster.
Select Container > Services.
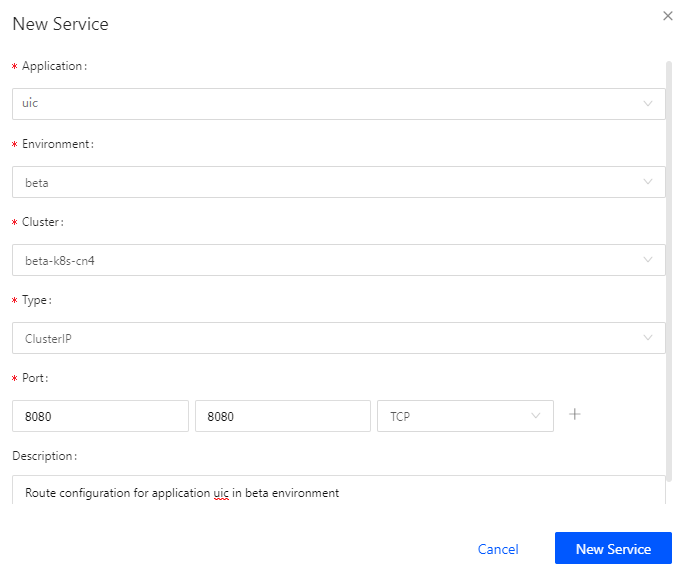
Click the New Service button and enter the following information.
Application: uic
Environment: beta
Cluster: beta-k8s-cn4
Type: ClusterIp
Port: 8080, 8080, TCP
Description: Service configuration for application uic in beta environment
Click the OK button to complete the service configuration.
At the Enterprise Container Platform section, select Container > Routes.
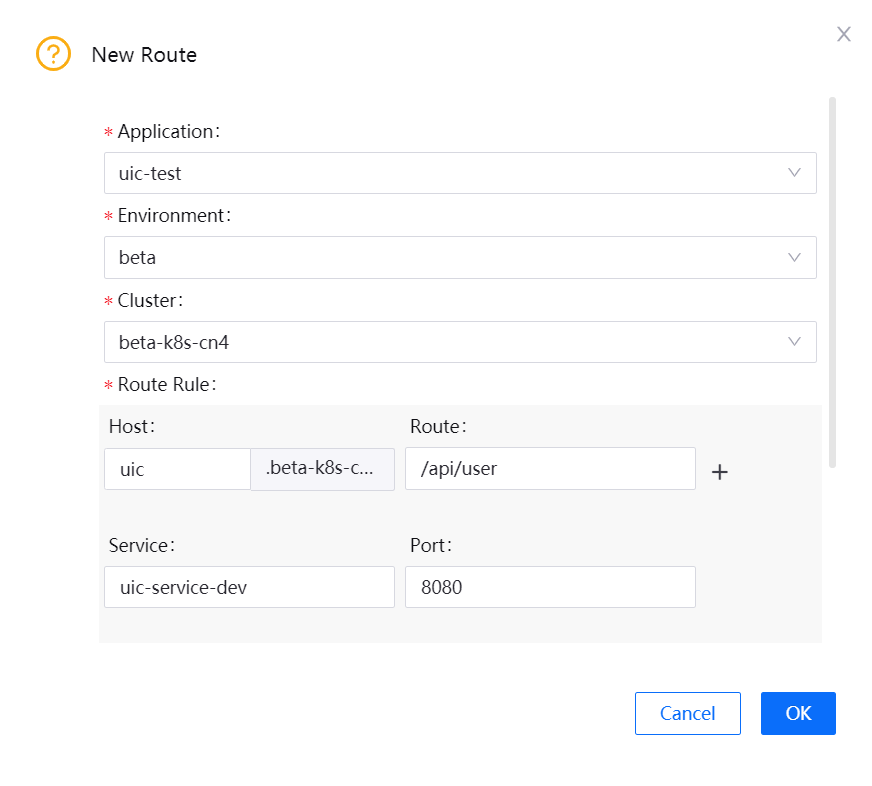
Click the New Route button and enter the following information.
Application: uic
Environment: beta
Cluster: beta-k8s-cn4
Host: uic
Route: /api/user
Service: uic-service-dev
Port: 8080
Description: Route configuration for application uic in beta environment
Click the OK button to complete the route configuration.
Step 4: Create a Pipeline
In this step, create the pipeline for the uic application. A pipeline consists of the basic information, stages, and jobs.
Configure the Basic Information
Select Development > Pipeline.
Click the New Pipeline button and enter the following basic information.
Application Name: uic
Pipeline Name: uic-pipeline-dev
Language/Version: java_1.8.0
Tool: maven_3.3.9
Triggering Mode: Manual

Configure the Stages
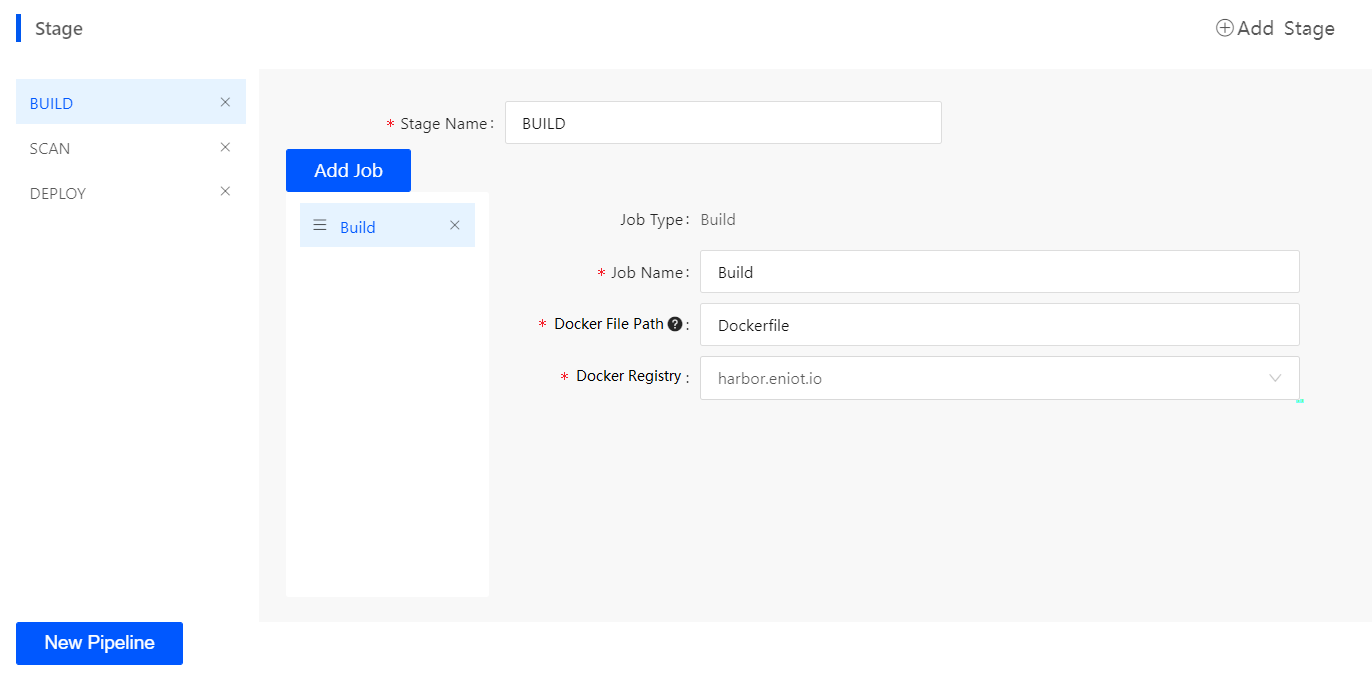
Select the BUILD stage, and enter the following information.
Job Name: Build
Docker File Path: Dockerfile
Docker Registry: harbor.eniot.io
Select the SCAN stage, and enter the following information.
Job Name: Sonar Scan
Source Code: src/main/java
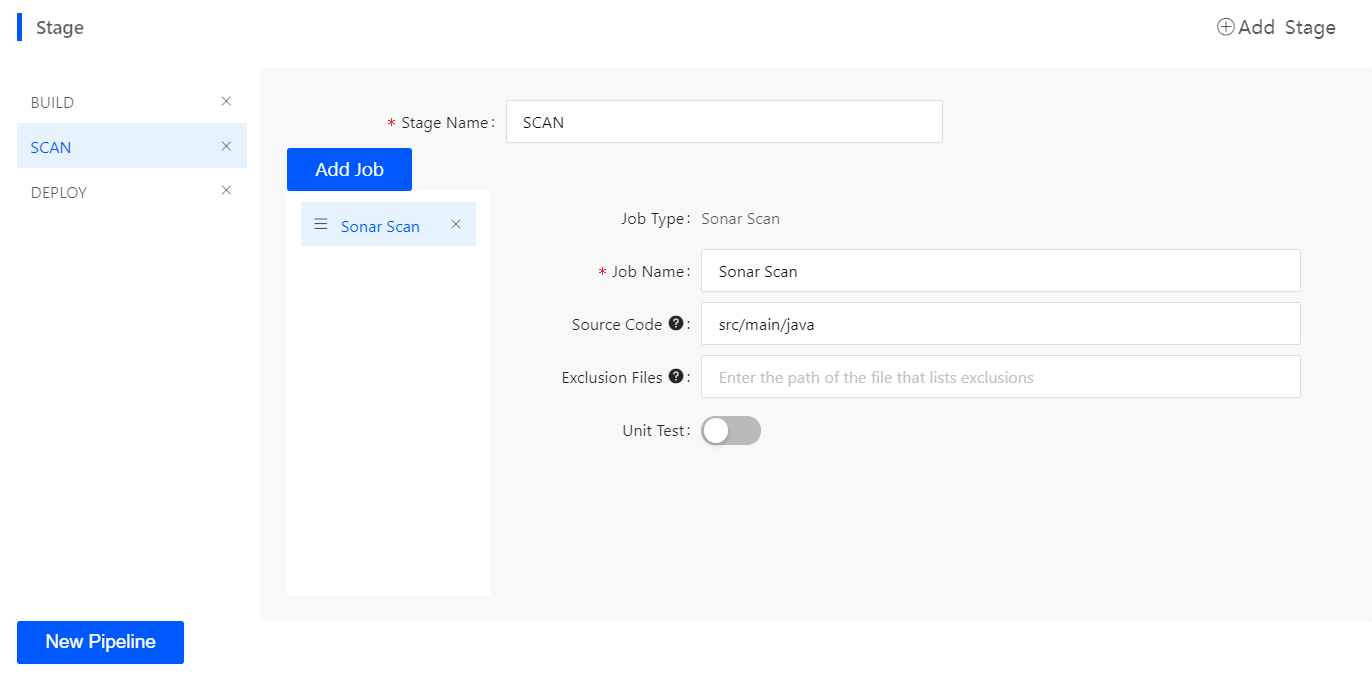
Note
For a detailed description for build and code scan rules, see Creating Pipelines.
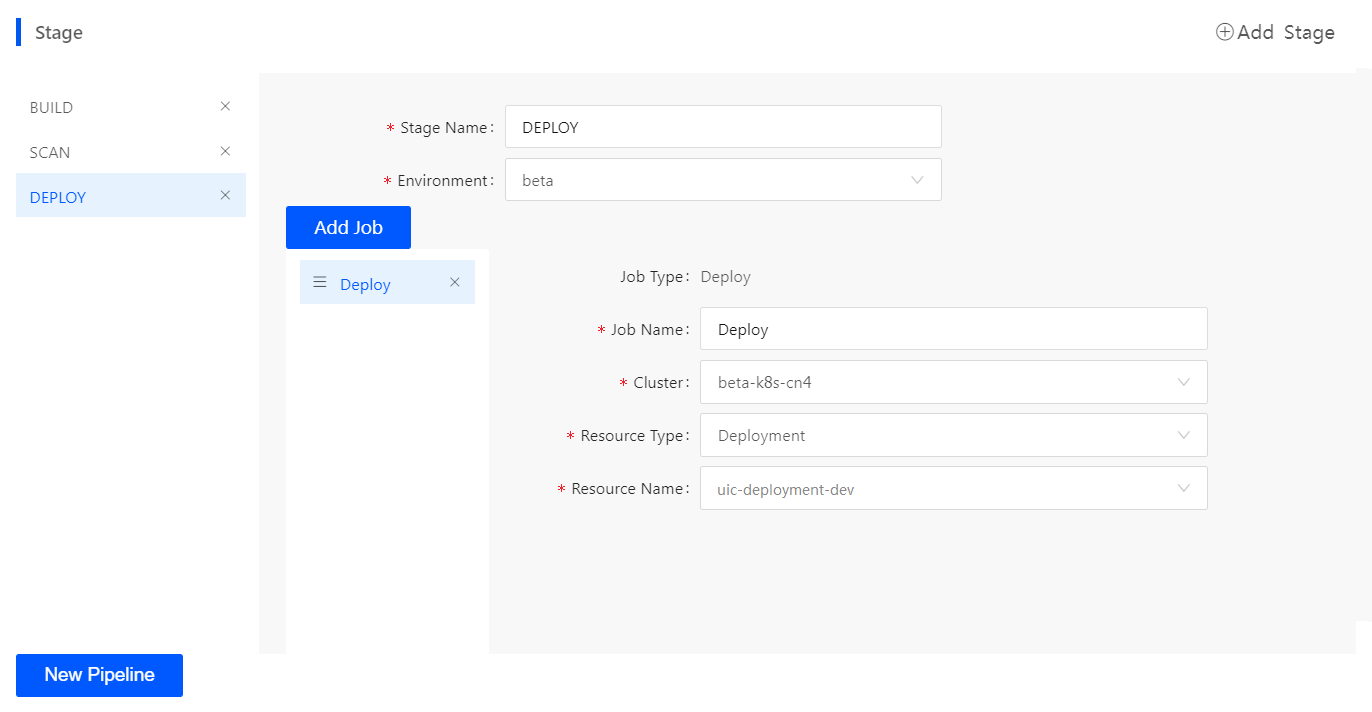
Select the DEPLOY stage, and enter the following information.
Environment: beta
Job Name: Deployment
Cluster: beta-k8s-cn4
Resource Type: Deployment
Resource Name: uic-deployment-dev
Click the New Pipeline button to save the pipeline configuration.
Step 5: Run the Pipeline and View the Results
In the list of pipelines, click the created pipeline uic-pipeline-dev to open the pipeline details page.
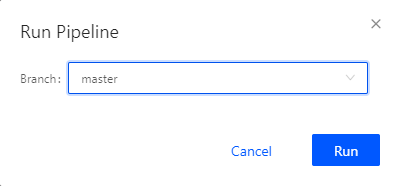
Click the Run button, select the GitLab branch, and click Run.
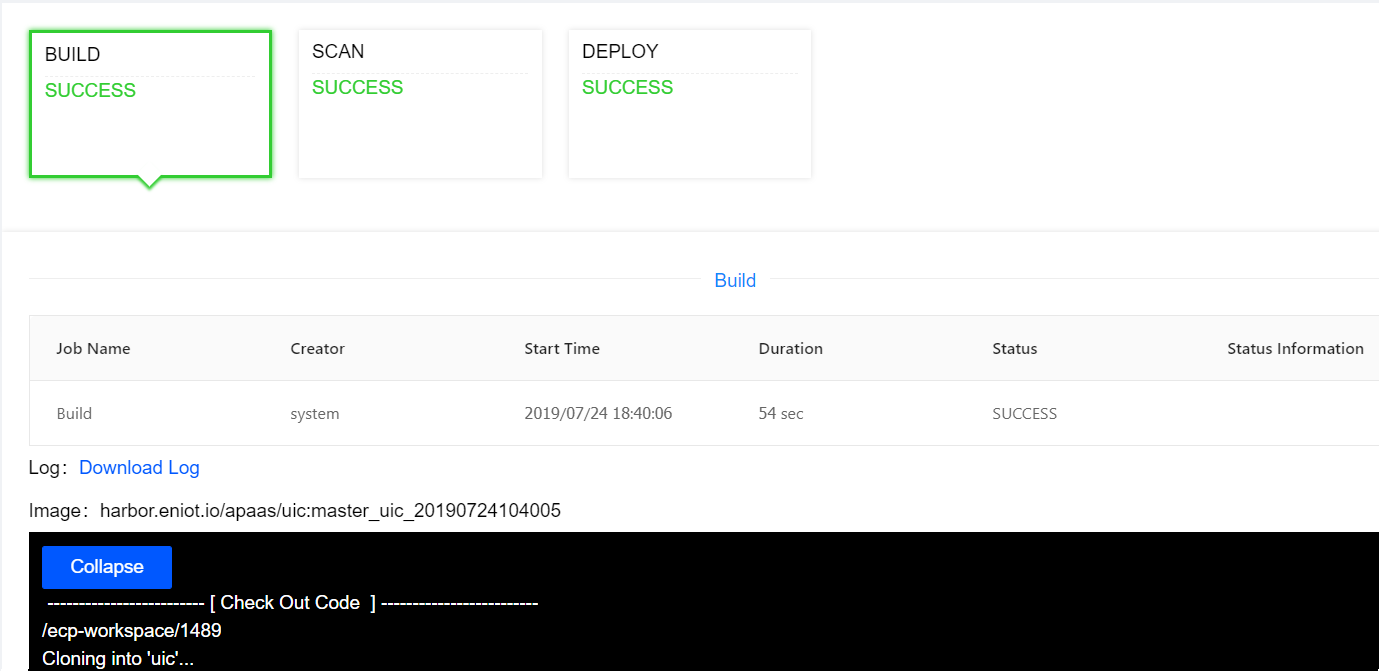
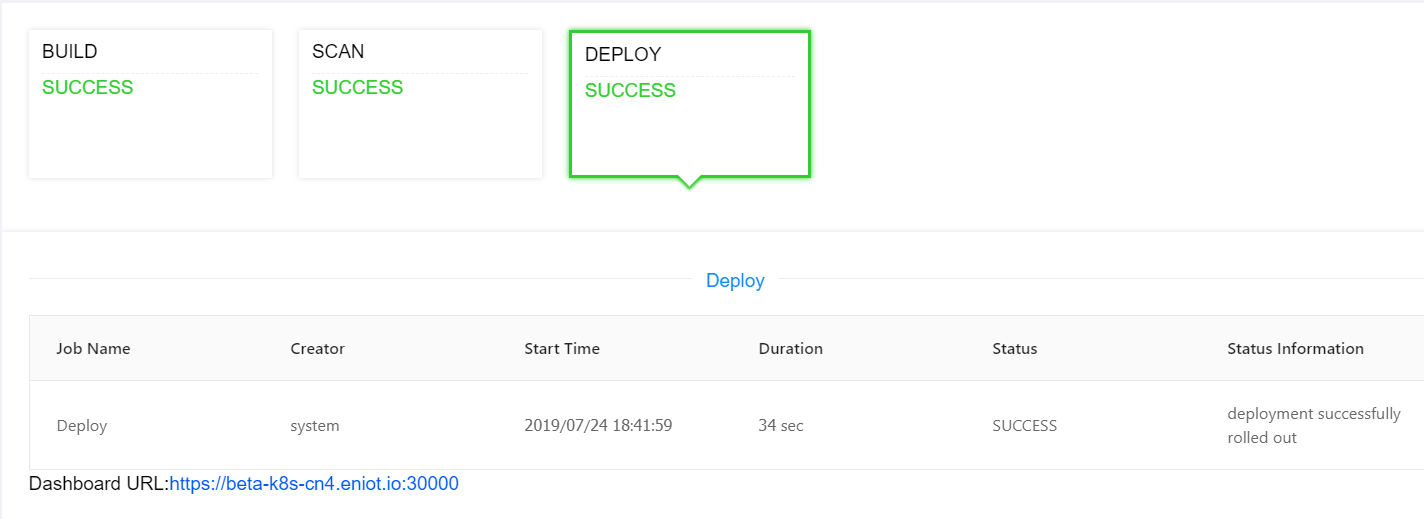
View the running results of the pipeline.
Click Build to view the running results of the build job, including the build log and the image address.
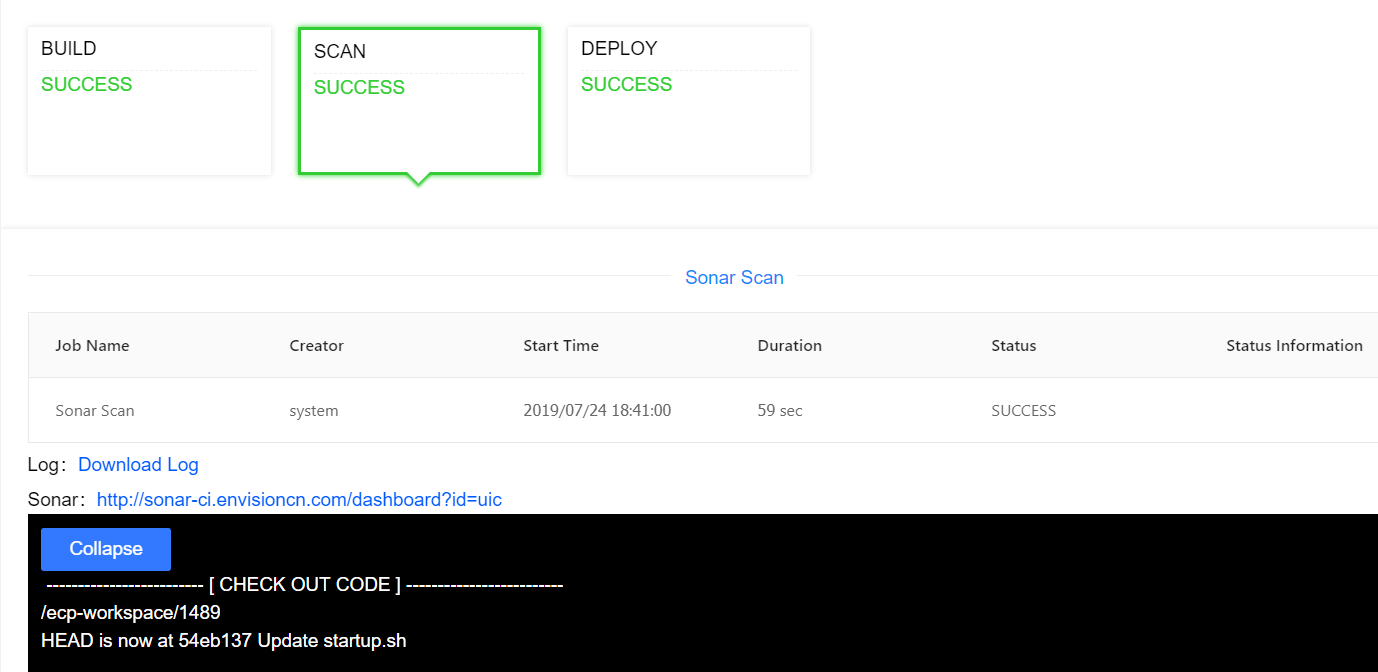
Click Scan to view the results of the code scanning job, including the scanning log and scanning result address.
Click Deploy to view the results of the deployment job.
Step 6: Test the Published Application
After the application is deployed successfully, test run the application to ensure that the application service can run normally according to the configured service information.