Develop Pipelines
This section describes how to design and develop a pipeline in the editing canvas of the Pipeline Design page.
Browse Design Page
Select Pipeline Designer for the target experiment in the experiment list to enter the design editing canvas and start pipeline design and development. The design page includes the following parts:
Operator List
The left side is the operator list including group, logic operators, model operators, SQL operators, file operators, processing operators, custom operators, etc. You can search for operators in the search box at the top of the page.
Editing Canvas
The middle part is the pipeline editing canvas, you can drag and drop the operators you need to the editing canvas to organize the pipeline. For complex pipelines, you can group certain operators and move them together.
Parameter Configuration
Select the Workflow setting  on the right side to configure parameters:
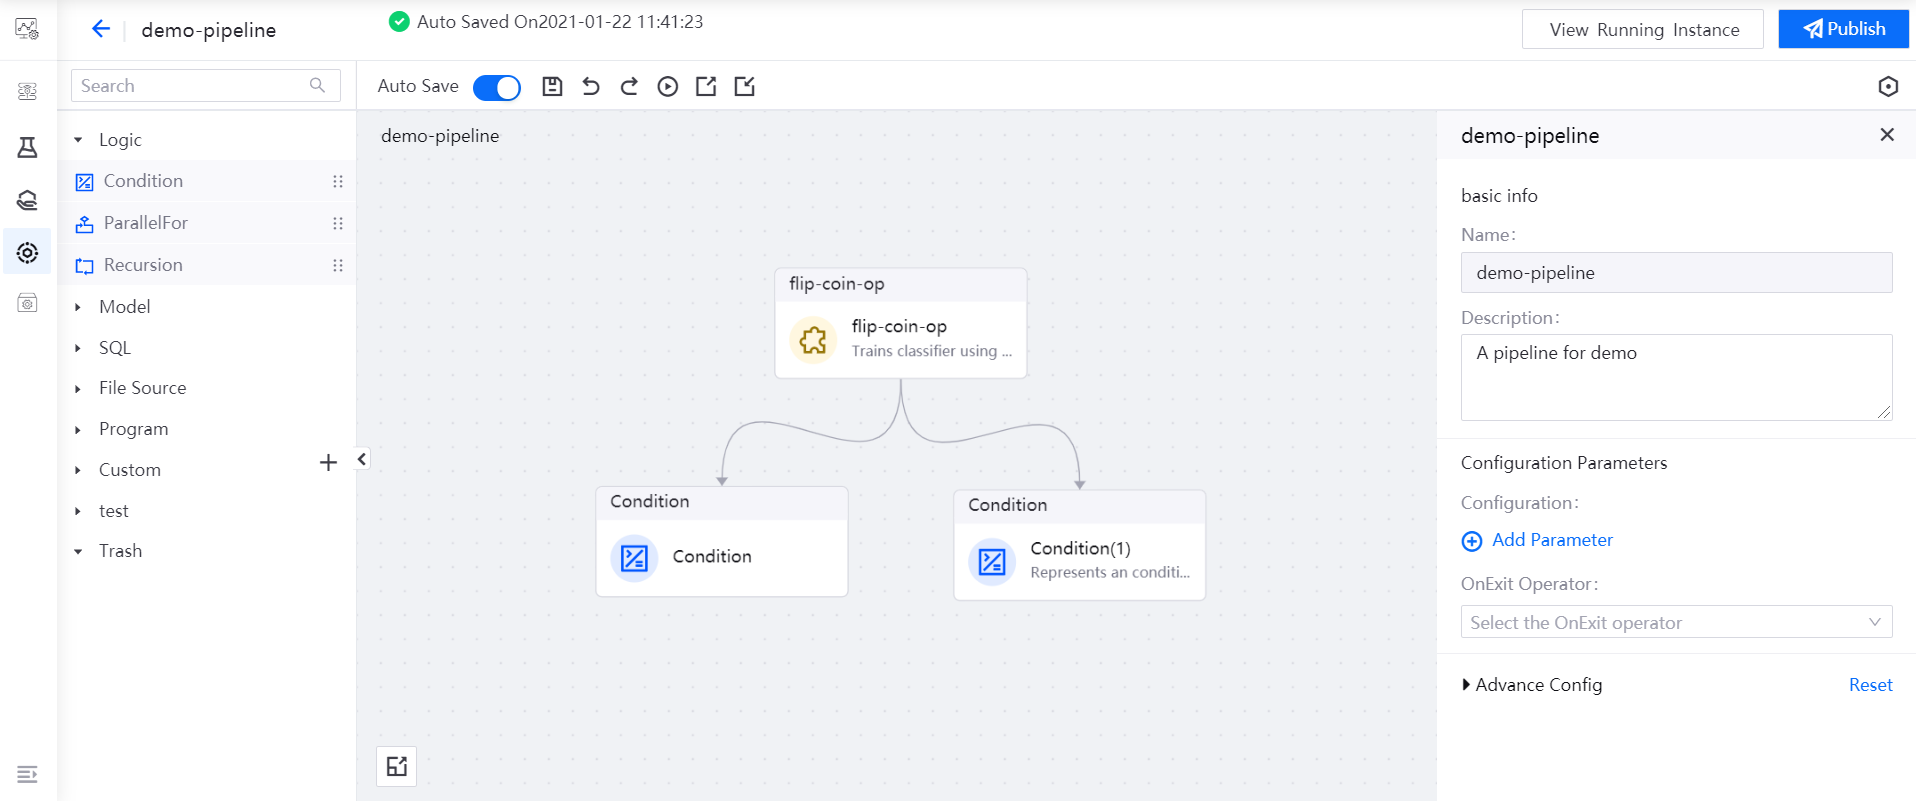
You can configure the basic information, advanced configuration, and global parameters for the pipeline without selecting any operators. You can also specify an OnExit operator for the pipeline. Note that you cannot add parameters with file and fir types or reference values of these types as global parameters.
You can configure basic information, parameters, and advanced configuration for a operator with the operator selected:
Basic Information: Define the name and description of the operator.
Parameter Configuration: Configure the input and output parameters of the operator.
Input Parameters: Define the parameter name, data type, function (Declaration or Reference), and value. If the parameter function is Declaration, enter the parameter value or select a value from the value list. If the parameter function is Reference, enter the parameter value or add a global variable (time related variable or system environment related variable, such as experiment name, running instance name, or user name).
Output Parameters: Define the parameter name and data type.
Advanced Configuration: Configure the running resources, timeout, and retry times of the operator, as well as the mount PVC (used for storing the running results of the operator). You can choose whether to use GPUs if GPUs are available.
Functional Operations
At the top of the design page is the functional operation area, where you can perform the following operations on the pipeline:
Auto Save: enable or disable the automatic saving of the pipeline information.
Save
 : save the pipeline information in the current canvas. No new pipeline version is generated.
Undo
 / Redo
  : undo or redo the pipeline information in the canvas.
Run
 : run the current pipeline and a new pipeline version is generated.
Export
 : export and save the current pipeline configuration information.
Import
 : import the pipeline configuration file and edit it on the editing canvas.
Delete
 : delete the selected operator from the canvas.
Copy
 : copy the selected operator and its configuration details.
Quick Start
 : explore and learn pipeline canvas.
View Running Instances: you can view the list of pipeline instances that are running online.
Scheduling Configuration: configure the scheduling for the current pipeline.
Orchestrate Pipelines
You can orchestrate the pipeline by dragging and dropping operators to the pipeline editing canvas, setting the configuration information of each operator, and using arrows to connect the operators to indicate the logical dependence among them. Finally, the pipeline can be automatically run by configuring the scheduling period of the entire pipeline.
This section use “Random number” scenario as an example, PythonEx operator and Condition operator are used to generate a random number and display it based on one of the following conditions:
The number generated equals to or larger than 5
The number generated is smaller than 5
You can complete the pipeline and operator parameter configuration, and orchestrate the operators into a pipeline by following these steps.
Drag the operators you need to use (1 flip-coin-op operator and 2 Condition operators) to the editing canvas.
Select the Condition operator, and reference the
outputvalue of the flip-coin-op operator as the expression of the Condition operator:flip-coin-op.output == heads.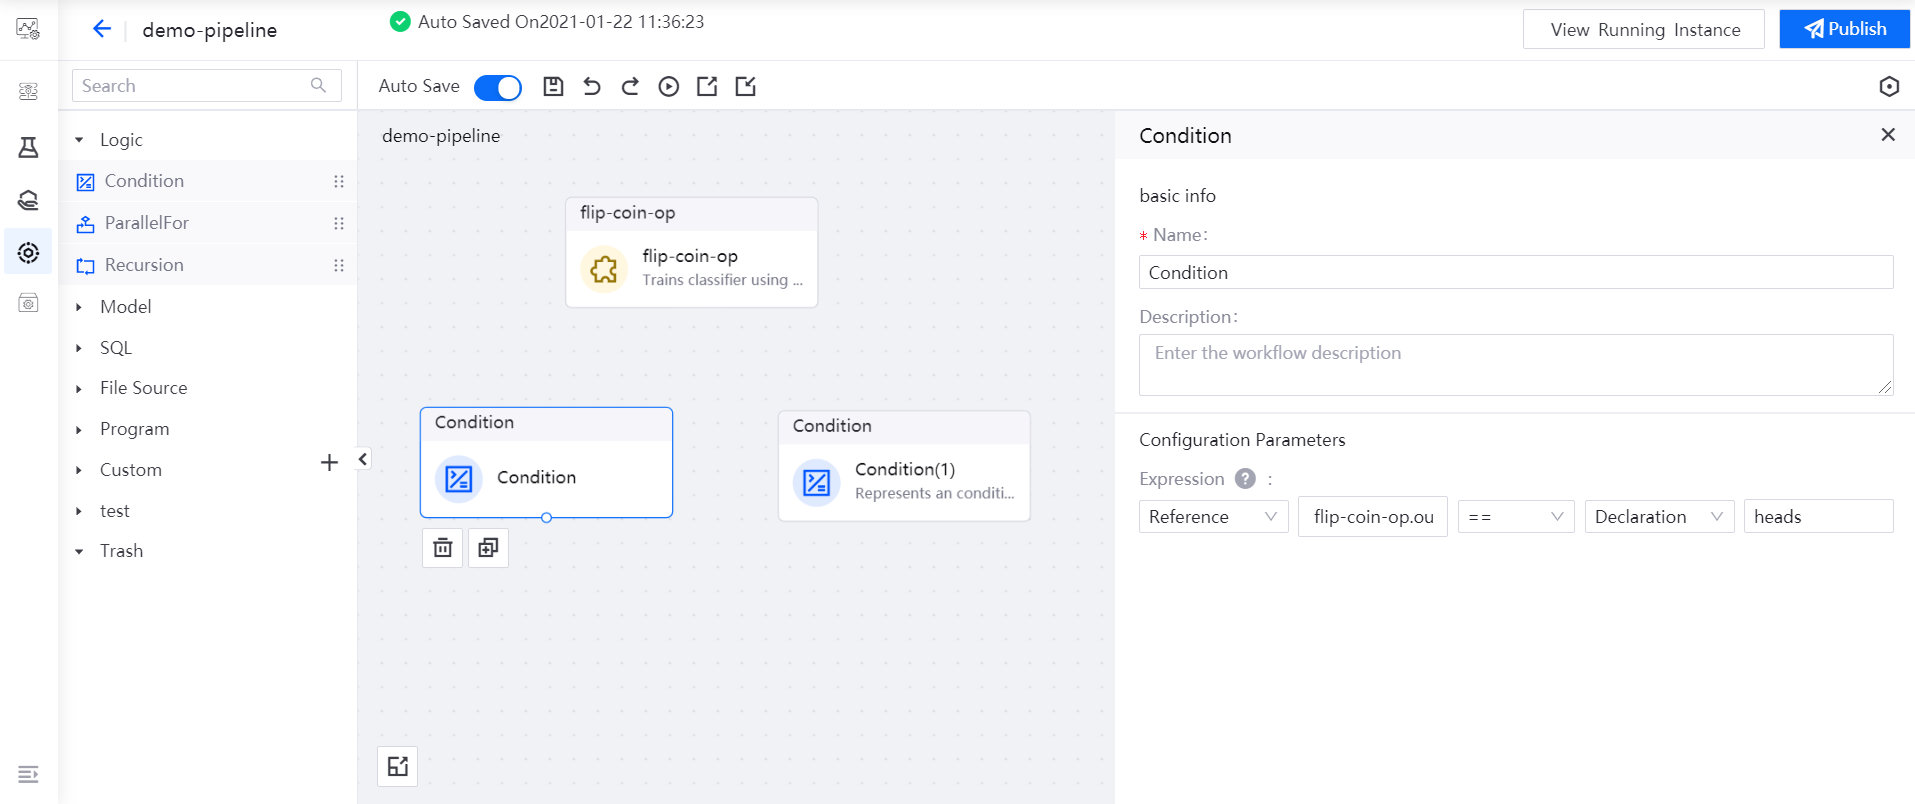
Select the Condition(1) operator, and reference the
outputvalue of the flip-coin-op operator as the expression of the Condition(1) operator:flip-coin-op.output == tails.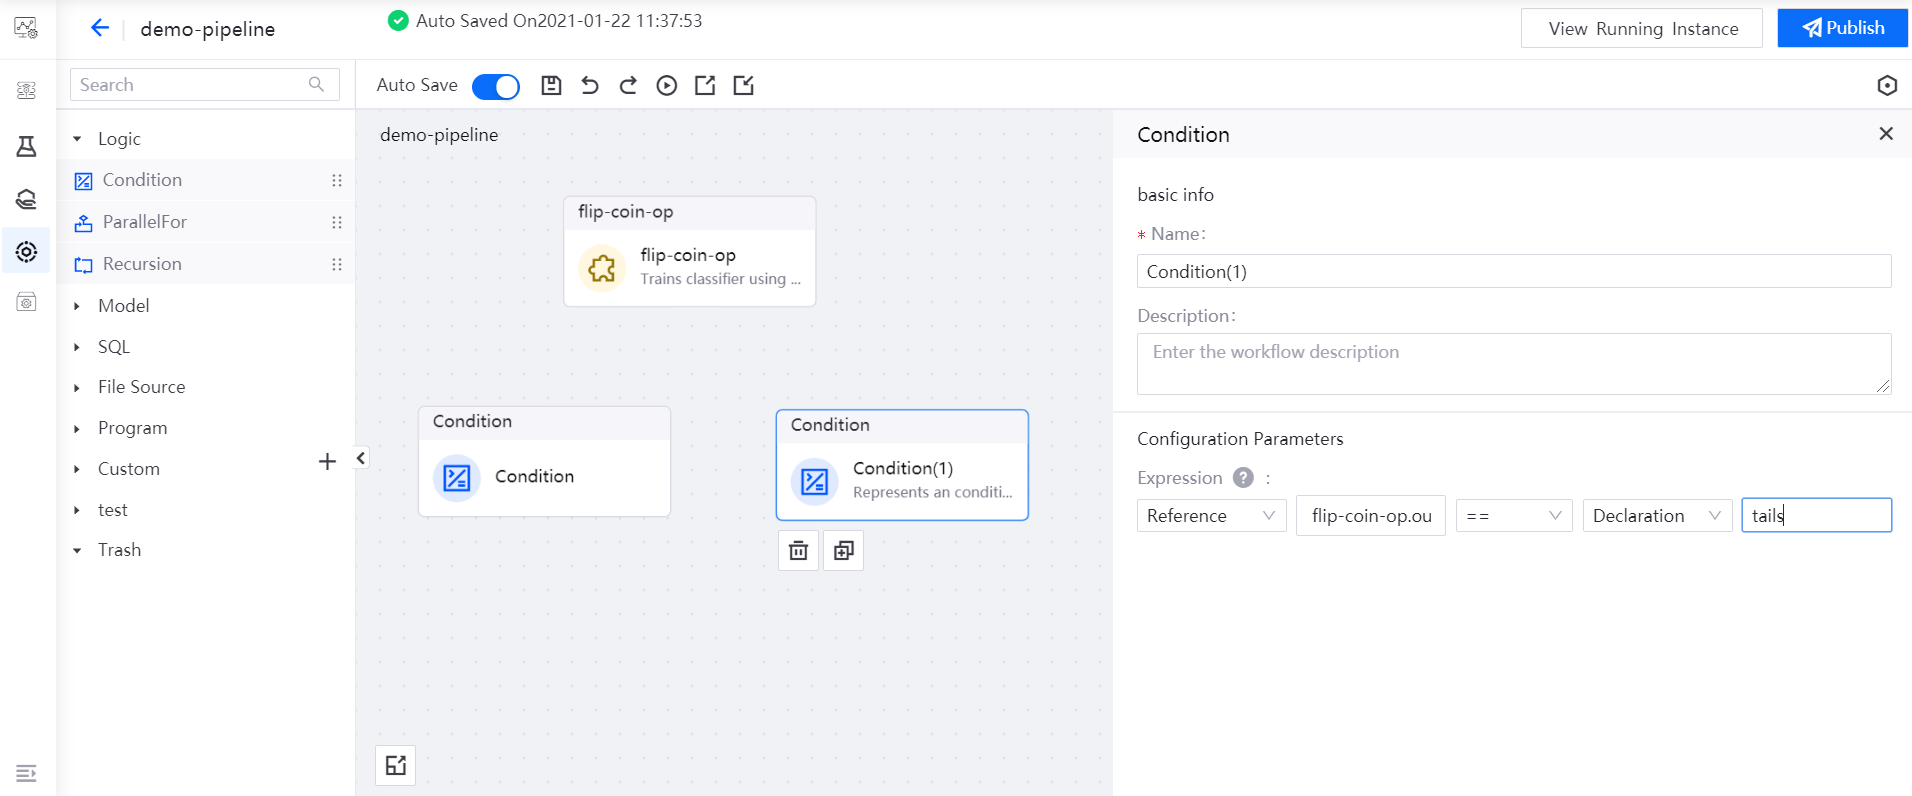
Double-select the Condition operator to open its sub-canvas, drag the print-op operator to the editing canvas, and reference the
outputvalue of the flip-coin-op operator for printing the value offlip-coin-op.output.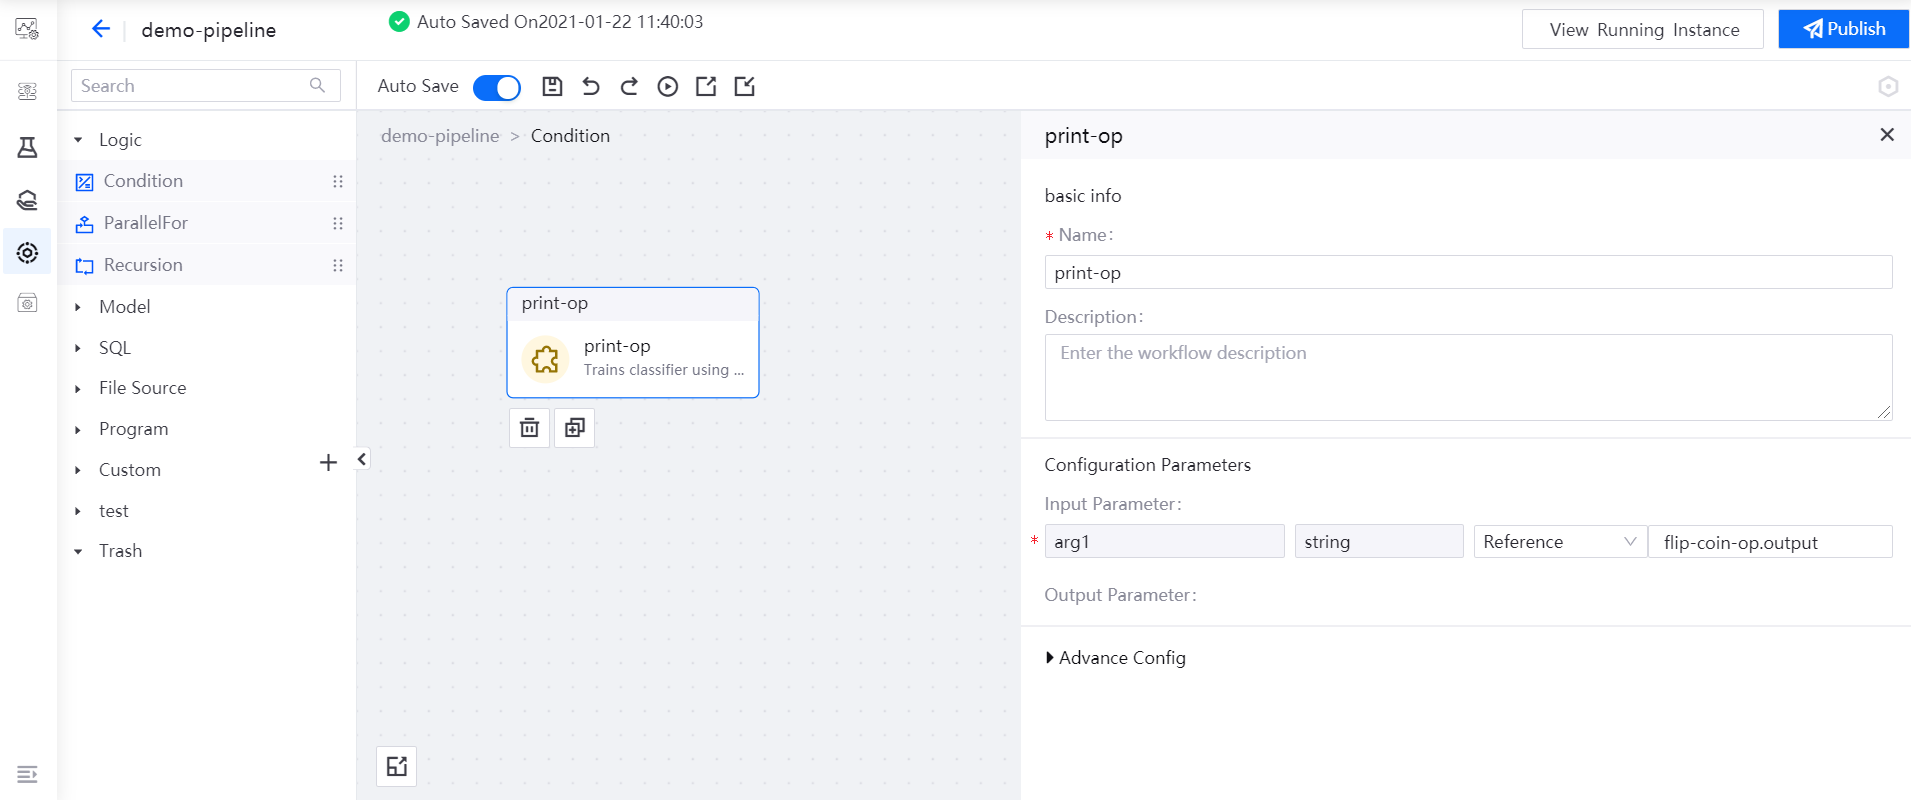
By referring to Step 4, double-select the Condition(1) operator, and configure the print-op operator in its sub-canvas.
In the main canvas, drag the output point of the flip-coin-op operator and connect it to the input points of the two Condition operators with arrows to indicate the logical dependence among the operators so as to complete the orchestration of the pipeline.
Run Pipelines
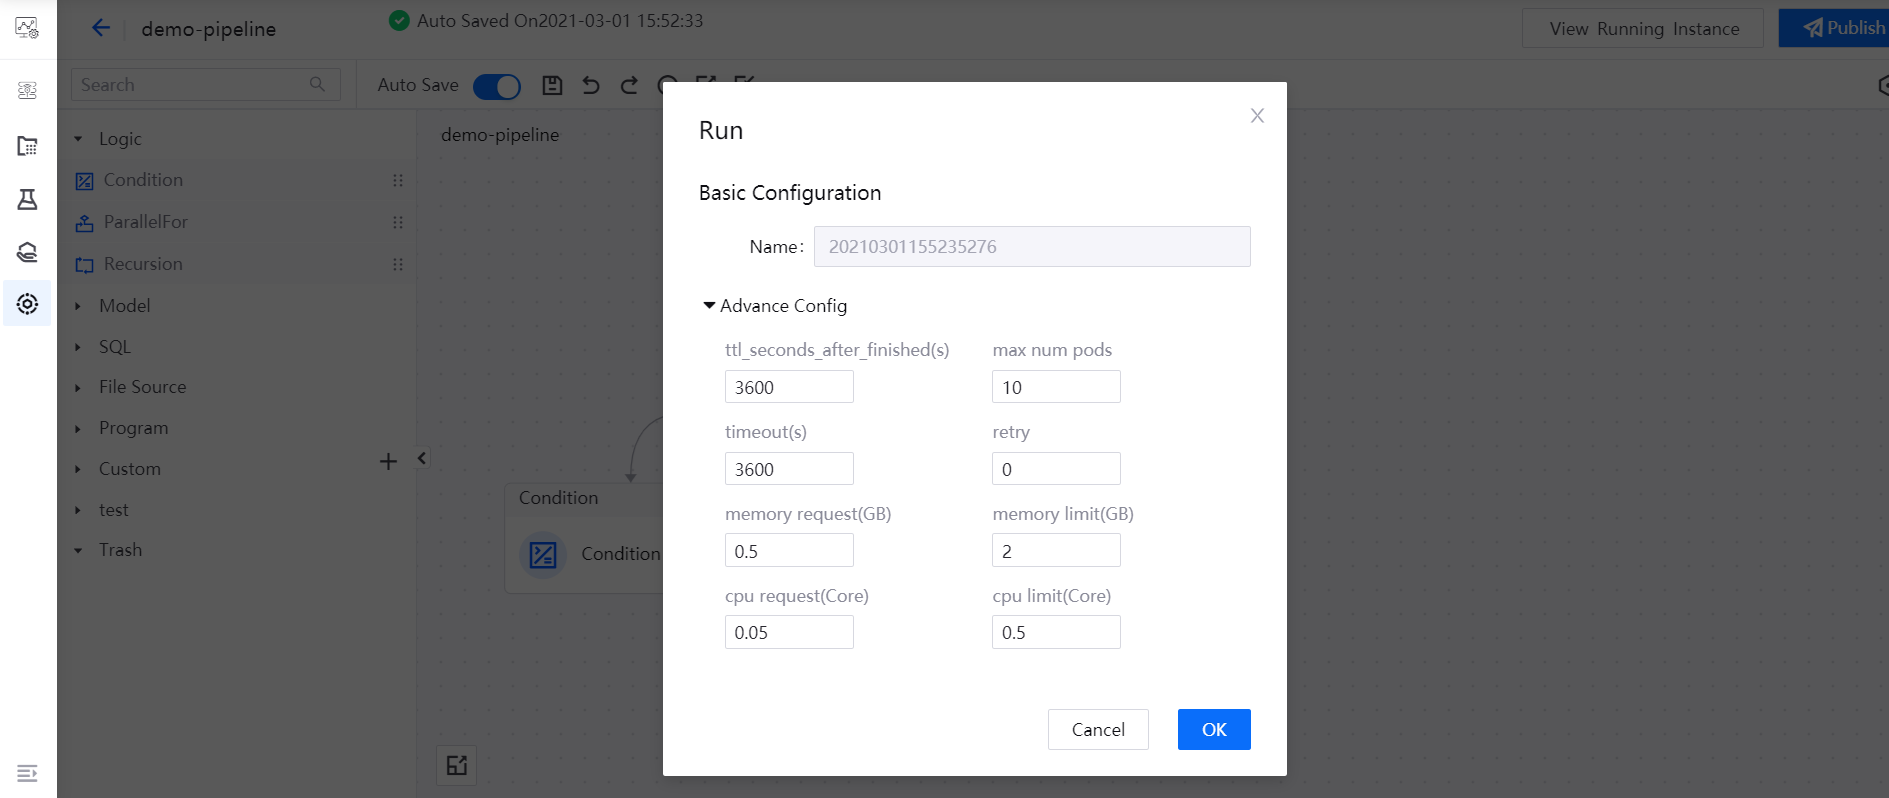
After saving the pipeline, select the Run icon in the functional operation area. In the pop-up window, the system will generate the pipeline running instance name (in format: yyyymmddhhmmssms). If you need to change the resource configuration for running the pipeline, update the configuration in the Advance Config section. Then, select OK to run the pipeline.
After the pipeline starts running, select the View Running Instance icon in the functional operation area, and you can view the pipeline instance that has run in the Running Instances list.
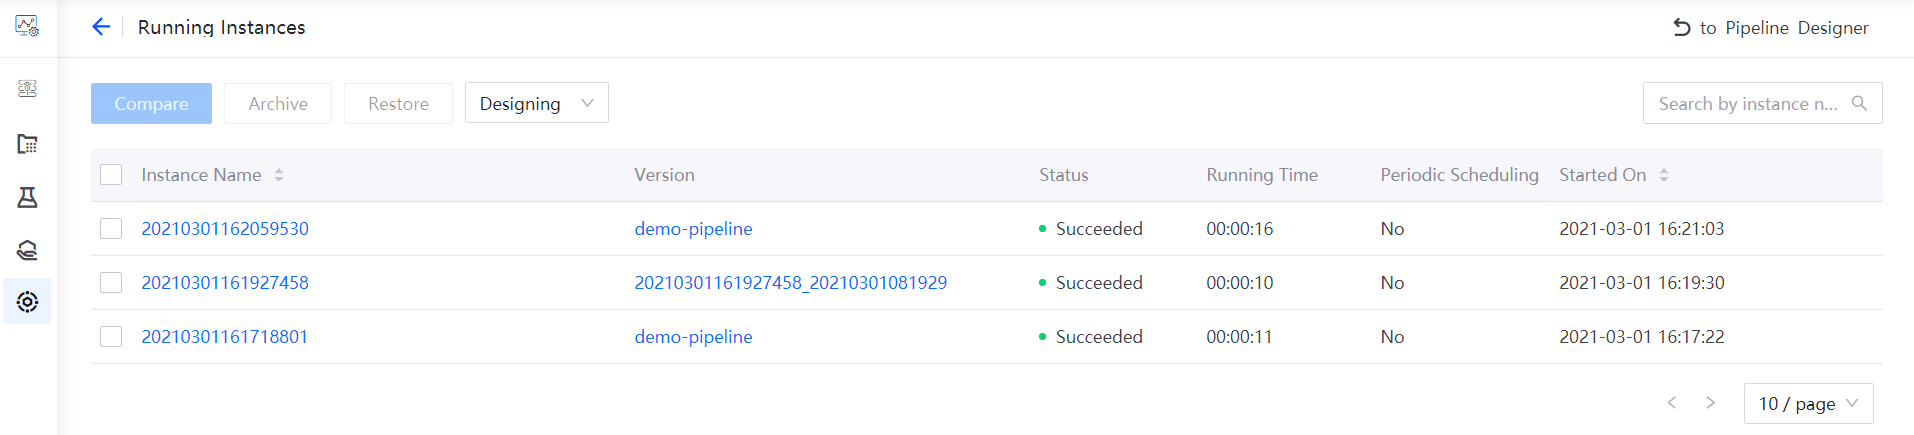
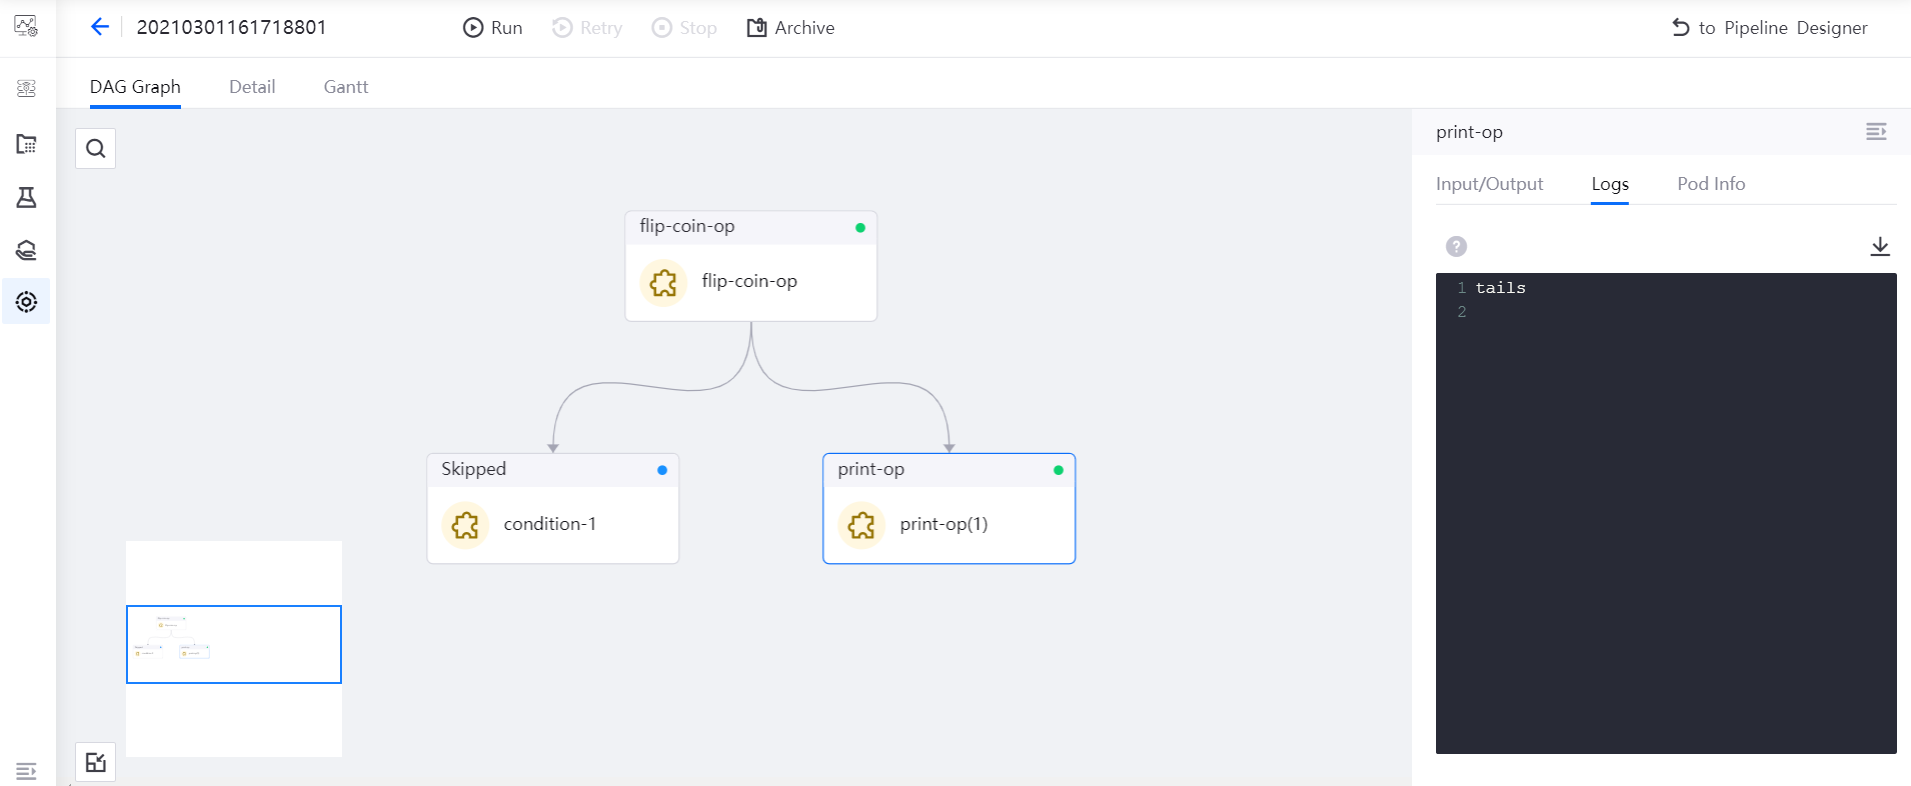
Select the instance name to view the running results of the pipeline instance.
Configure Schedules for Pipelines
You can also configure the a pipeline to run on a schedule automatically.
In the pipeline designer page or from the experiment list, select Scheduling Configuration .
(Optional) If you are adding a schedule form the experiment list, select New Schedule and select a version to run on a schedule. A new pipeline version is generated after the pipeline is run.
Define the concurrency, select Next.
Complete the following scheduling configuration:
Trigger Type: select to schedule the pipeline at a fixed frequency period or at a specified time (configured by Cron expression)
Set the start time and end time of the scheduled pipeline (the default start time is the current system time, and the default end time is 10 minutes after the current time)
If the pipeline is scheduled at a fixed frequency period, set the running time interval (the default running time interval is 1 hour)
If the pipeline is scheduled at a specified time, enter the cron expression
Select OK.